
 Facebook
  Twitter
  LinkedIn
 How to Use Timesheet Arbitration in Arez for Area Managers (AM)
Introduction
The Timesheet Arbitration module in Arez enables Area Managers (AMs) to review shift discrepancies, assess attendance issues, apply payment decisions, and approve shifts for payroll processing.
This guide explains how to:
Review shift issues
Assess recorded vs scheduled hours
Decide payable time
Apply deductions
Mark shifts ready for payroll
Send approved shifts to the worker pay sheet
Step 1: Open Timesheet Arbitration
Navigate to:
Reports / Analytics → Timesheet Arbitration
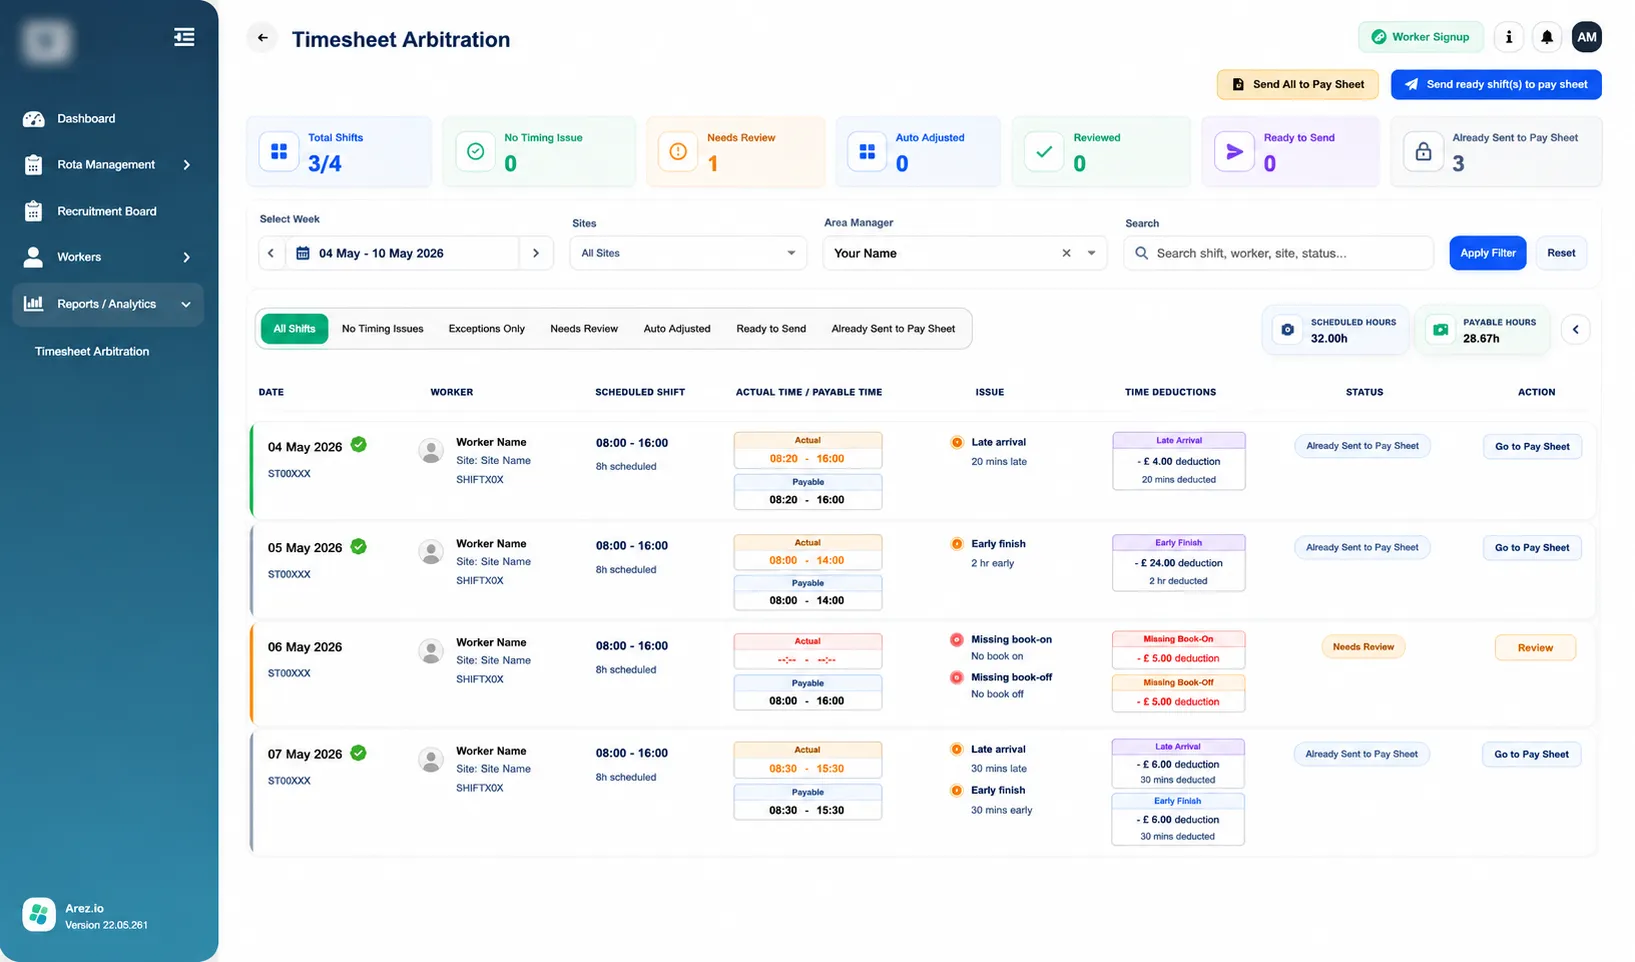
The dashboard provides an overview of:
Total shifts
No timing issues
Needs review
Auto adjusted
Reviewed
Ready to send
Already sent to pay sheet
You can also filter by:
Week
Site
Worker or shift search
Step 2: Review Shift Statuses
Each shift displays:
Worker Information:
Worker name
Site
Shift reference
Shift Details:
Scheduled shift hours
Actual recorded time
Payable time
Issues:
Examples include:
Late arrival
Early finish
Missing book-on
Missing book-off
Time Deductions:
Shows automatic or applied deductions affecting payment.
Status:
Examples:
Ready to Send
Needs Review
Auto Adjusted
Already Sent to Pay Sheet
Step 3: Review the Shift and Select a Pay Decision
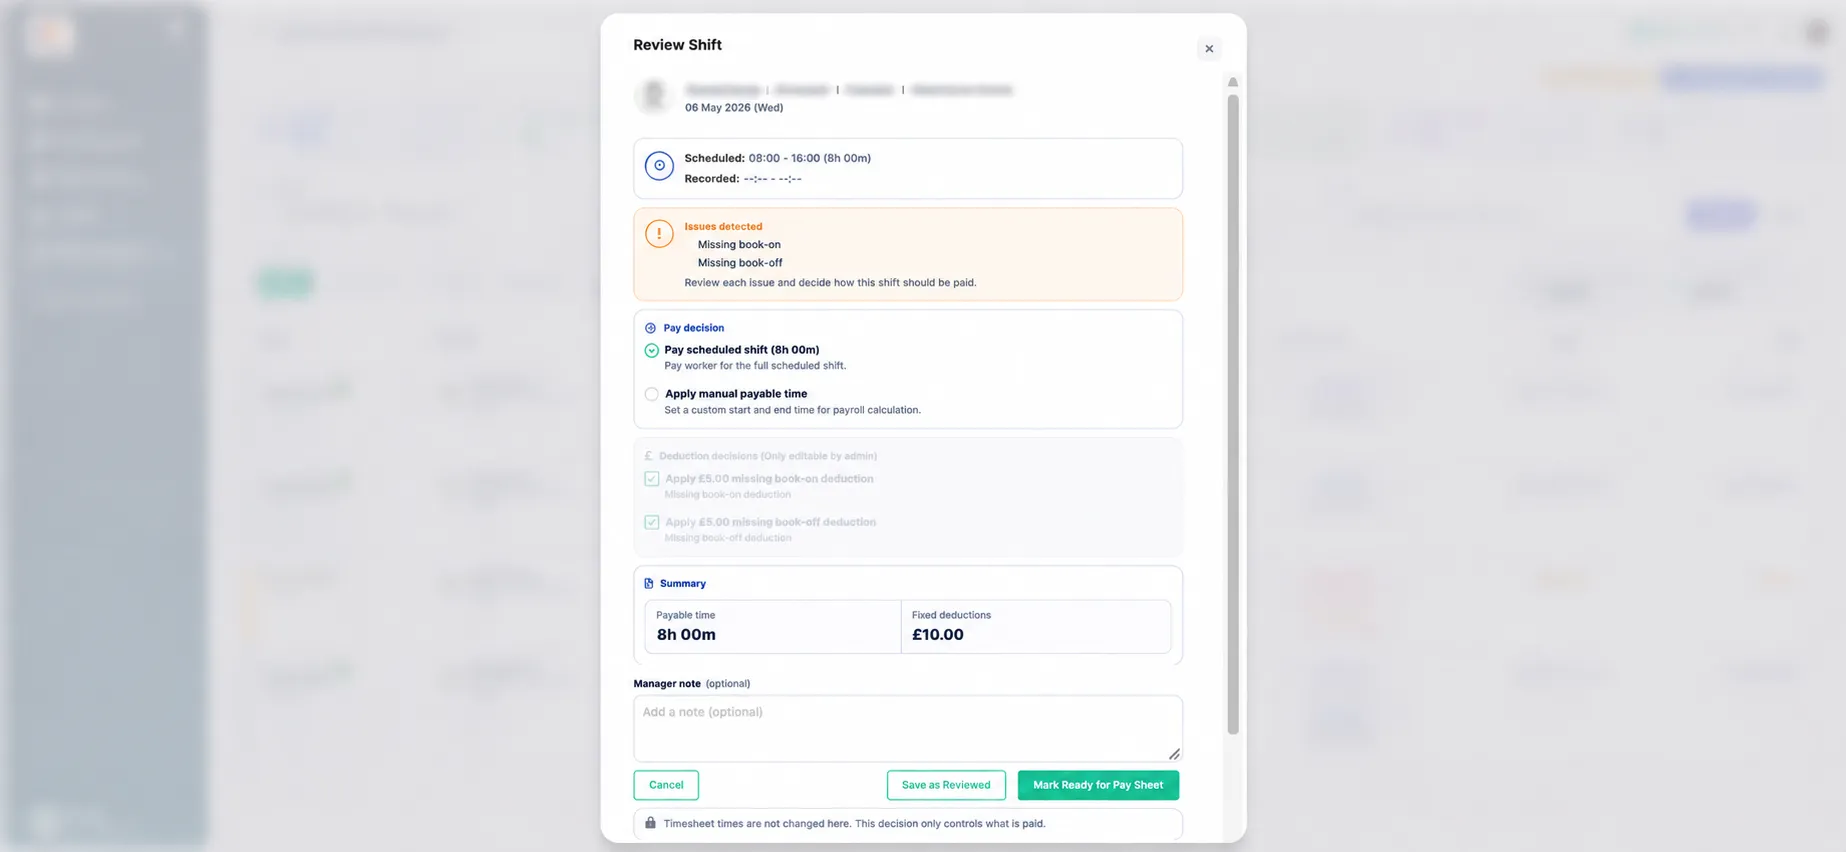
After clicking Review, a Review Shift window will open showing the worker’s scheduled shift, recorded time, detected issues, and payroll impact.
Review the Scheduled and Recorded times.
Check any detected issues (e.g., Missing book-on or Missing book-off).
Under Pay decision, choose how the worker should be paid:
Pay scheduled shift – Pay the worker for the full scheduled shift.
Apply manual payable time – Enter custom payable hours for payroll calculation.
Review the Summary section to confirm payable time and deductions.
Add an optional Manager note if required.
Click Save as Reviewed to save changes, or Mark Ready for Pay Sheet to move the shift to the next stage for payroll processing.
Step 4: Make a Payment Decision
Area Managers can choose how the worker should be paid.
Available options:
Option 1: Pay Recorded Time
Pay based on the worker’s actual clock-in and clock-out times.
Example:
Scheduled:
08:00 → 16:00
Recorded:
08:20 → 16:00
Worker paid:
7h 40m
Option 2: Pay Scheduled Shift
Pay for the full scheduled shift regardless of attendance discrepancies.
Example:
Scheduled:
08:00 → 16:00
Worker paid:
8h
Step 5: Review Deductions
Depending on the issue detected, deductions may apply.
Examples:
Late arrival
Deduction:
£4.00
Missing book-on
Deduction:
£5.00
Missing book-off
Deduction:
£5.00
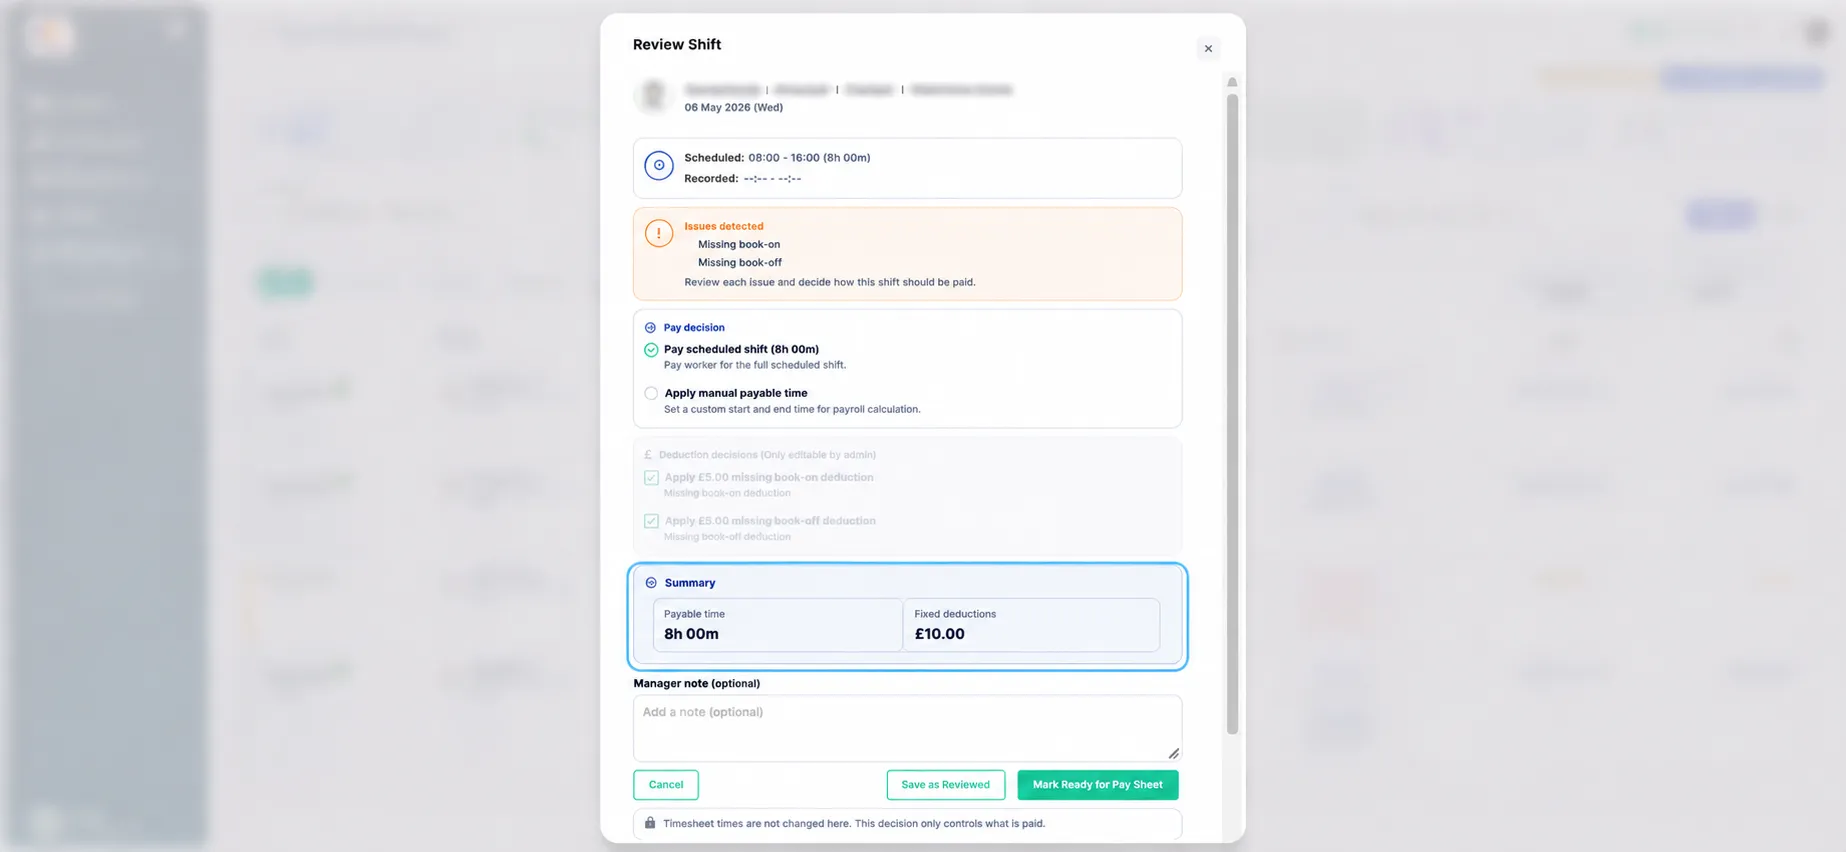
The Summary section displays:
Payable time
Fixed deductions
Review carefully before proceeding.
Step 6: Add Manager Notes (Optional)
Area Managers can enter notes explaining the decision.
Examples:
Late arrival approved
Missing clock-in confirmed by site
Shift paid in full due to exceptional circumstances
Manager notes help maintain audit history.
Step 7: Save or Approve the Shift
After reviewing:
Choose:
Save as Reviewed
Saves the decision without sending it to payroll.
OR
Mark Ready for Pay Sheet
Approves the shift for payroll processing.
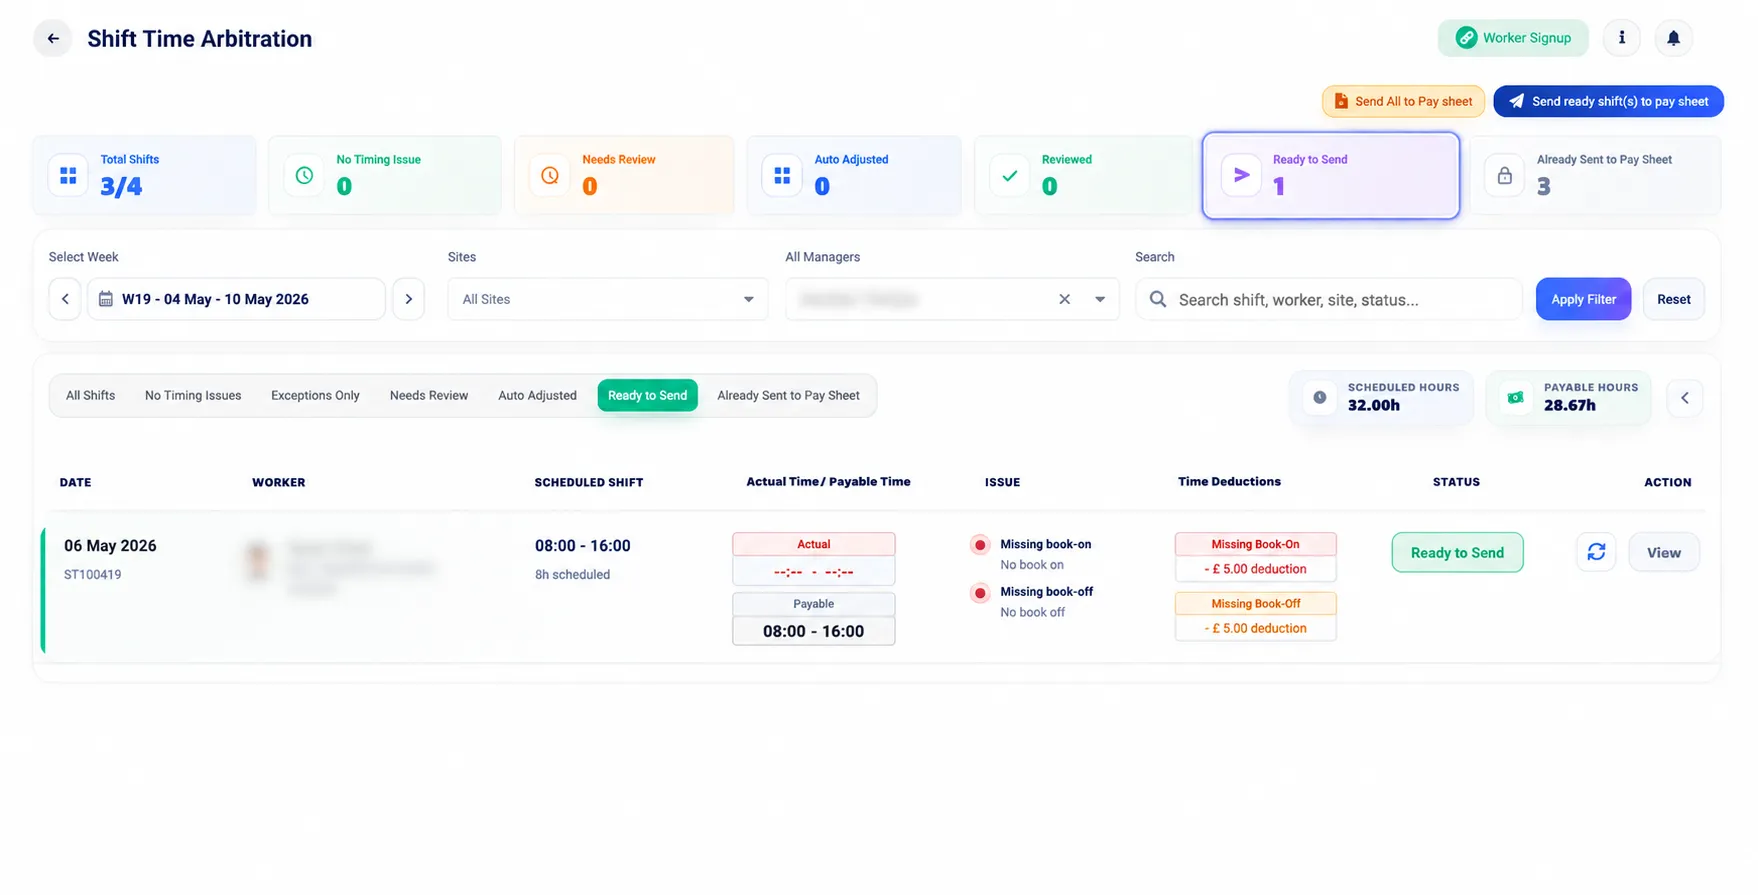
The shift status changes to:
Ready to Send
Step 8: Send Ready Shifts to Pay Sheet
After reviewing all shifts:
Click:
Send ready shift(s) to pay sheet
located at the top right.
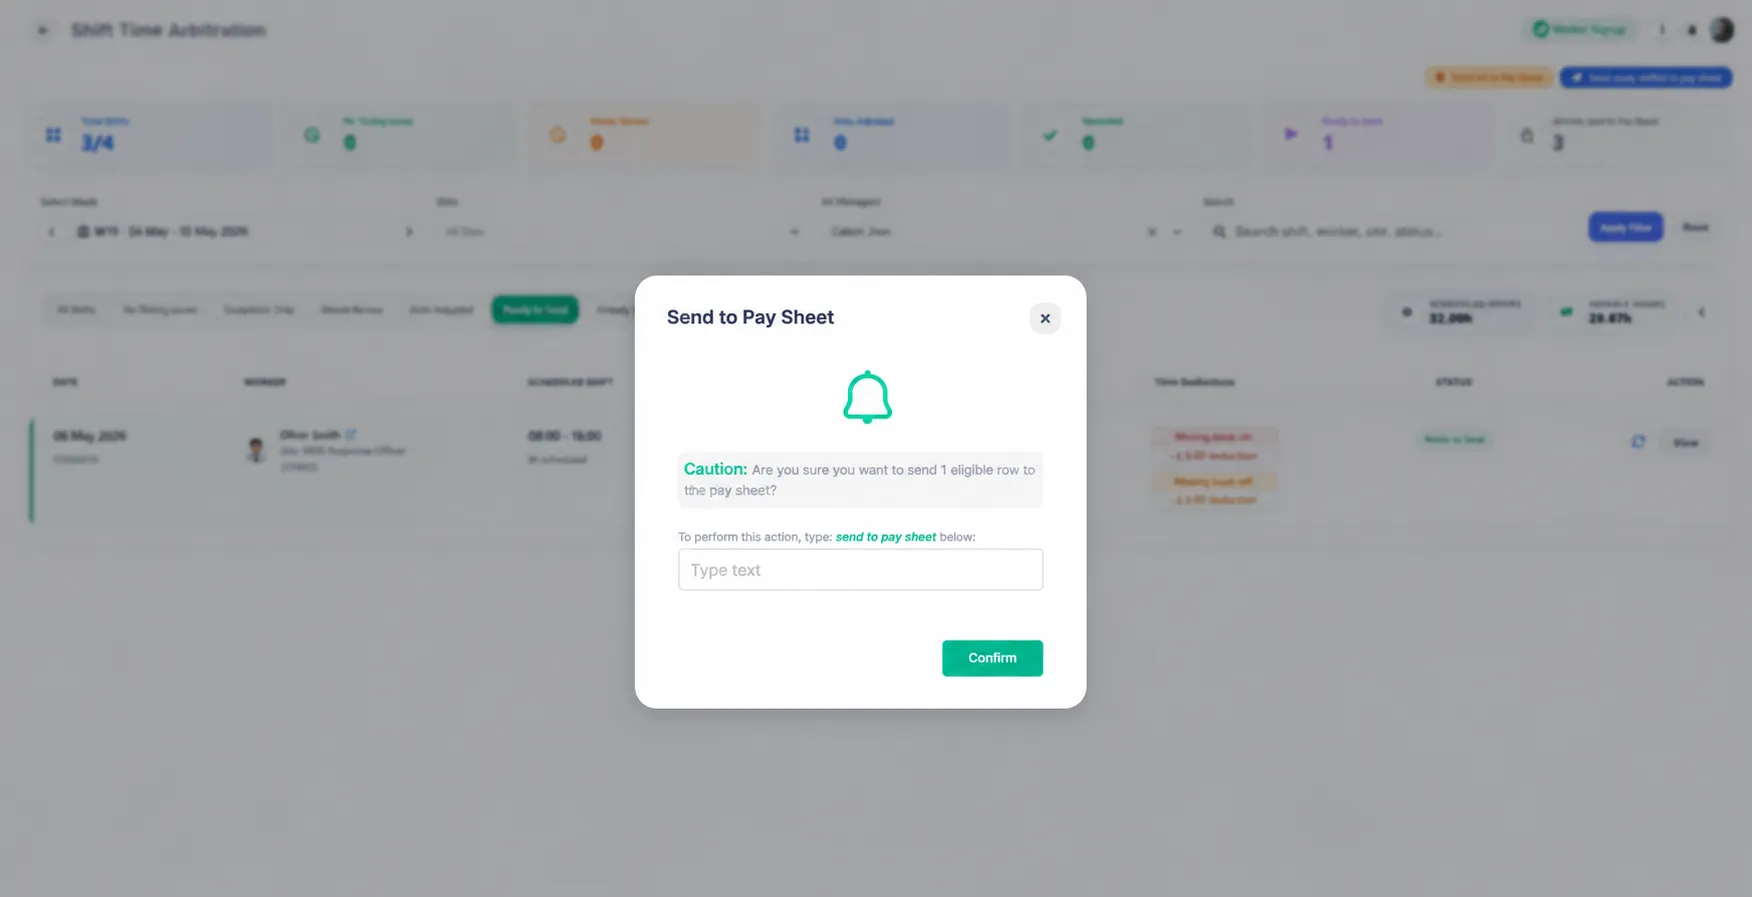
A confirmation popup appears.
Type the required confirmation text and click:
Confirm
Dashboard Status Definitions
Status | Meaning |
No Timing Issue | No discrepancies detected |
Needs Review | Manual review required |
Auto Adjusted | System adjusted payable time automatically |
Reviewed | Reviewed but not yet sent |
Ready to Send | Approved for payroll |
Already Sent to Pay Sheet | Shift transferred to payroll |
Timesheet Arbitration Workflow Summary
Review shift issue
↓
Assess recorded vs scheduled hours
↓
Choose payment method
↓
Apply deductions if required
↓
Add manager notes
↓
Mark Ready for Pay Sheet
↓
Send ready shifts to pay sheet
↓
Shift moves to Worker Pay Sheet
↓
Payroll processing
Final Notes
Review all deductions before approving payment.
Ensure exceptional attendance issues are documented in manager notes.
Only mark shifts ready when payment decisions are final.
Once shifts are sent to the pay sheet, they become available for payroll processing.