
 Facebook
  Twitter
  LinkedIn
 How to Use Invoicing in Arez
Introduction
The Invoices & Billing module allows users to generate invoices from approved timesheets, organise billing by client or role, review invoice summaries, add manual charges, and manage invoice statuses before sending to clients.
Only approved and arbitration-confirmed timesheets are included in invoice generation. Unapproved shifts will be excluded automatically.
Accessing Invoices & Billing
Navigate to:
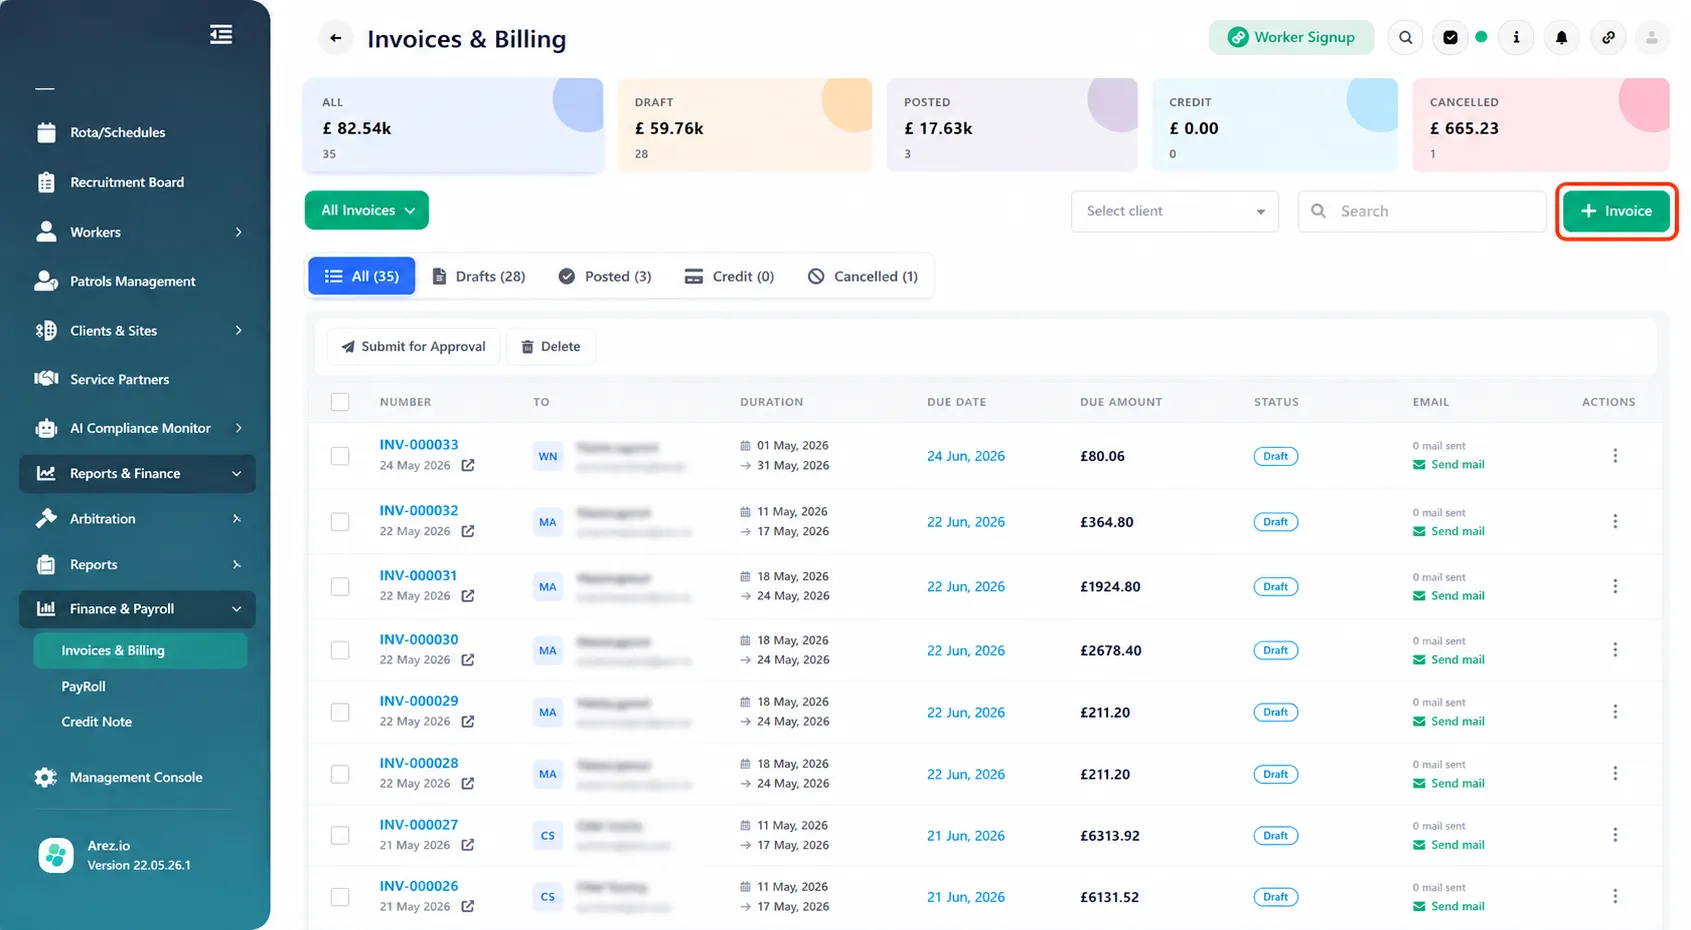
Reports & Finance → Finance & Payroll → Invoices & Billing
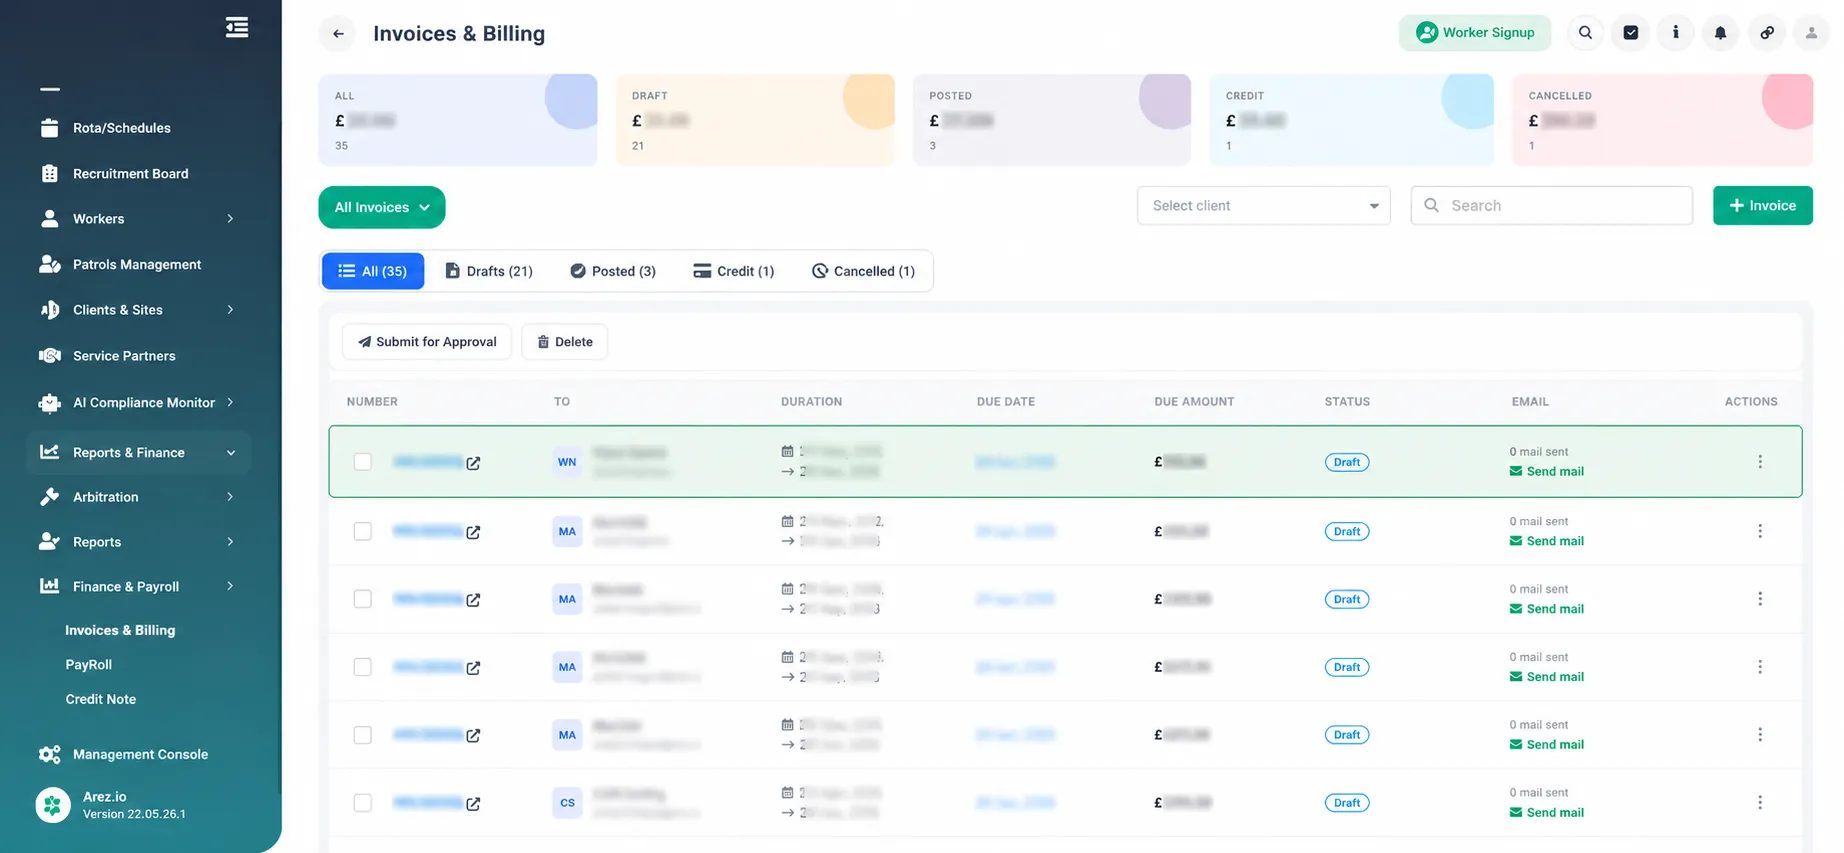
The dashboard displays:
Total invoice values
Draft invoices
Posted invoices
Credit notes
Cancelled invoices
Existing invoice records and statuses
Creating a Draft Invoice
Click:
+ Invoice
to begin creating a new invoice.
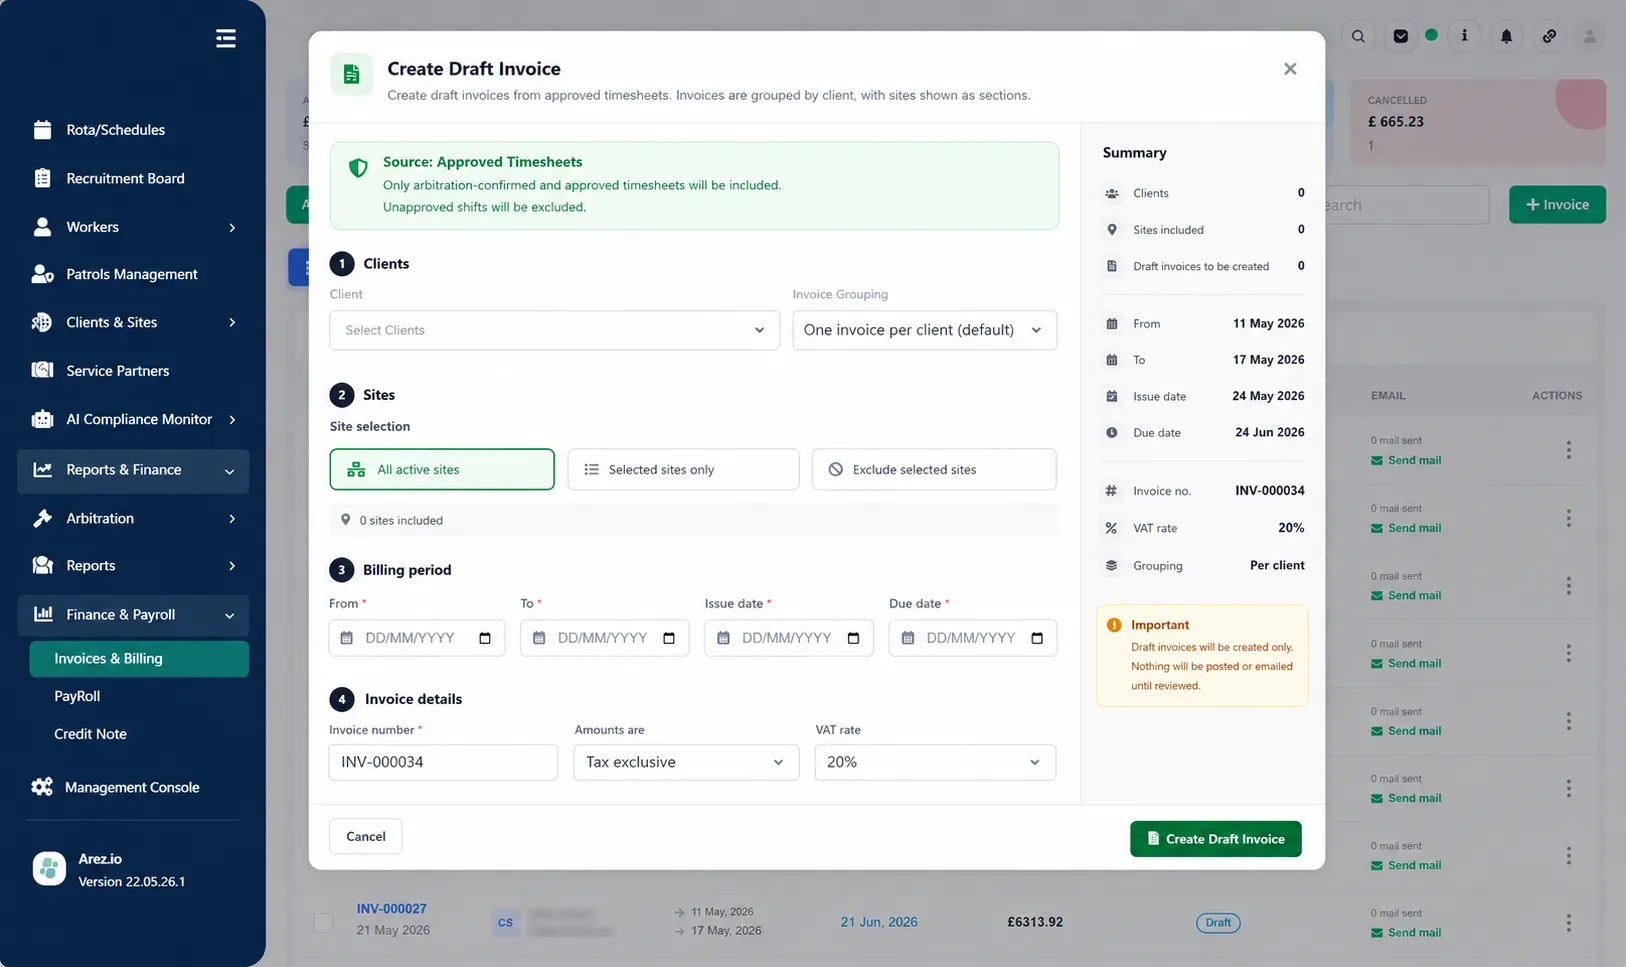
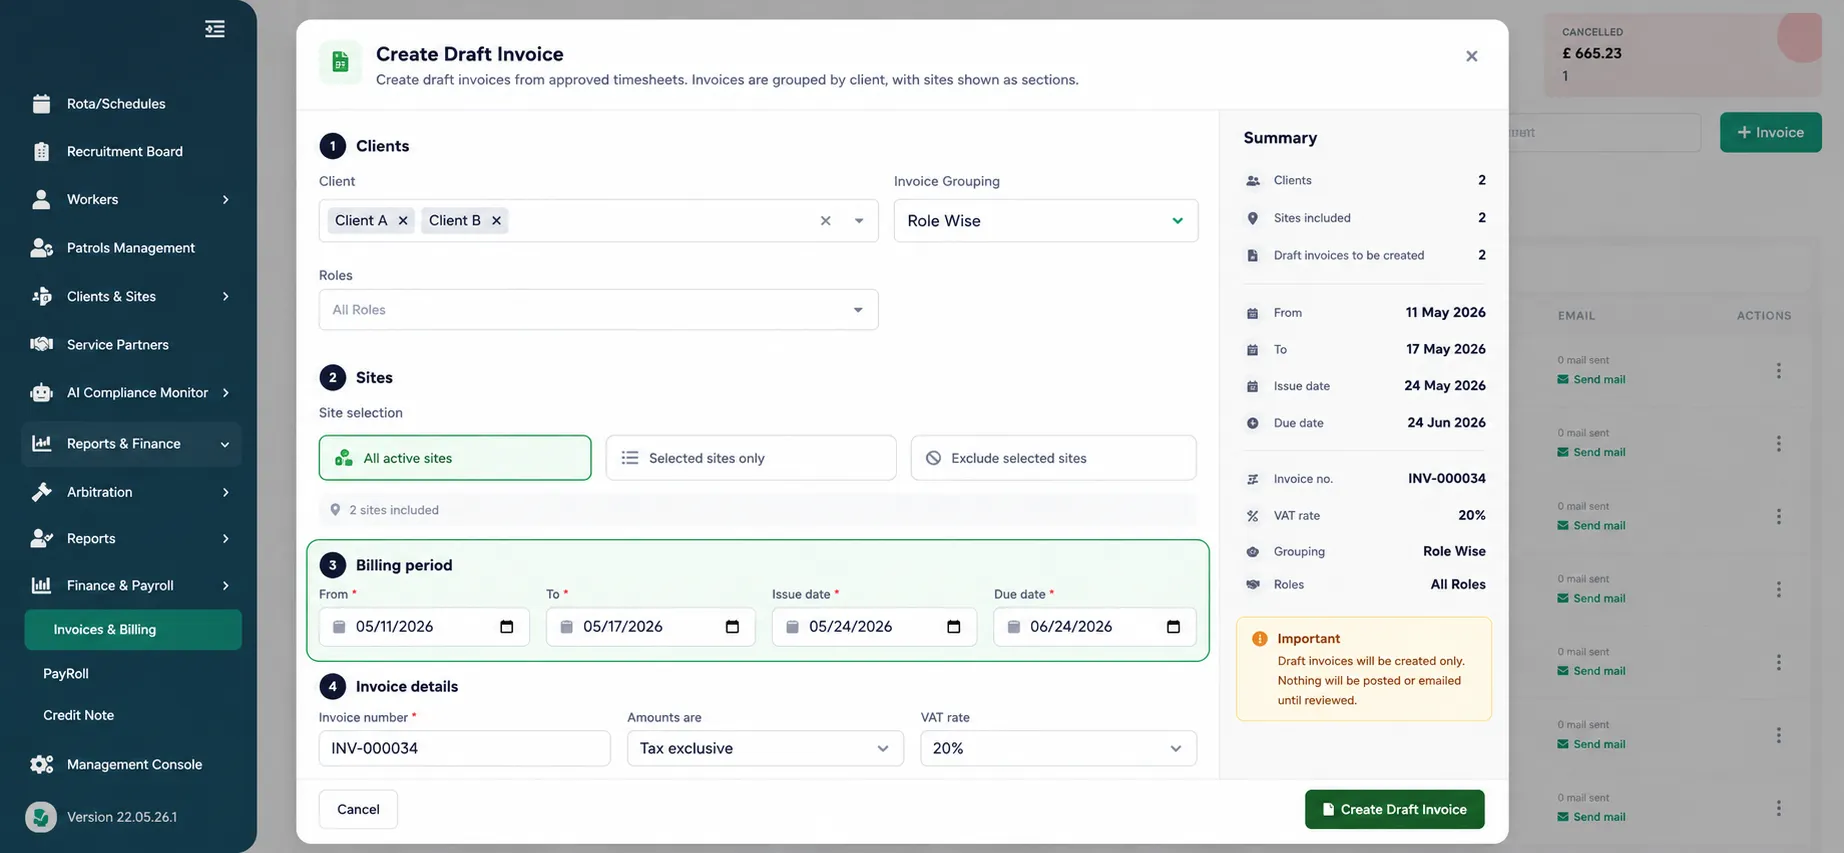
The invoice setup contains four sections:
Clients
Sites
Billing Period
Invoice Details
A summary panel appears on the right showing:
Number of clients
Sites included
Draft invoices to be created
Billing dates
Invoice number
VAT
Grouping type
Draft invoices are created only and will not be posted or emailed until reviewed.
Step 1: Select Client
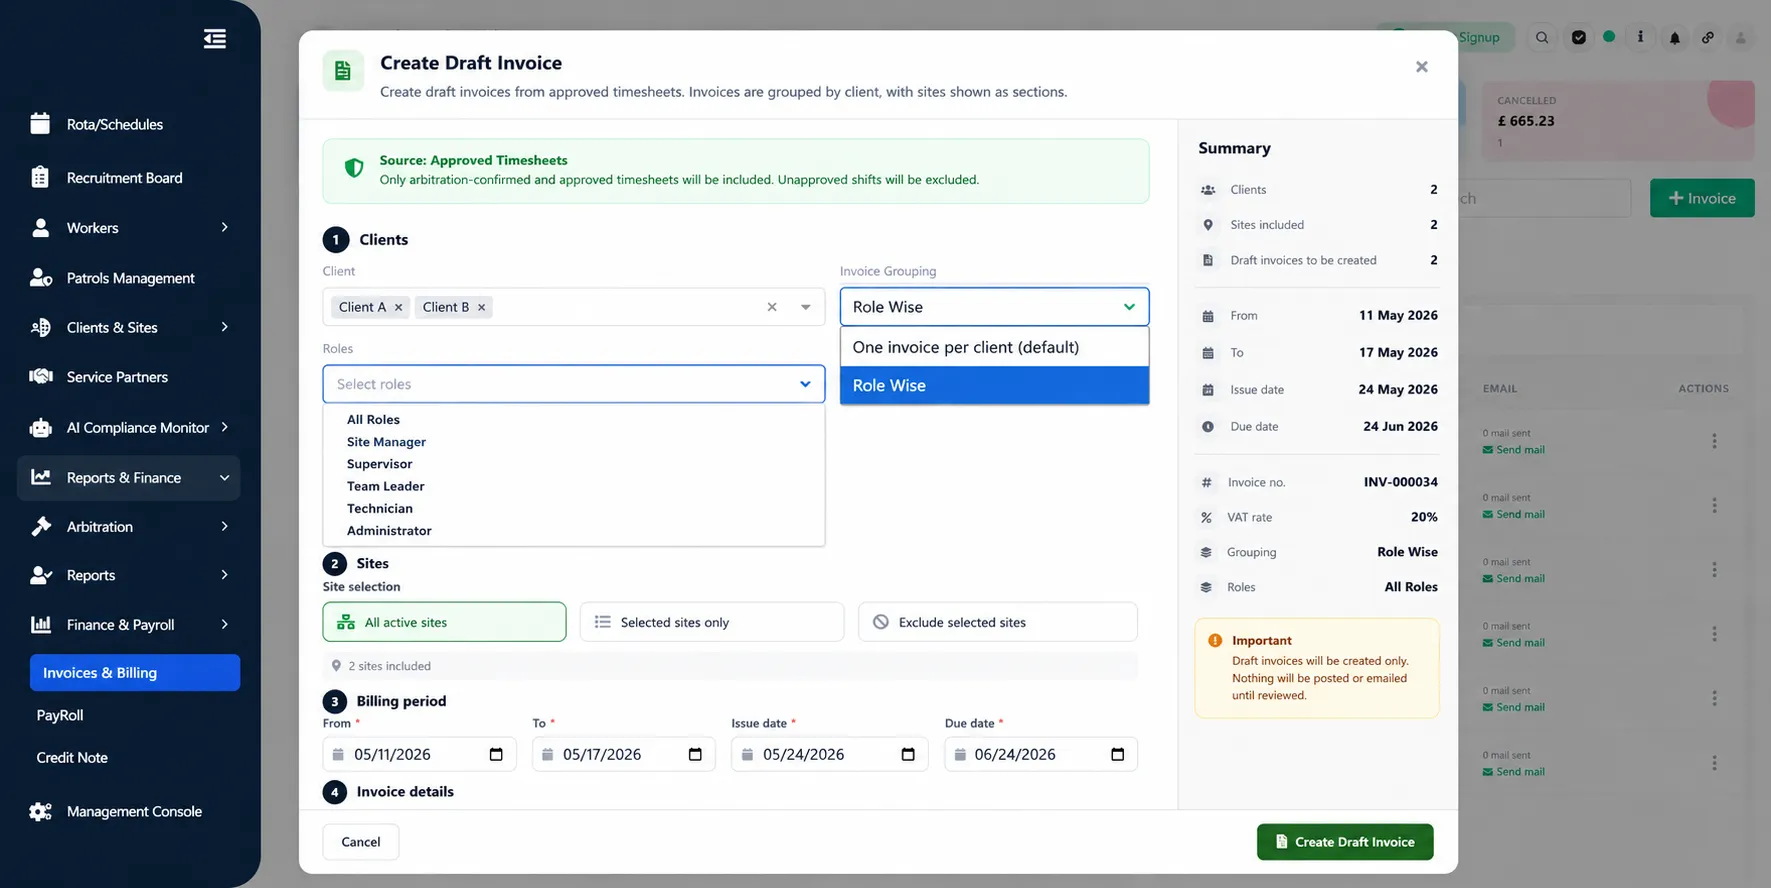
Choose the client(s) for whom invoices should be generated.
Under Invoice Grouping, select:
One invoice per client (Default)
Creates one invoice combining all approved records for the selected client.
Role Wise
Creates separate invoices grouped by worker roles.
Examples:
SG Grade A
SG Grade B
Shift Lead
Contract Manager
SIA Events
Use Role Wise when different billing rates apply to different positions.
Step 2: Configure Site Selection
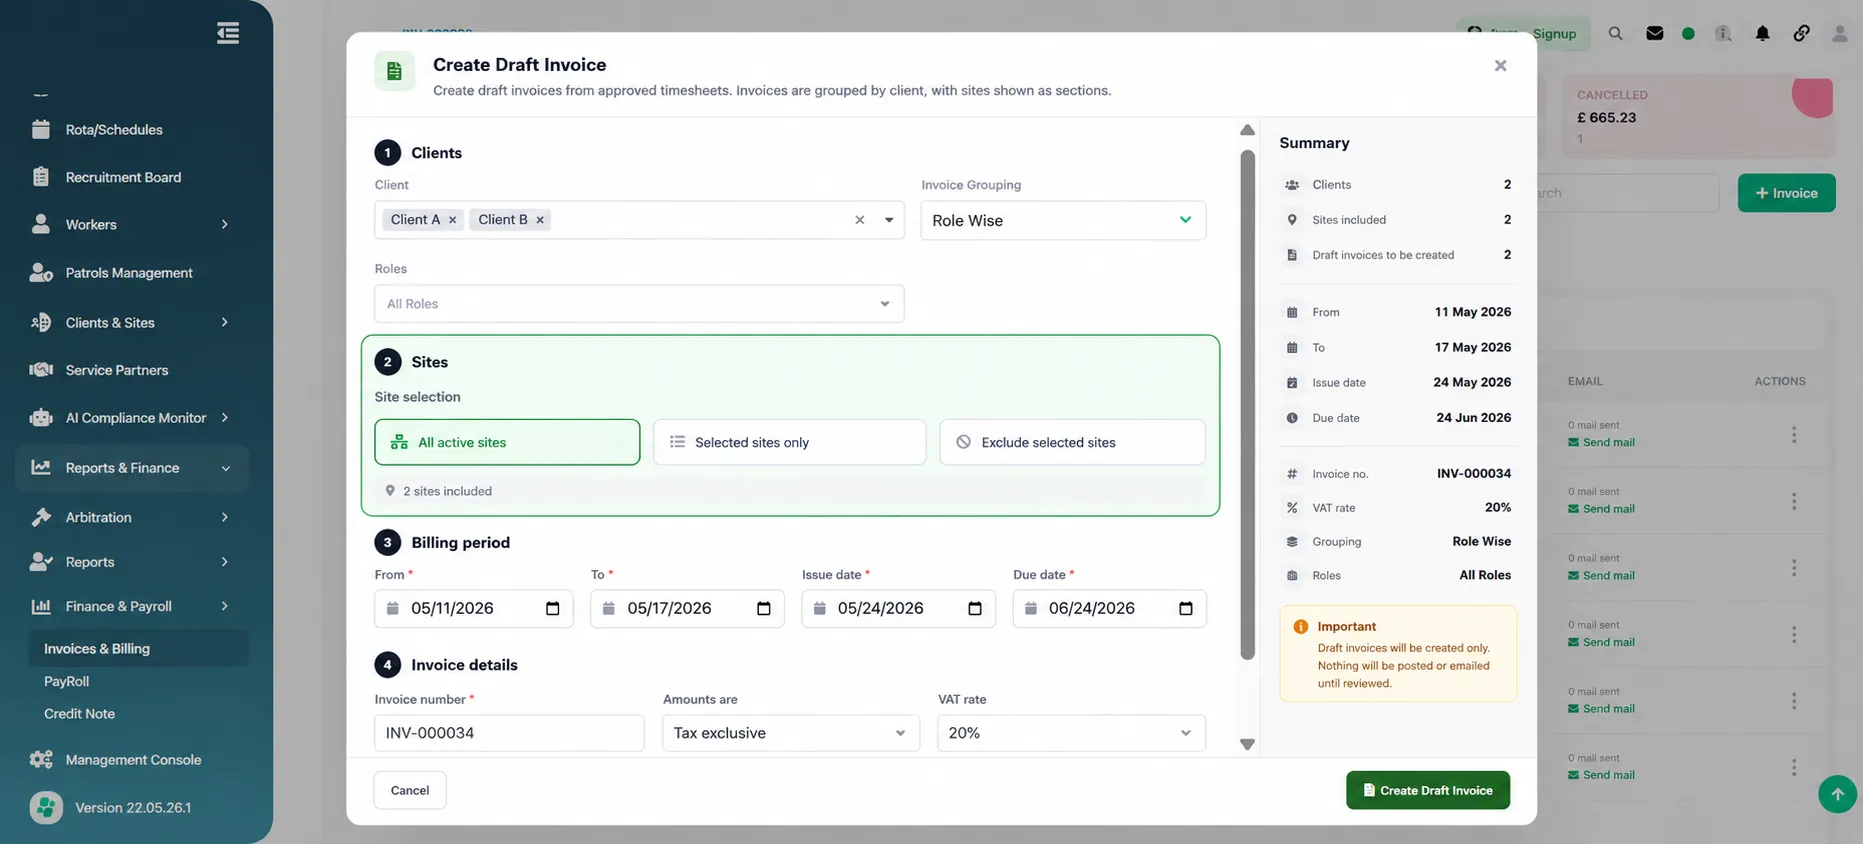
Choose which sites to include:
All active sites
Includes all active sites under the selected client.
Selected sites only
Generate invoices for specific sites only.
Exclude selected sites
Exclude chosen sites from invoicing.
The summary updates automatically.
Step 3: Define Billing Period
Specify:
From date
To date
Issue date
Due date
These dates determine:
Included shifts
Invoice issue date
Payment due date
Ensure billing dates match approved payroll periods.
Step 4: Configure Invoice Details
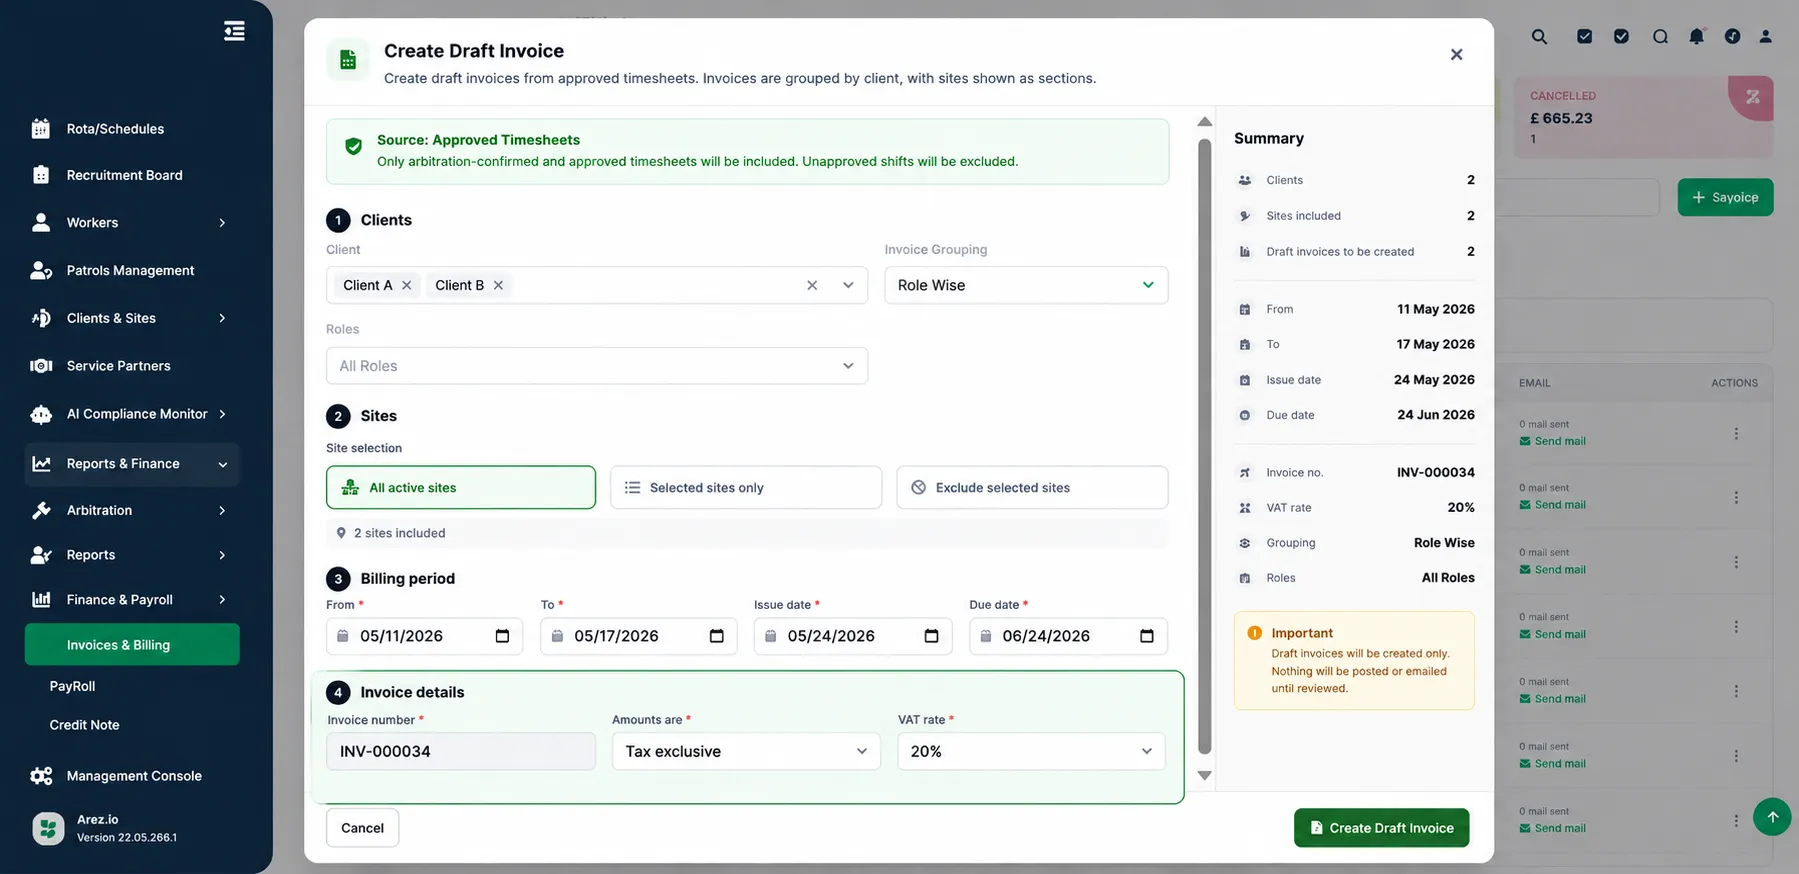
The Invoice Details section allows users to review invoice settings before creating the draft invoice.
Invoice Number
The Invoice Number is automatically generated by the system and assigned to the invoice.
Example:
INV-000034
Invoice numbers are generated sequentially and cannot be edited manually.
Amount Type
Select how tax should be applied to the invoice:
Tax Exclusive
VAT is added separately to the invoice total.
Tax Inclusive
VAT is already included within the invoice total.
No Tax
No VAT will be applied.
VAT Rate
Select the applicable VAT percentage for the invoice.
Example:
20%
Ensure the VAT setting matches the client’s billing requirements.
Create Draft Invoice
Review all selections and click:
Create Draft Invoice
The invoice appears in the dashboard with status:
Draft
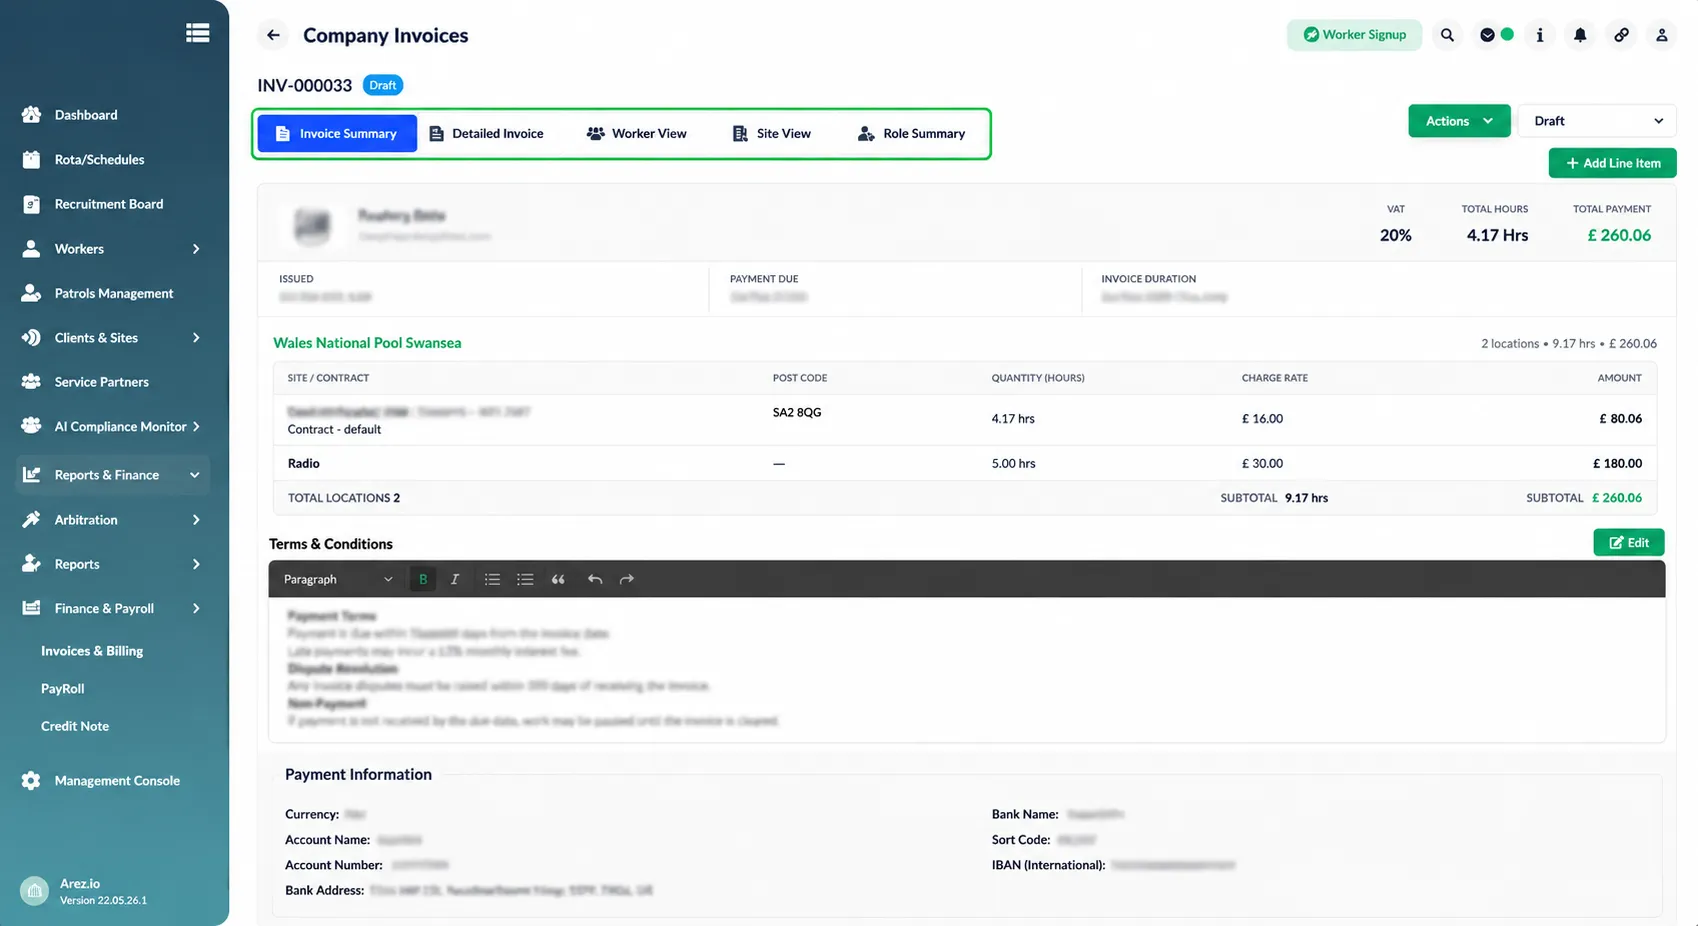
Step 6: Review the Invoice Summary
Open the created invoice to review all invoice details before approval or sending.
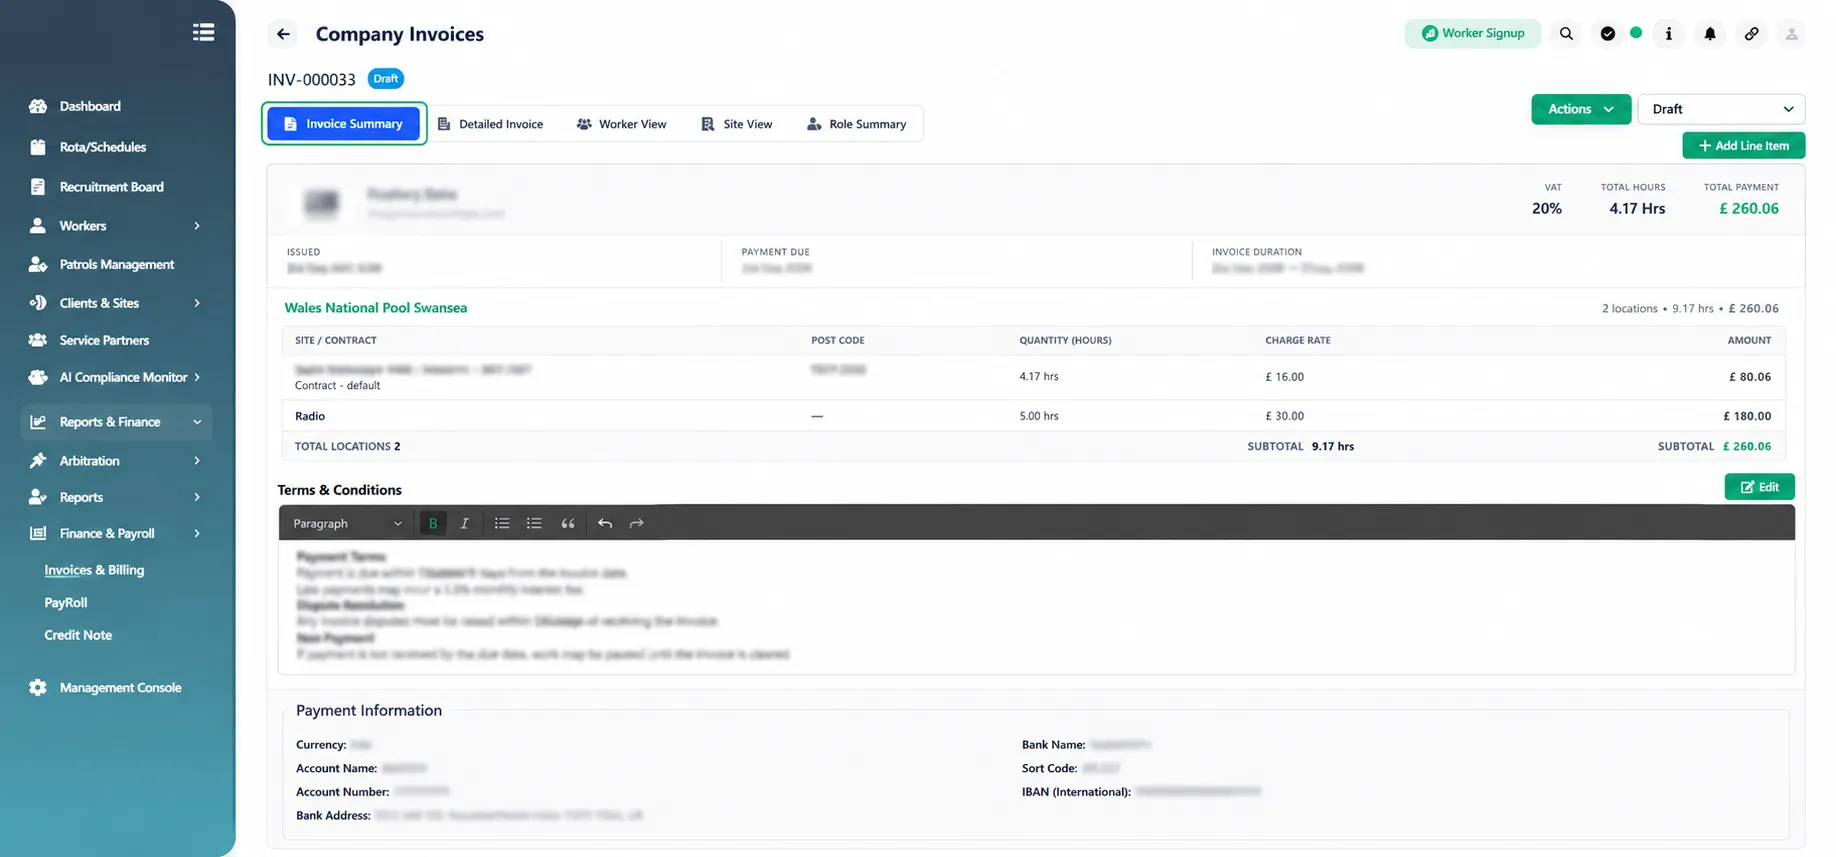
Select the Invoice Summary tab to view an overview of the invoice, including:
Client and site/contract information
Invoice issue date and payment due date
Invoice period
VAT percentage applied
Total hours worked
Total payment amount
Site breakdown and contracted locations
Charge rates applied
Quantity (hours) billed
Subtotals and invoice totals
Terms & Conditions
Payment information (bank details and payment instructions)
Review these details carefully to ensure invoice accuracy before progressing to approval or sending.
Invoice Views
Multiple views are available:
Detailed Invoice
Shows full billing breakdown.
Worker View
Displays charges grouped by worker.
Site View
Displays charges grouped by site.
Role Summary
Displays charges grouped by role.
Use these views to validate calculations before sending.
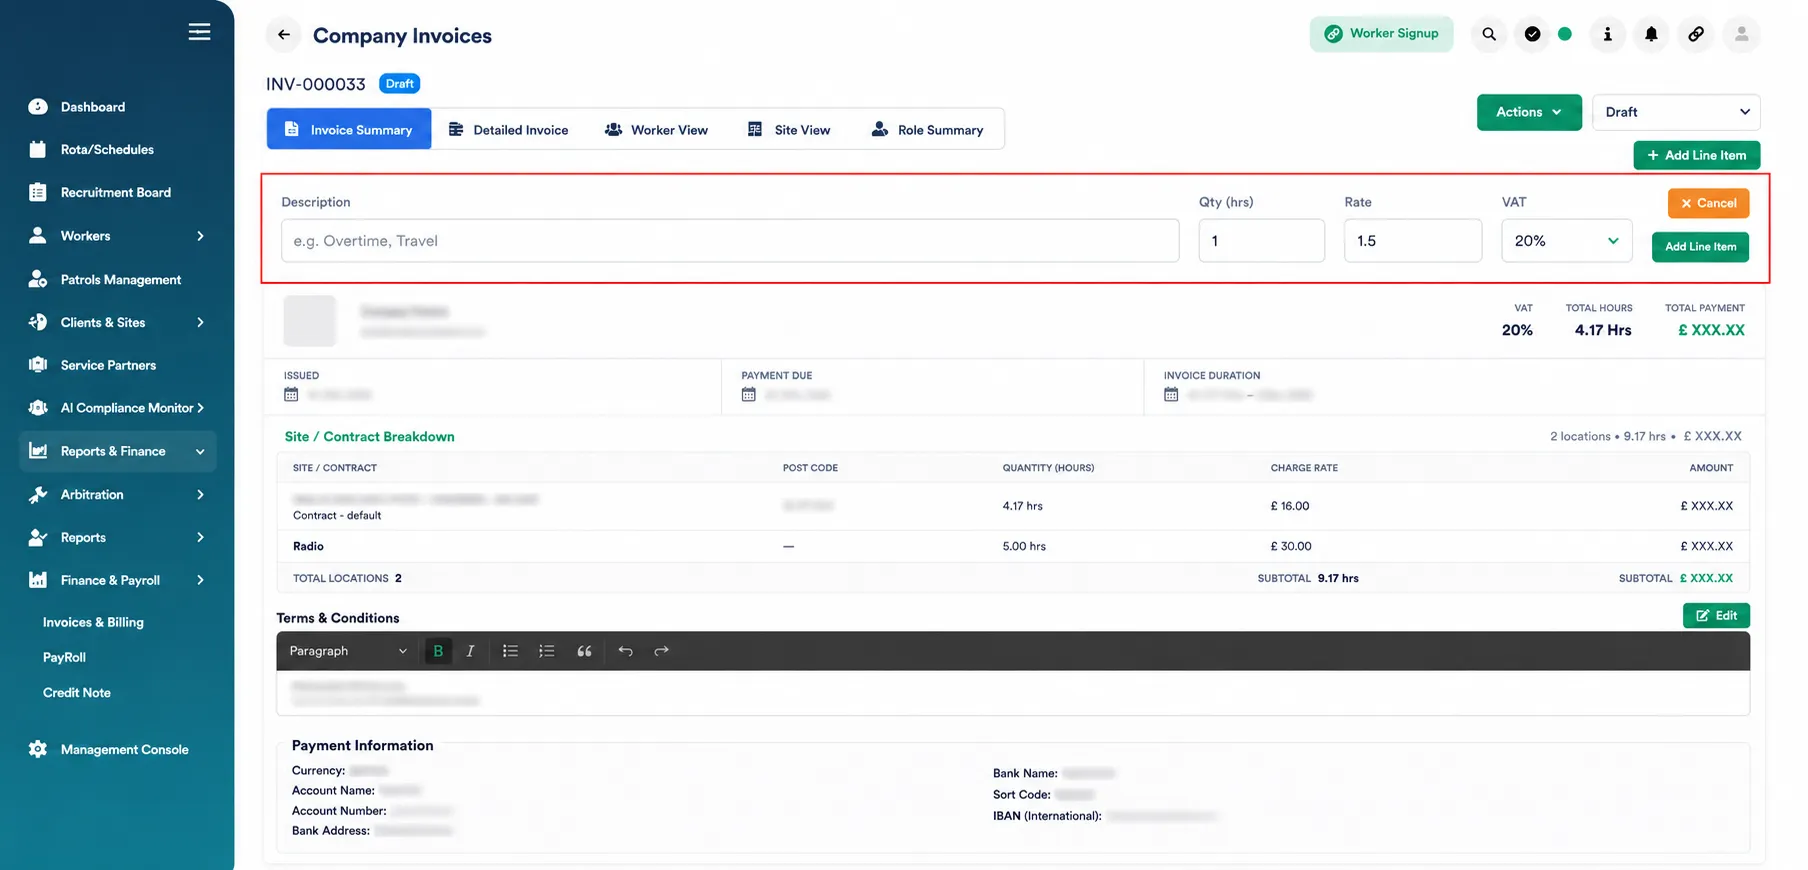
Add Manual Line Items (Optional)
Additional charges can be added manually.
Examples:
Overtime
Equipment
Travel
Radios
Uniform costs
Miscellaneous charges
Enter:
Description
Quantity (Hours)
Rate
VAT
Then select:
Add Line Item
The invoice total updates automatically.
Payment Information
Invoice payment details display:
Currency
Account Name
Account Number
Bank Name
Sort Code
IBAN
Bank Address
Verify information before posting invoices.
Managing Invoice Status
Invoices can move between different statuses depending on their stage:
Draft – Invoice is editable and not finalised.
Posted – Invoice has been finalised/posted.
Credit – Used for credit notes or adjustments.
Cancelled – Invoice has been cancelled.
To update the invoice status:
Open the Status dropdown (top right).
Select the required status:
Draft
Posted
Credit
Cancelled
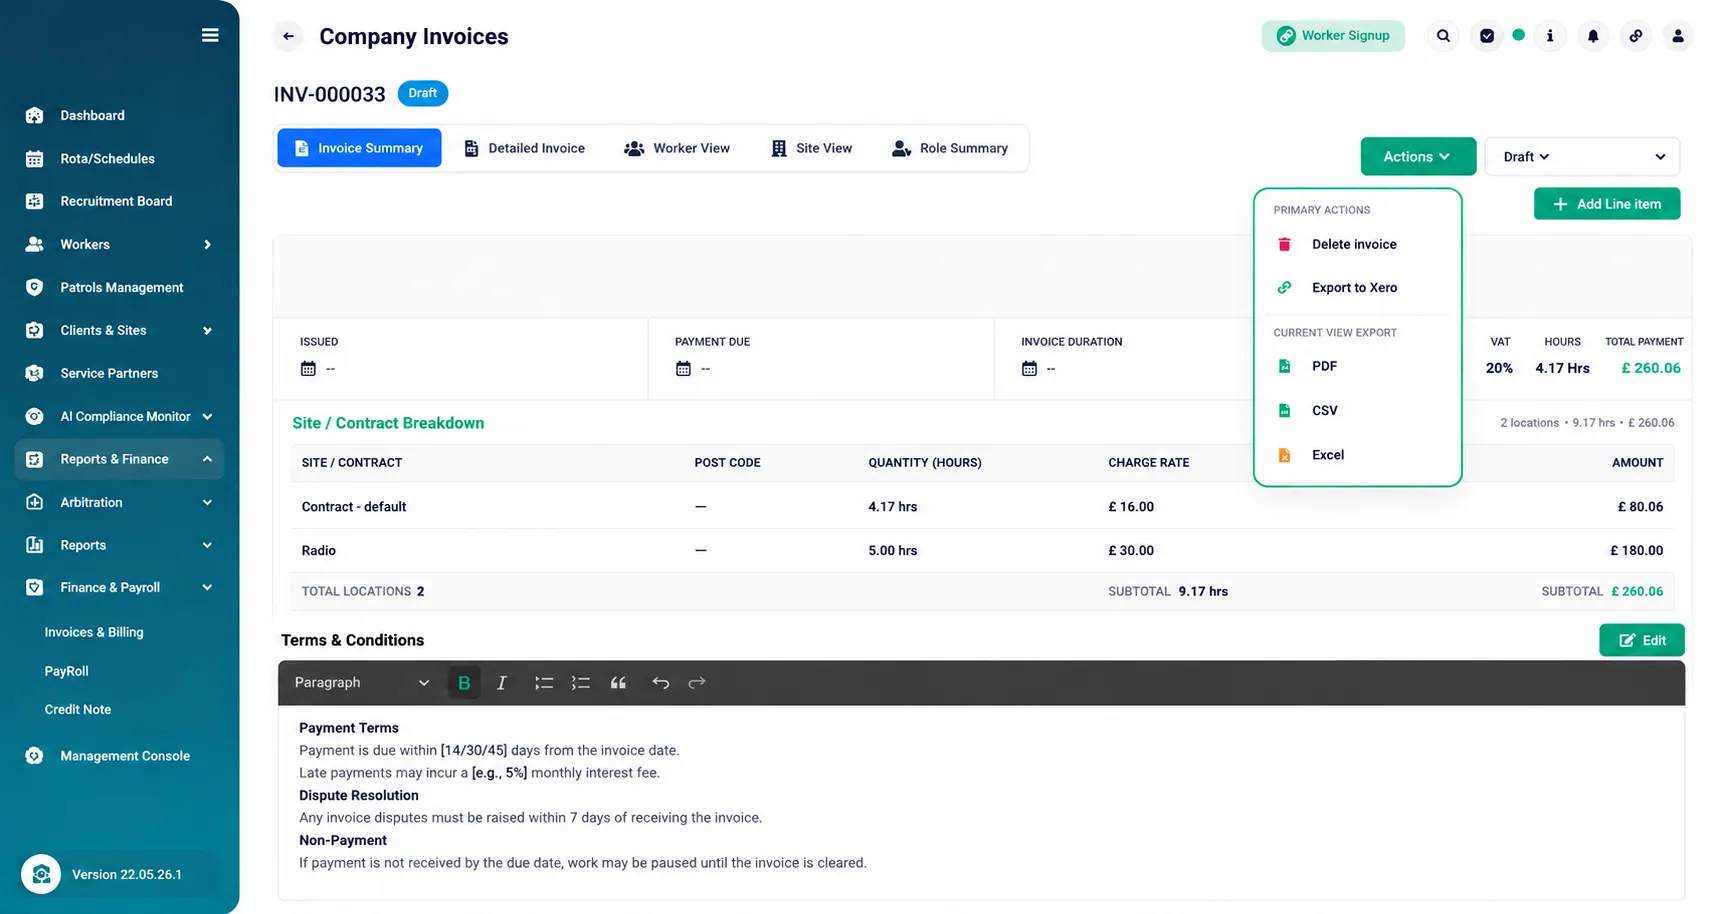
Additional actions available from the Actions menu:
Delete invoice
Export to Xero
Download as:
PDF
CSV
Excel
Troubleshooting
Missing shifts in invoice
Check:
Timesheets approved
Arbitration completed
Billing dates correct
Incorrect totals
Verify:
Rates
VAT
Added line items
Invoice grouping
Invoice not generating
Ensure:
Client selected
Sites included
Approved shifts exist within chosen period
Summary
The Invoices & Billing module converts approved timesheets into structured invoices, allowing users to group billing by client or role, add adjustments, review calculations, and manage invoice approval before sending to clients.