How to Upload Multiple Sites for an Existing Client Using Bulk Upload
Overview
The Bulk Upload feature allows administrators to create multiple sites for an existing client in a single upload, eliminating the need to add each site manually. This feature is particularly useful when onboarding new clients with multiple locations or when adding a large number of sites at once.
Using the provided Excel template, you can enter all required site information and upload the file directly into the system. Once validated, the sites will be created automatically.
Step 1: Navigate to Sites & Groups
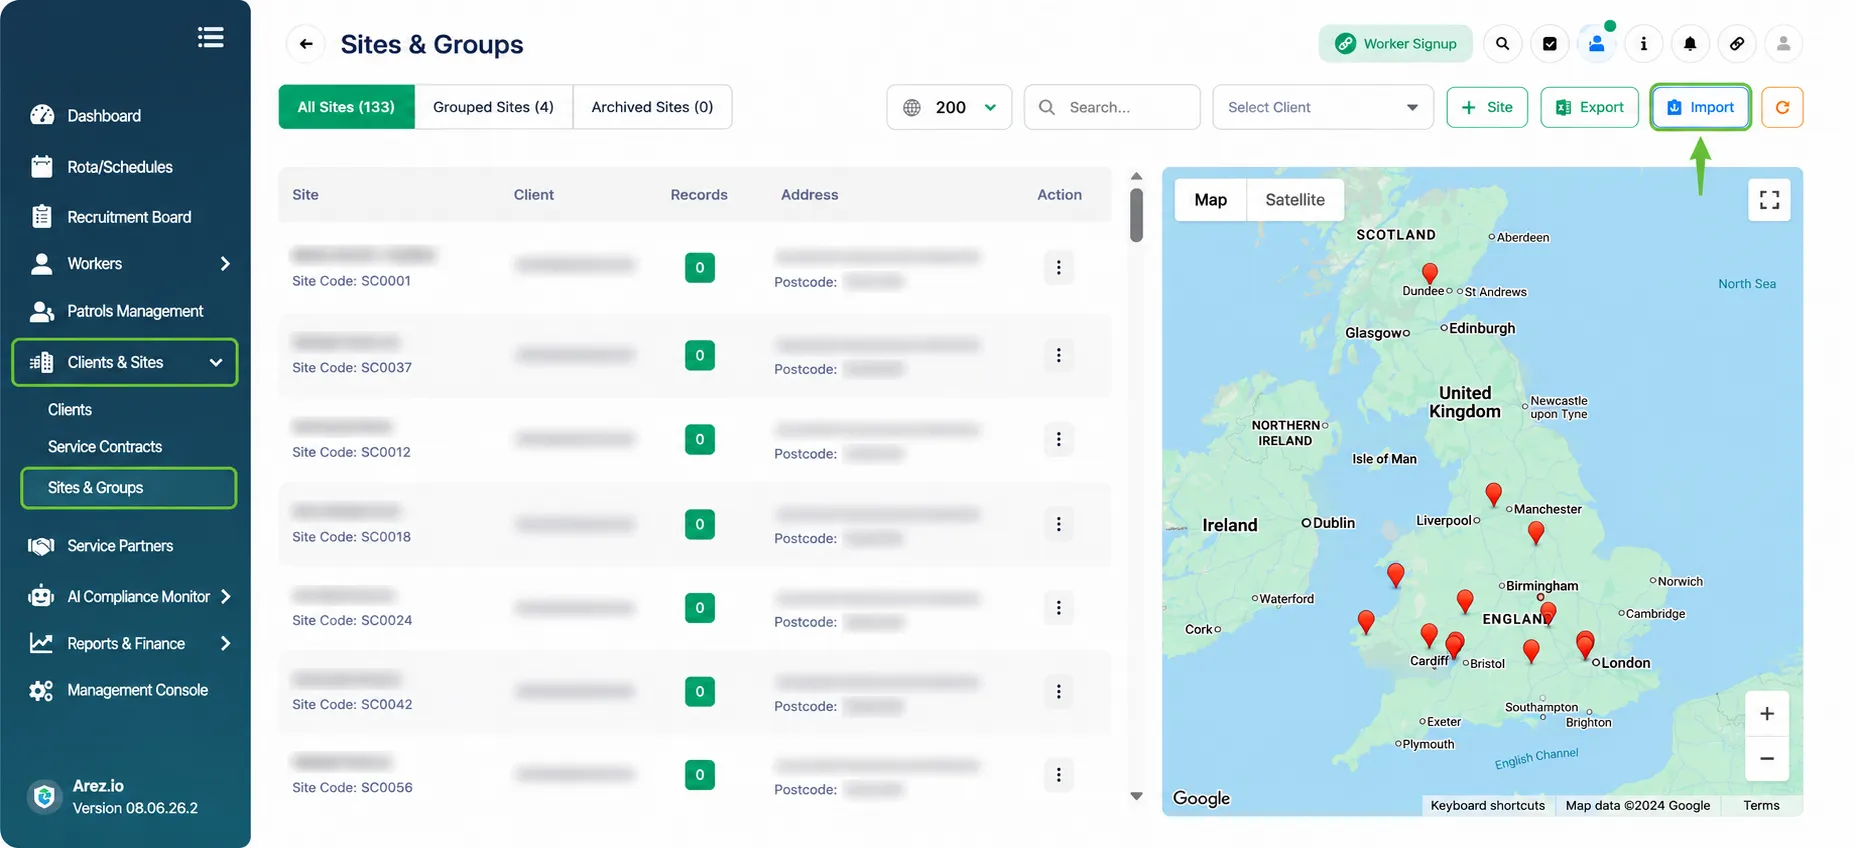
From the left-hand menu, expand Clients & Sites and select Sites & Groups.
Once the Sites & Groups page opens, click the Import button located in the top-right corner of the screen.
Purpose: This option allows you to upload multiple sites for an existing client using the bulk upload feature.
Step 2: Download and Complete the Sample Excel File
After clicking Import, the Site Bulk Upload page will open.
Select the client you want to add sites to from the Select Client dropdown.
Click the Sample excel file link located below the upload area.
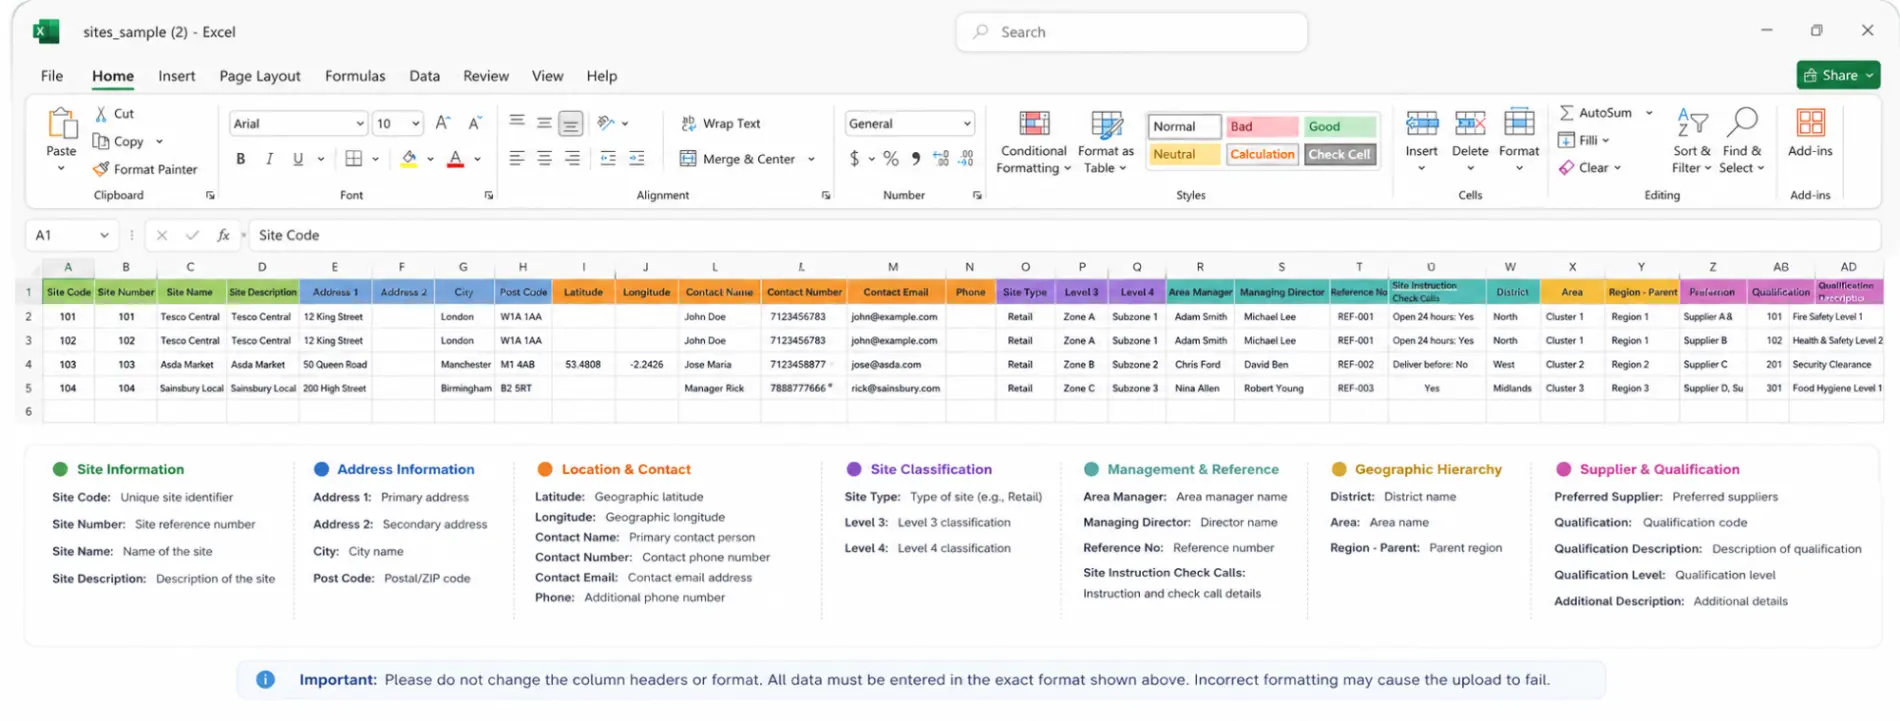
Open the downloaded file and enter the details for all sites you wish to upload.
Important:
The bulk upload file must follow the exact format provided in the sample file. Each column contains specific information required by the system, such as Site Code, Site Name, Address, Contact Details, Site Type, Region, and other site-related data.
⚠️ Please ensure that all information is entered in the same format as the sample file. If any data is missing, incorrectly formatted, or entered in the wrong column, the file validation will fail and the upload will not be processed successfully.
Step 3: Upload the Completed File and Import the Sites
Once you have completed the Excel template with all site information, return to the Site Bulk Upload page.
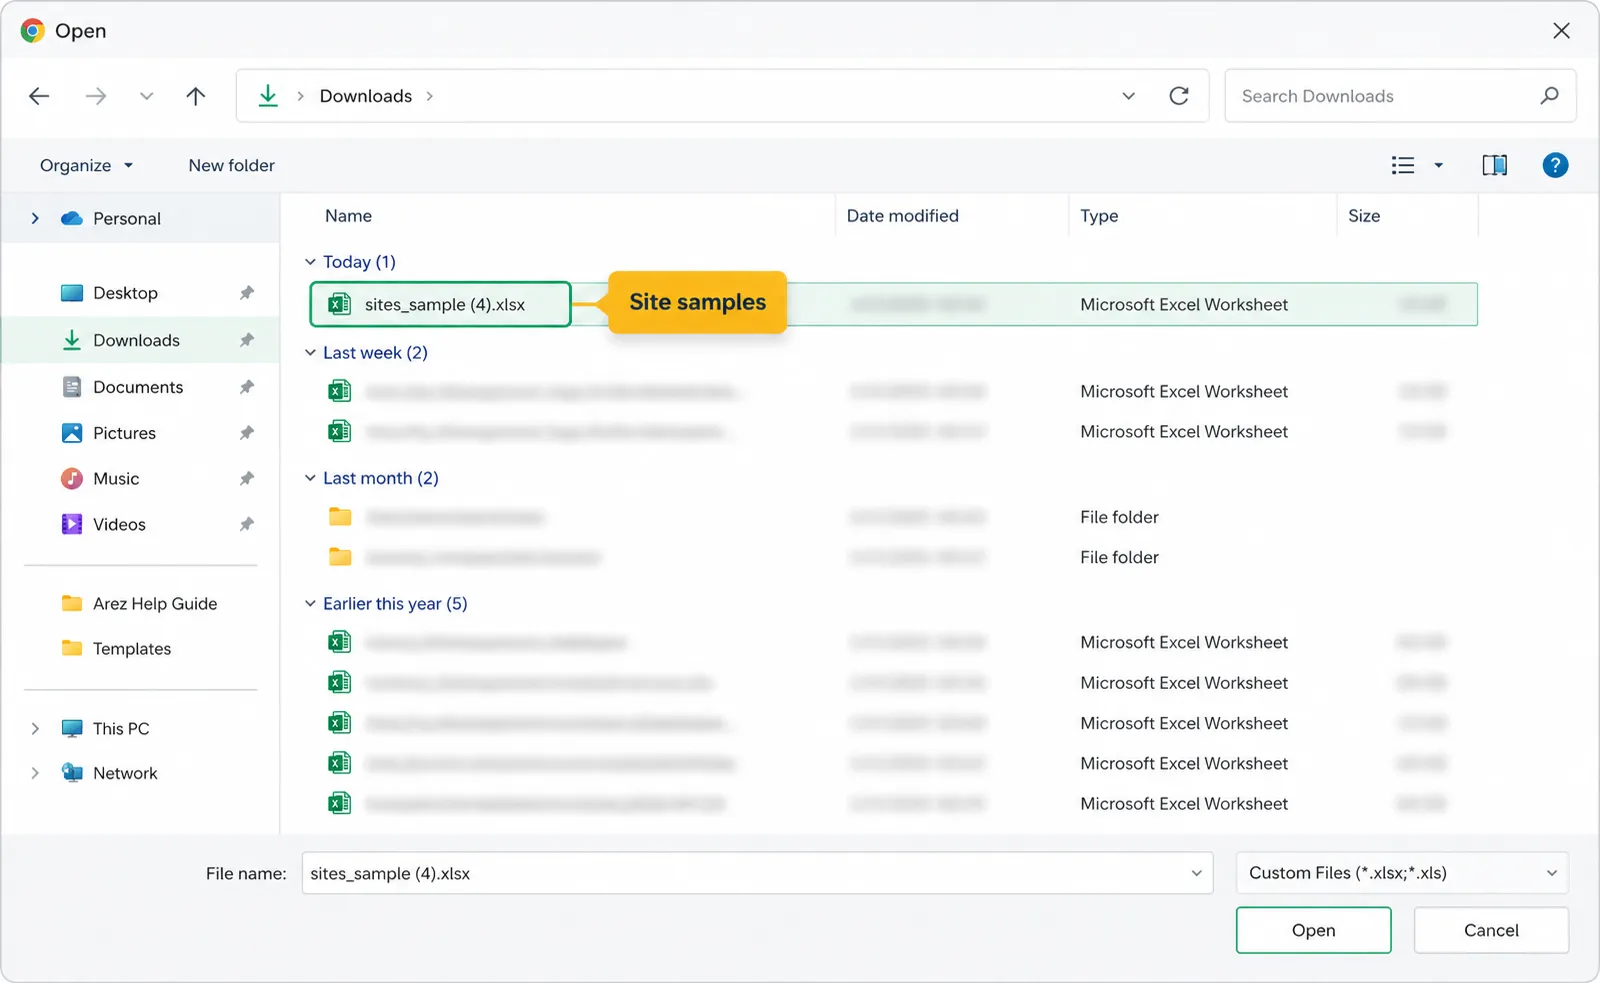
Click the Upload Area and select the completed Excel file from your computer.
Browse to the location where the file is saved and select the file.
Click Open to upload the file into the system.
After the file has been uploaded successfully, the filename will appear in the upload area.
Click the Load Data button to validate and process the file.
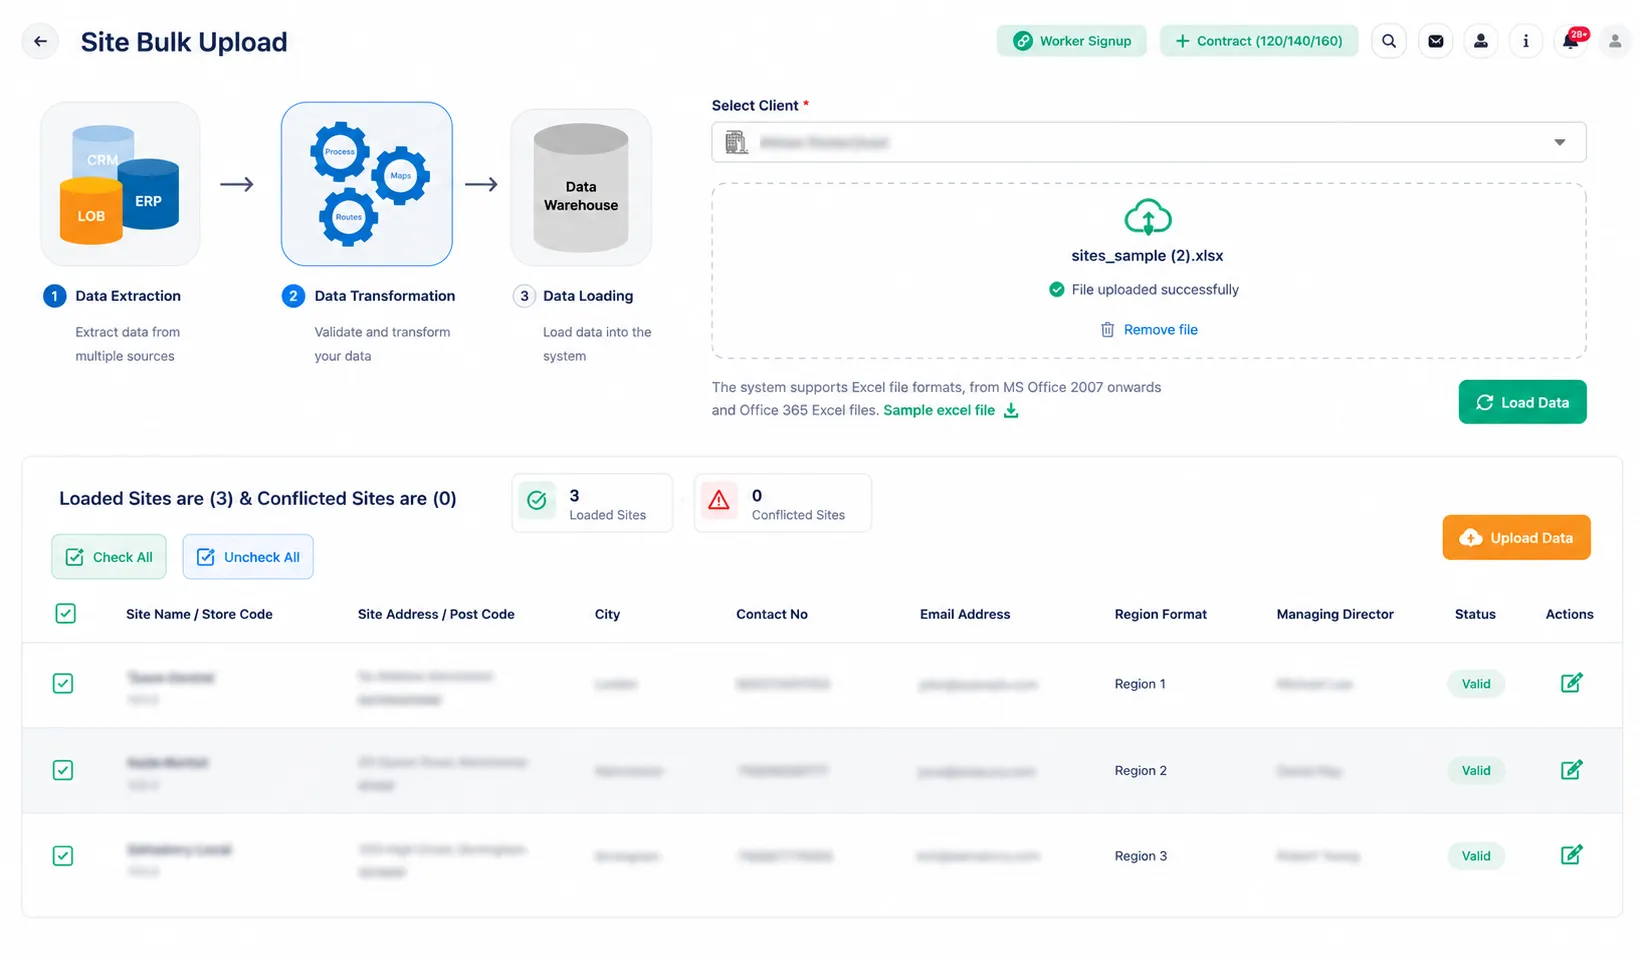
The system will then read the file and display a preview of all site records contained within it. During this stage, the system will also identify any validation issues or conflicting records.
The preview screen displays:
Loaded Sites
Conflicted Sites (if any)
Site Details
Address Information
Contact Information
Region Information
Managing Director Information
Validation Status
Important:
⚠️ If any conflicts or validation errors are found, review and correct the information in the Excel file before proceeding.
⚠️ Ensure all required records are selected before continuing with the upload.
Review the loaded site records.
Once you are satisfied that the information is correct, click the Upload Data button.
After the upload completes successfully, all sites contained within the Excel file will be created and assigned to the selected client.
Result:
The new sites are added to the client and become available within Clients & Sites → Sites & Groups.