
 Facebook
  Twitter
  LinkedIn
 How to Create and Assign a Foot Patrol
Overview
The Foot Patrol feature enables you to create patrol routes for a site, configure checkpoints using QR Codes, NFC Tags, or GPS, and assign patrols to worker shifts. Once assigned, patrol activity can be monitored through the Patrol Run Review, allowing supervisors to track checkpoint completion and patrol progress.
Accessing Foot Patrol
From the left-hand navigation menu:
Mobile Operations → Foot Patrol
The Foot Patrol dashboard displays all existing patrol routes along with their status, linked sites, checkpoint count, schedules, and patrol history.
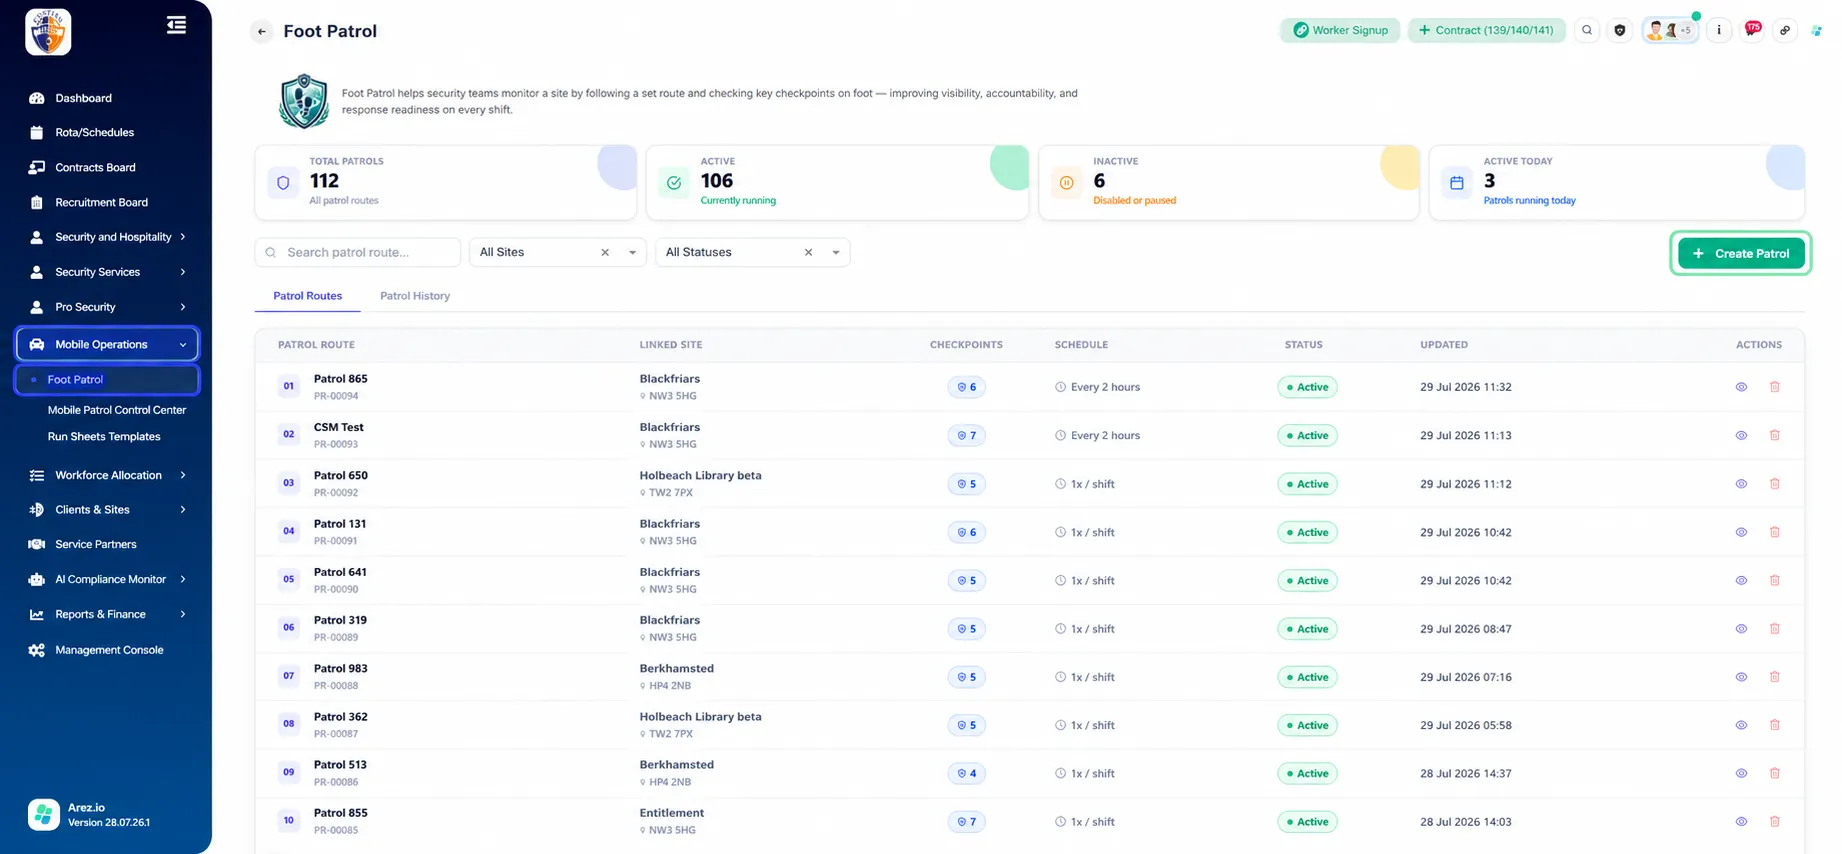
Step 1: Create a New Patrol
Click + Create Patrol in the top-right corner.
Complete the following information:
Patrol Name – Enter a descriptive name for the patrol.
Frequency – Choose how often the patrol should be completed (for example, every 2 hours or once per shift).
Client – Select the client.
Site – Select the site where the patrol will be carried out.
Description (Optional) – Add any notes or instructions for the patrol.
Once all required fields are completed, click Save.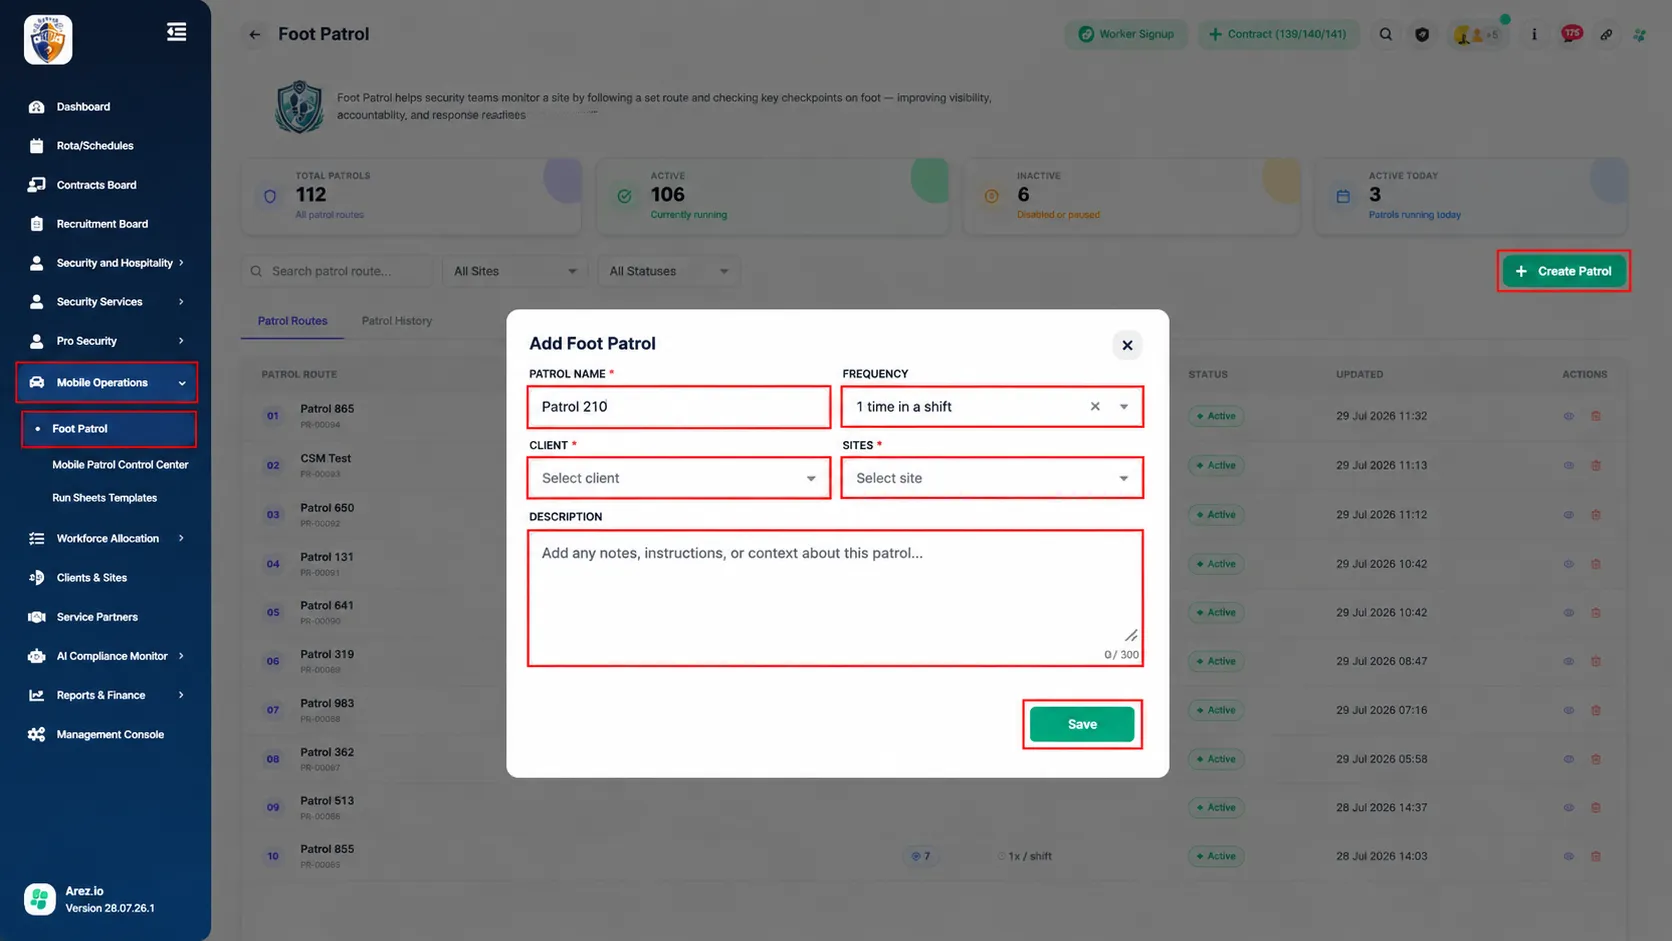
The newly created patrol will appear at the top of the patrol list.
Step 2: Open the Patrol
Click the newly created patrol from the patrol list to open its details.
The Patrol Detail page displays:
Patrol information
Client
Linked site
Patrol frequency
Checkpoint management
Route map
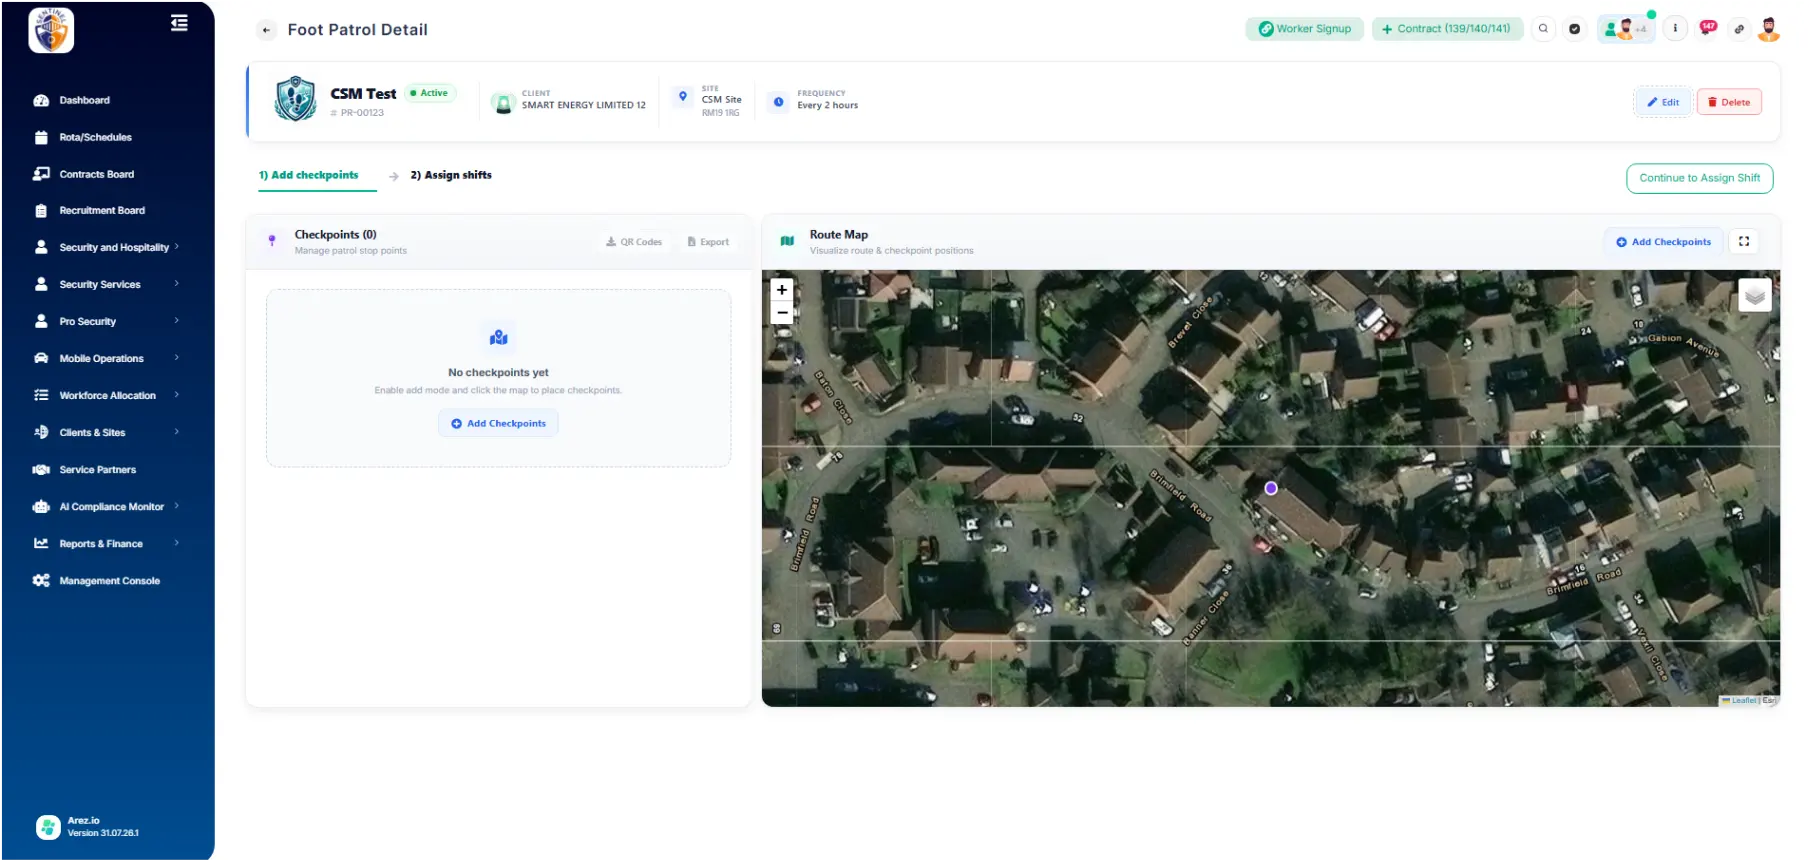
Step 3: Add Checkpoints
Click + Add Checkpoints in the top-right corner of the Route Map.
Place checkpoints on the map wherever workers should complete patrol stops.
Each checkpoint can be edited individually to configure:
Checkpoint Name
Checkpoint Type
Completion Radius
Location Settings
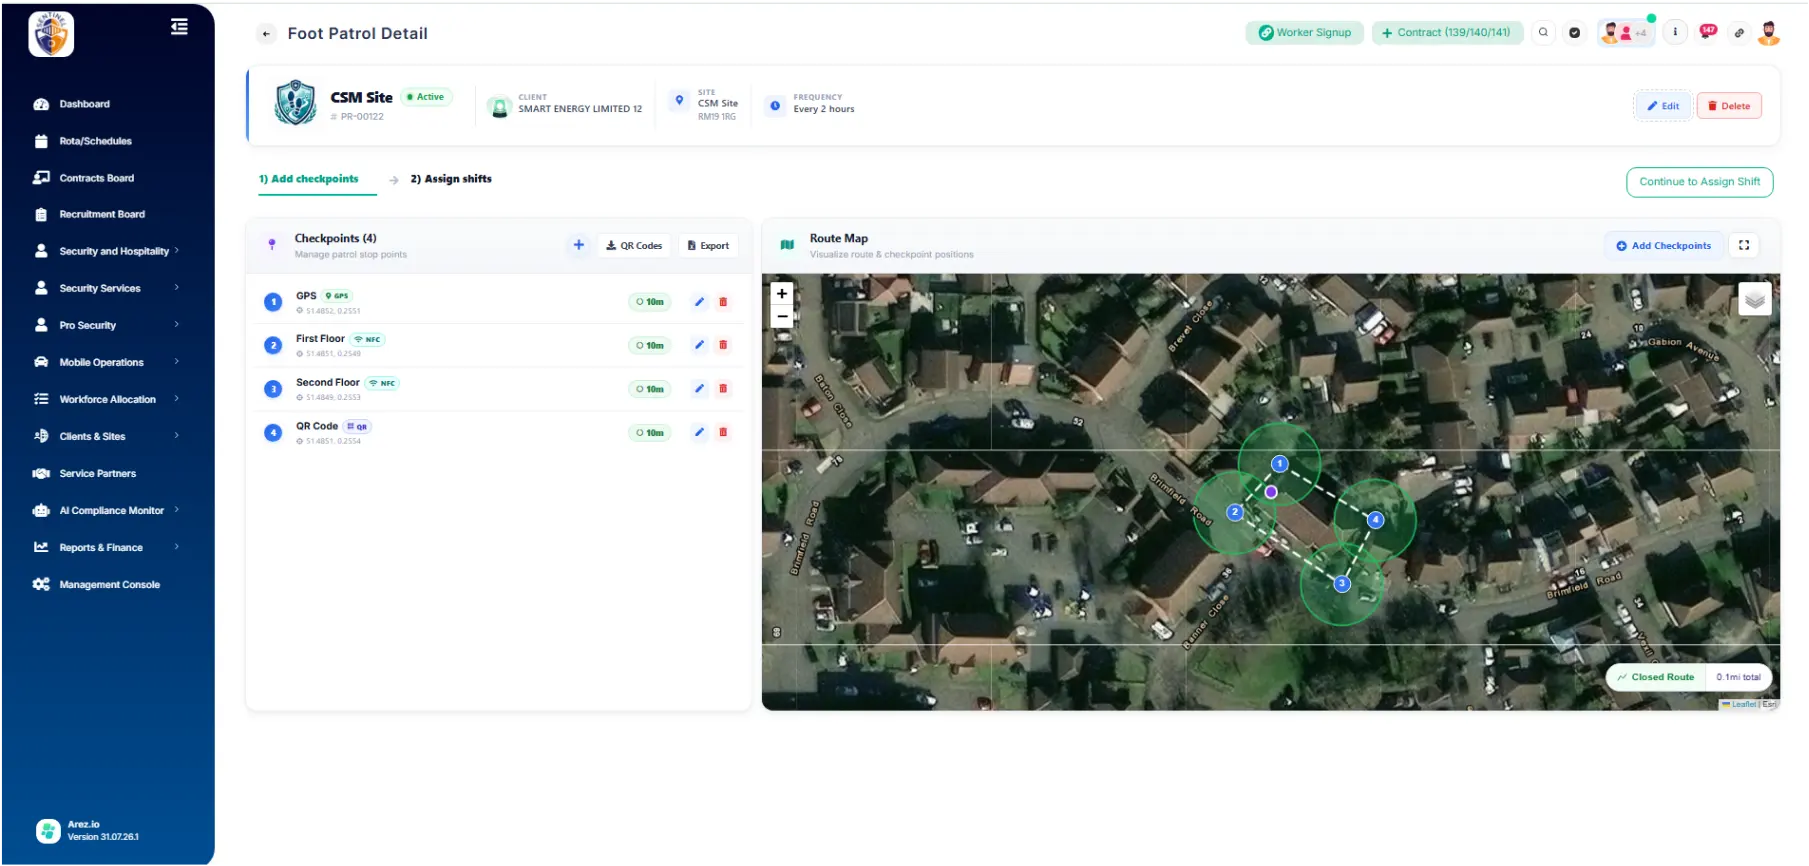
Step 4: Configure Checkpoint Types
Each checkpoint supports three different completion methods.
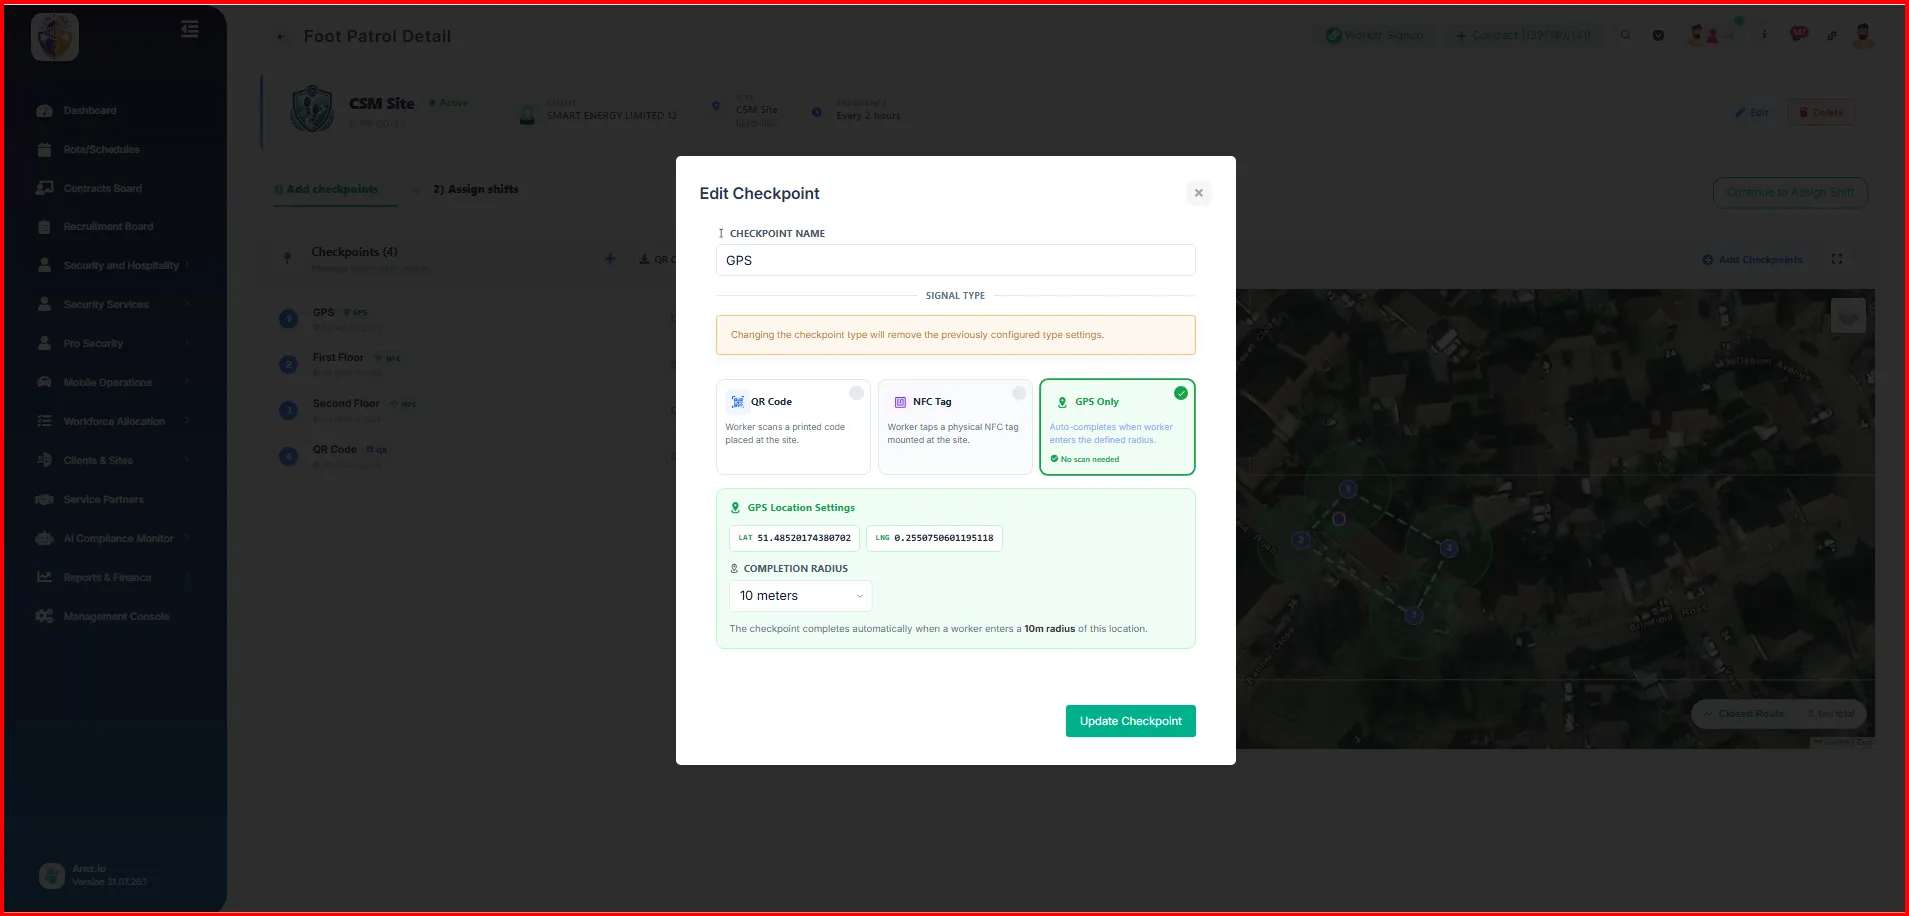
GPS Only
Workers complete the checkpoint automatically when they enter the configured GPS radius.
Configure:
GPS coordinates
Completion Radius
Completion Radius determines how close the worker must be before the checkpoint is automatically completed.
For example, a radius of 10 metres means the checkpoint will automatically register once the worker comes within 10 metres of the checkpoint location.
QR Code
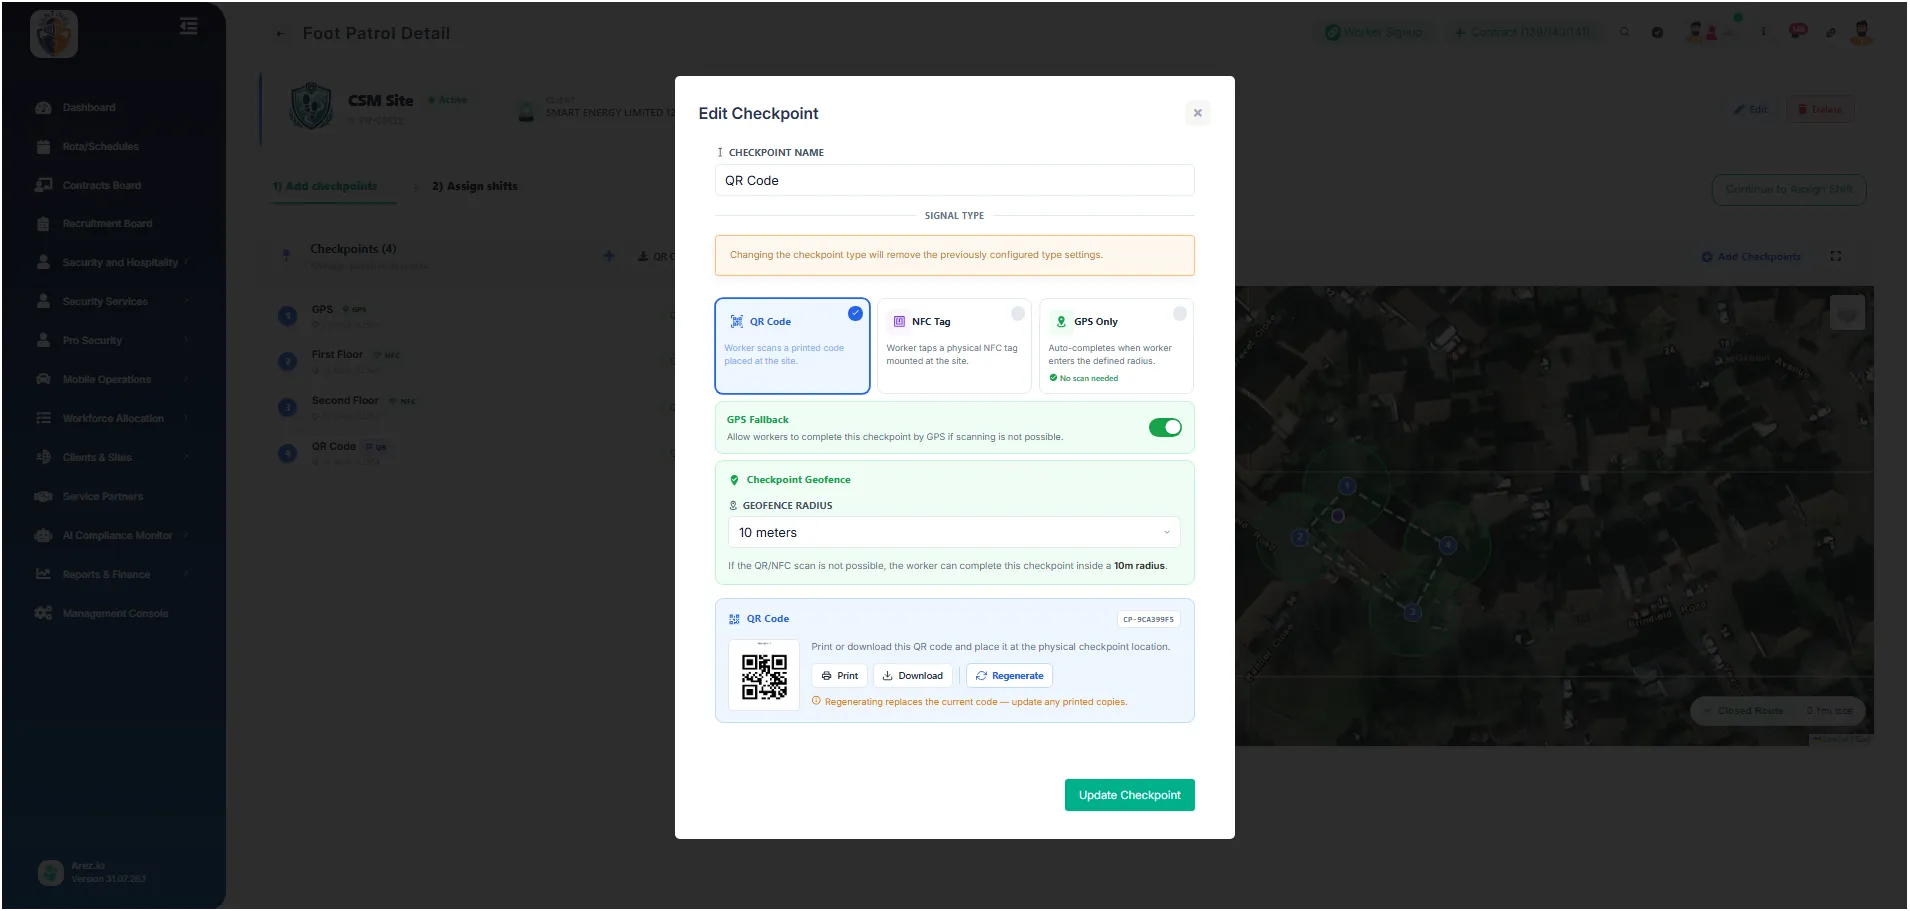
Workers scan a printed QR Code placed at the checkpoint.
Additional options include:
GPS Fallback
Geofence Radius
Print QR Code
Download QR Code
Regenerate QR Code
If GPS Fallback is enabled, workers can still complete the checkpoint by entering the configured GPS radius if scanning is not possible.
NFC Tag
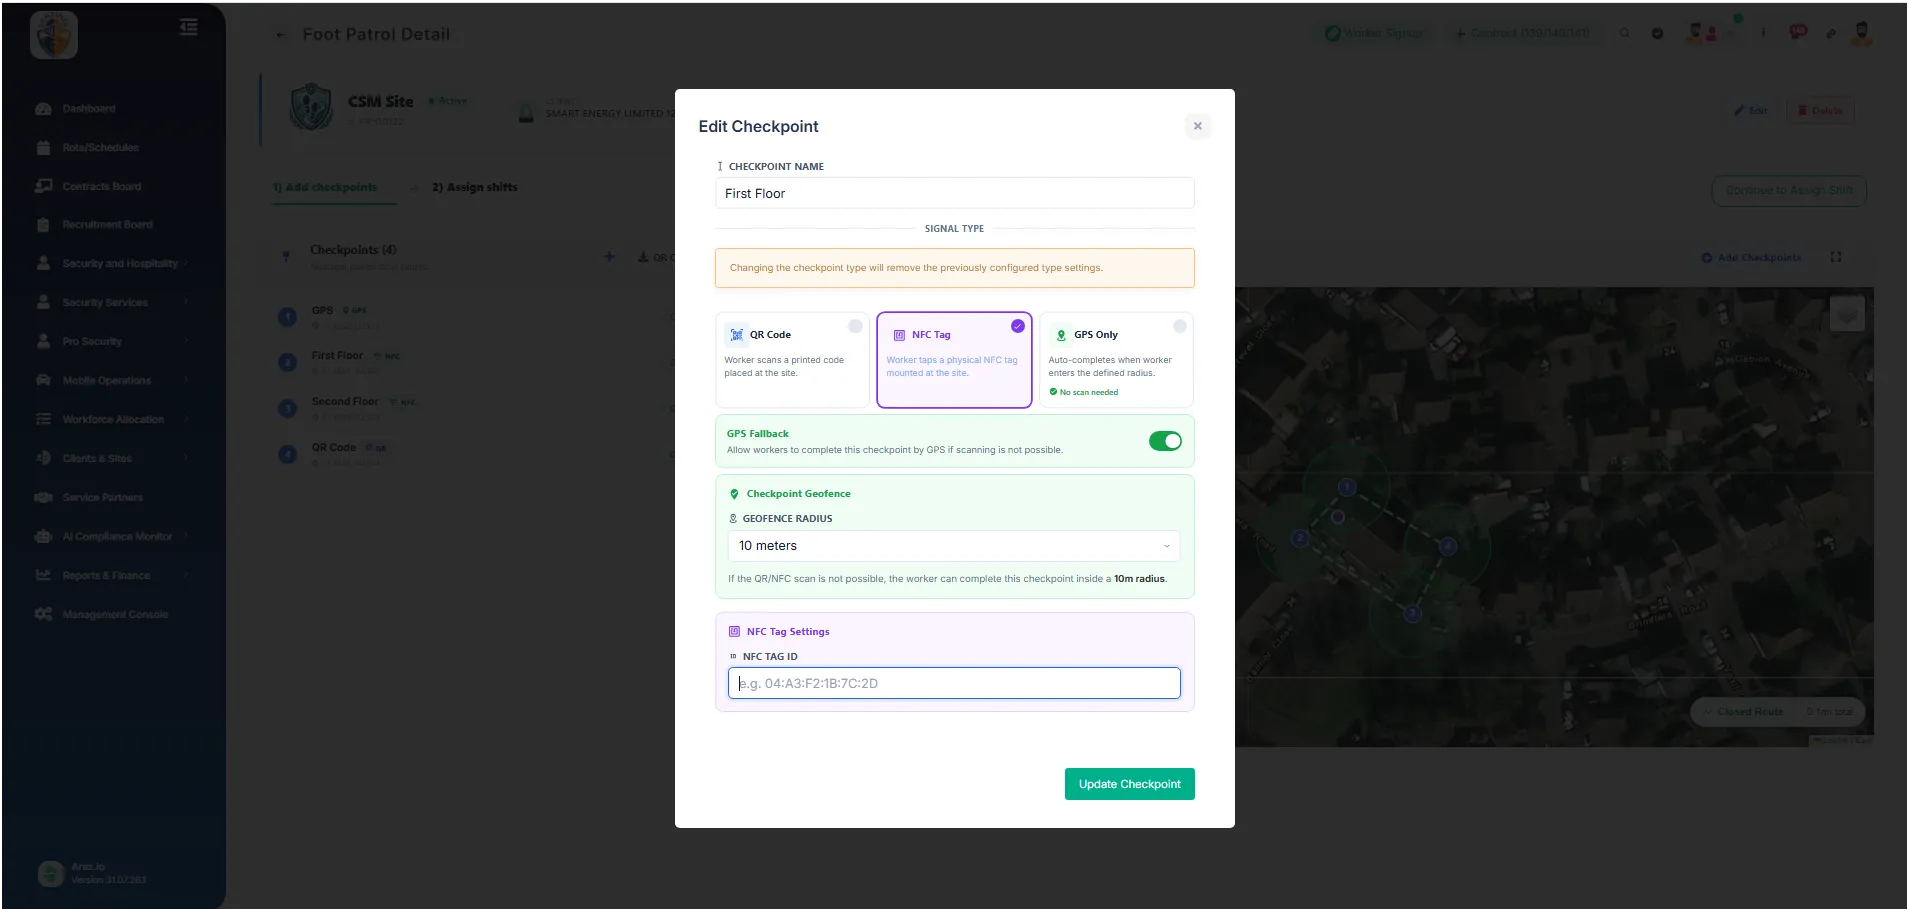
Workers tap a physical NFC tag installed at the checkpoint.
You can configure:
NFC Tag ID
GPS Fallback
Geofence Radius
This provides an alternative to QR scanning while still supporting GPS-based completion if required.
 Step 5: Export Checkpoints
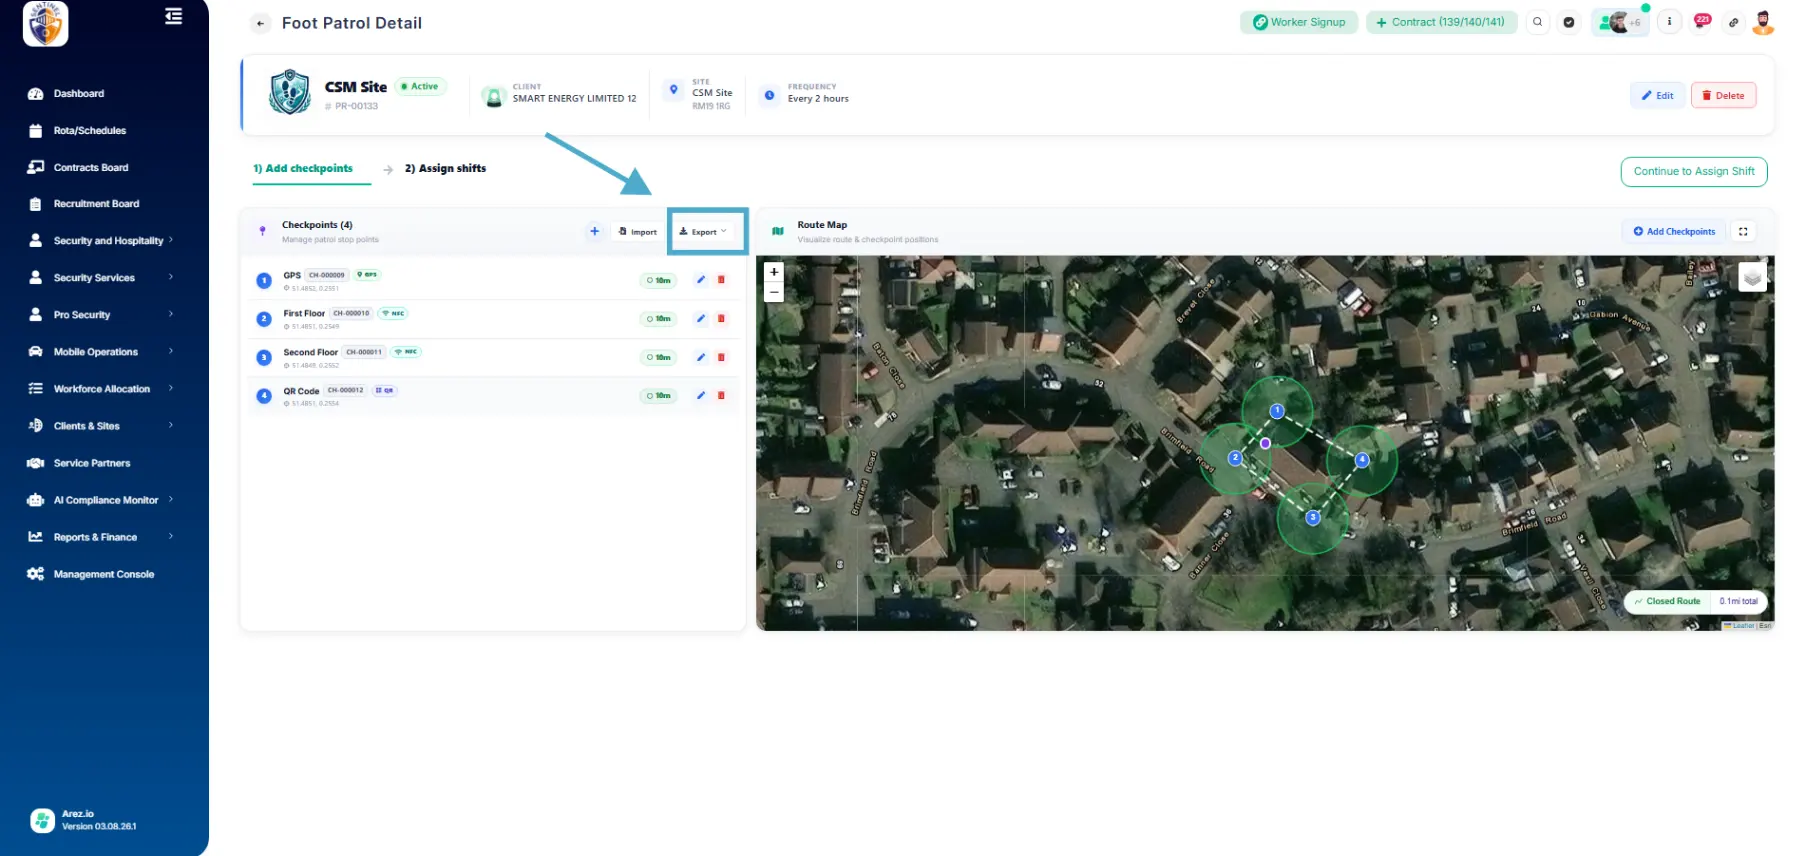
Export NFC Tags
Export the NFC Tag file, add the NFC Tag IDs, then import the updated file to assign the tags.
Export QR Codes
Export the QR Code file to download the QR codes for all checkpoints.
Step 6: Save the Patrol Route
After configuring all checkpoints, click Save Checkpoints & Continue.
The patrol route is now ready to be assigned to worker shifts.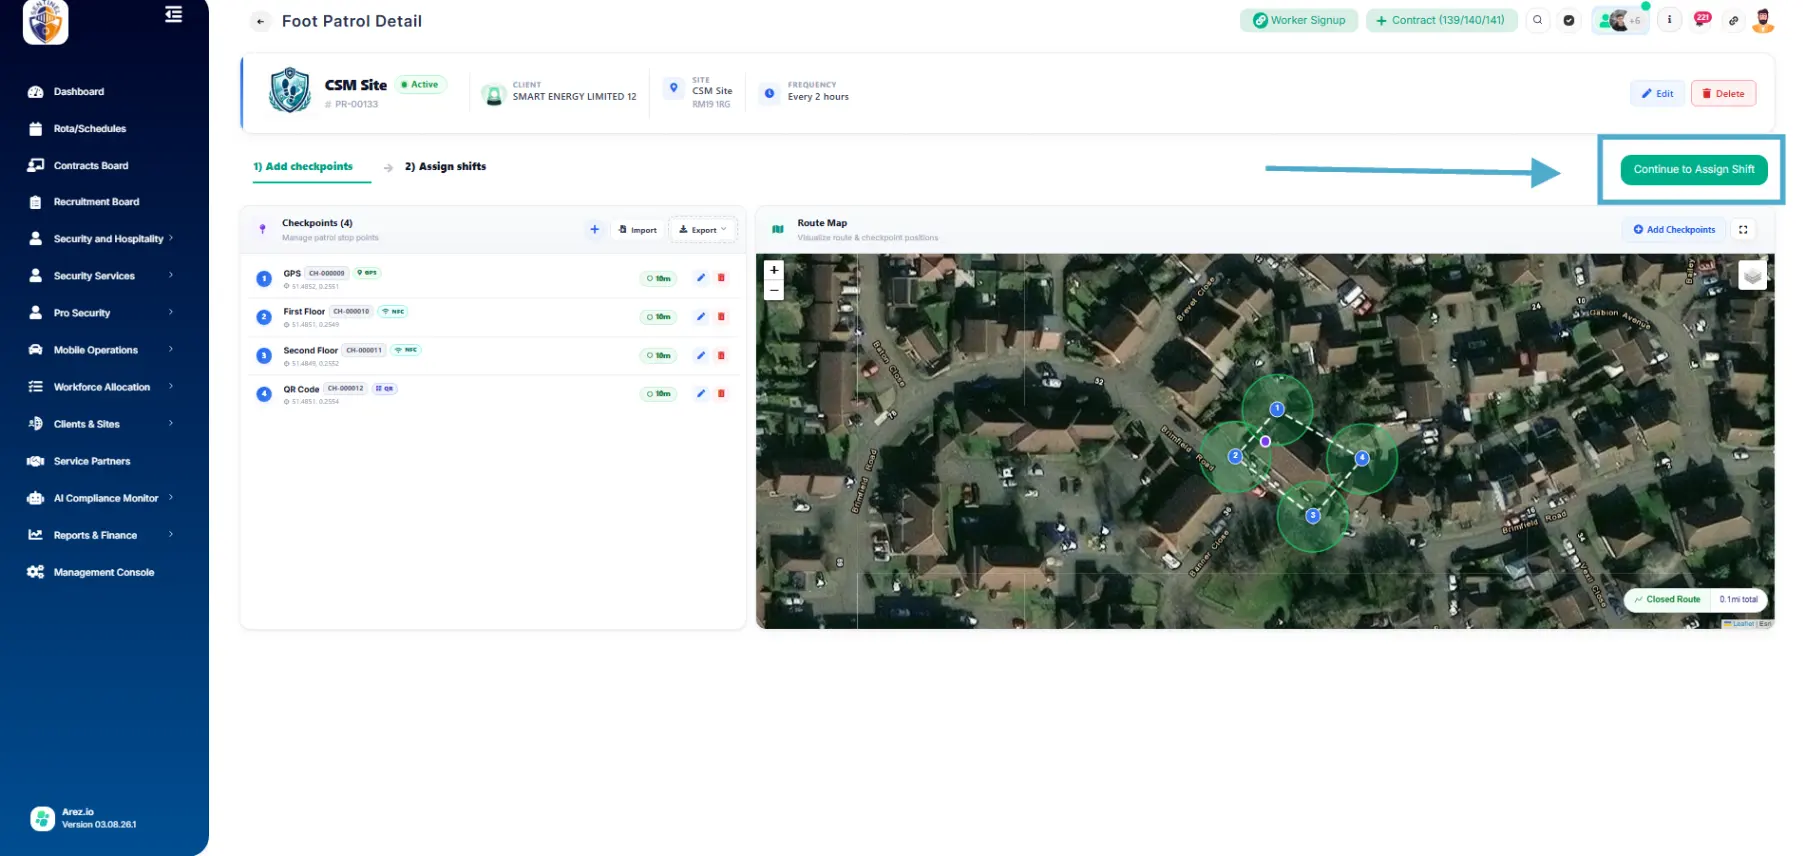
Step 7: Assign Patrols to Shifts
All shifts for the selected site are displayed automatically.
To assign a patrol:
Locate the required shift.
Click Assign Patrol on the shift card.
A confirmation window appears.
Click Assign Patrol again to confirm.
The patrol is now linked to that shift and will be available for the assigned worker.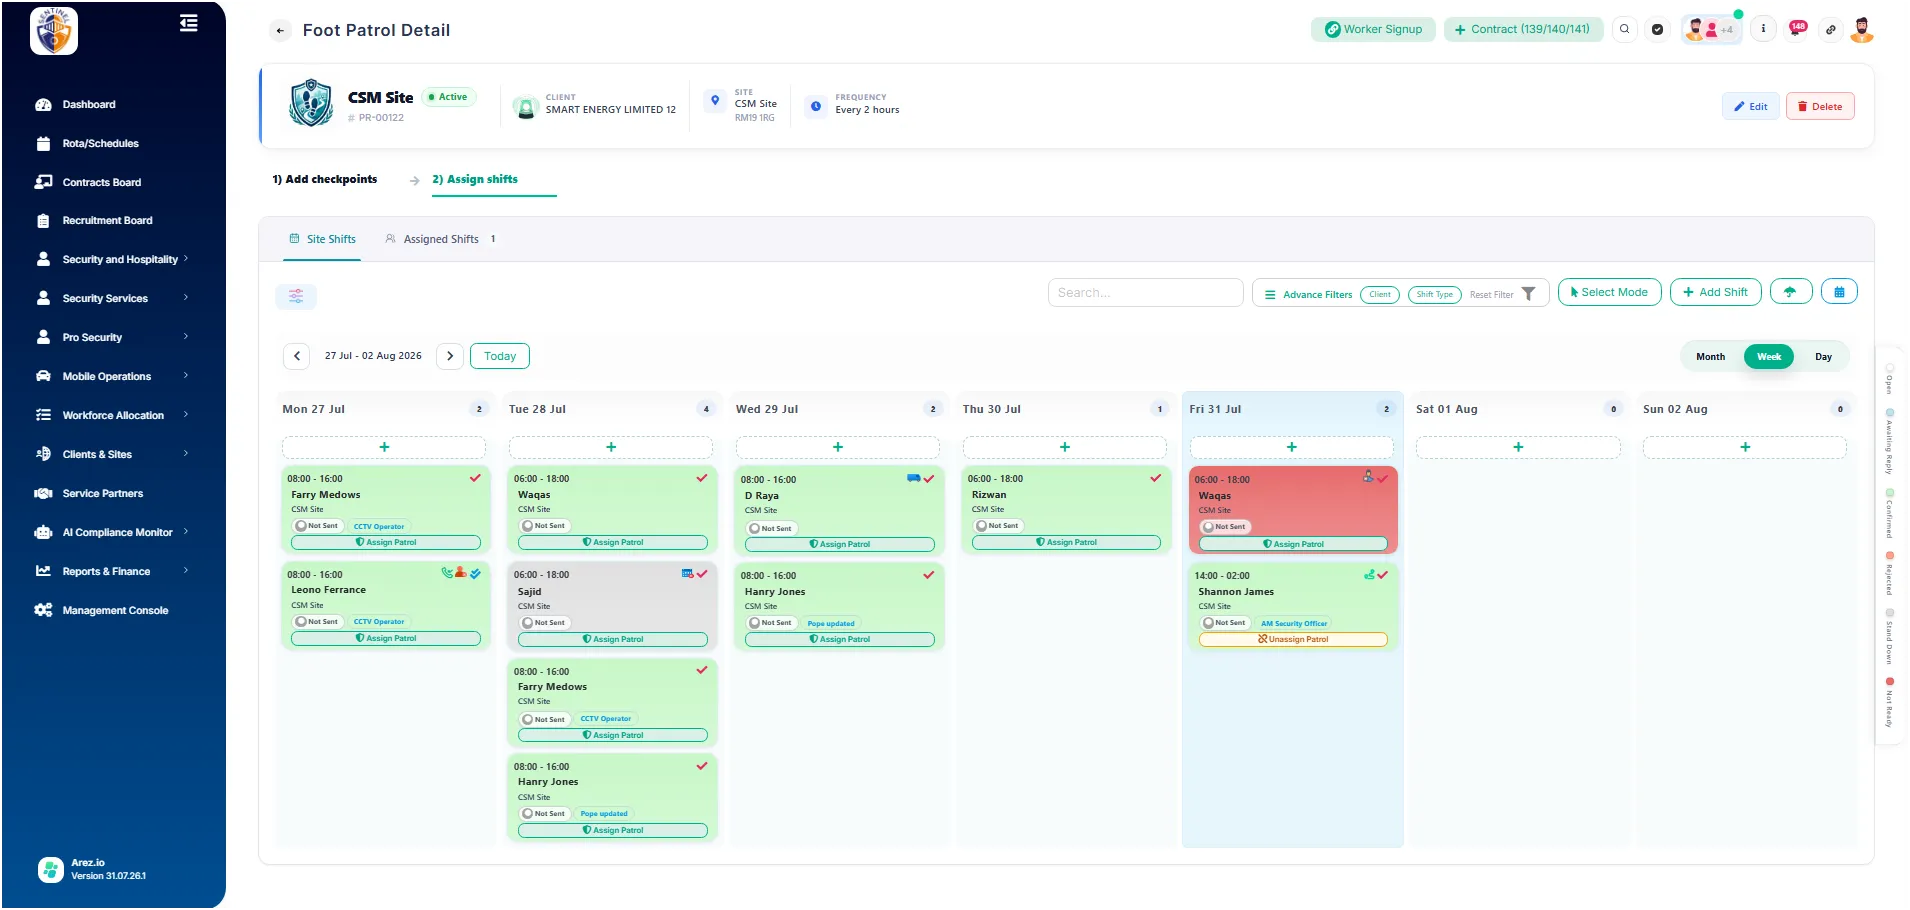
Step 8: View Patrol Progress
Open the assigned shift from the rota.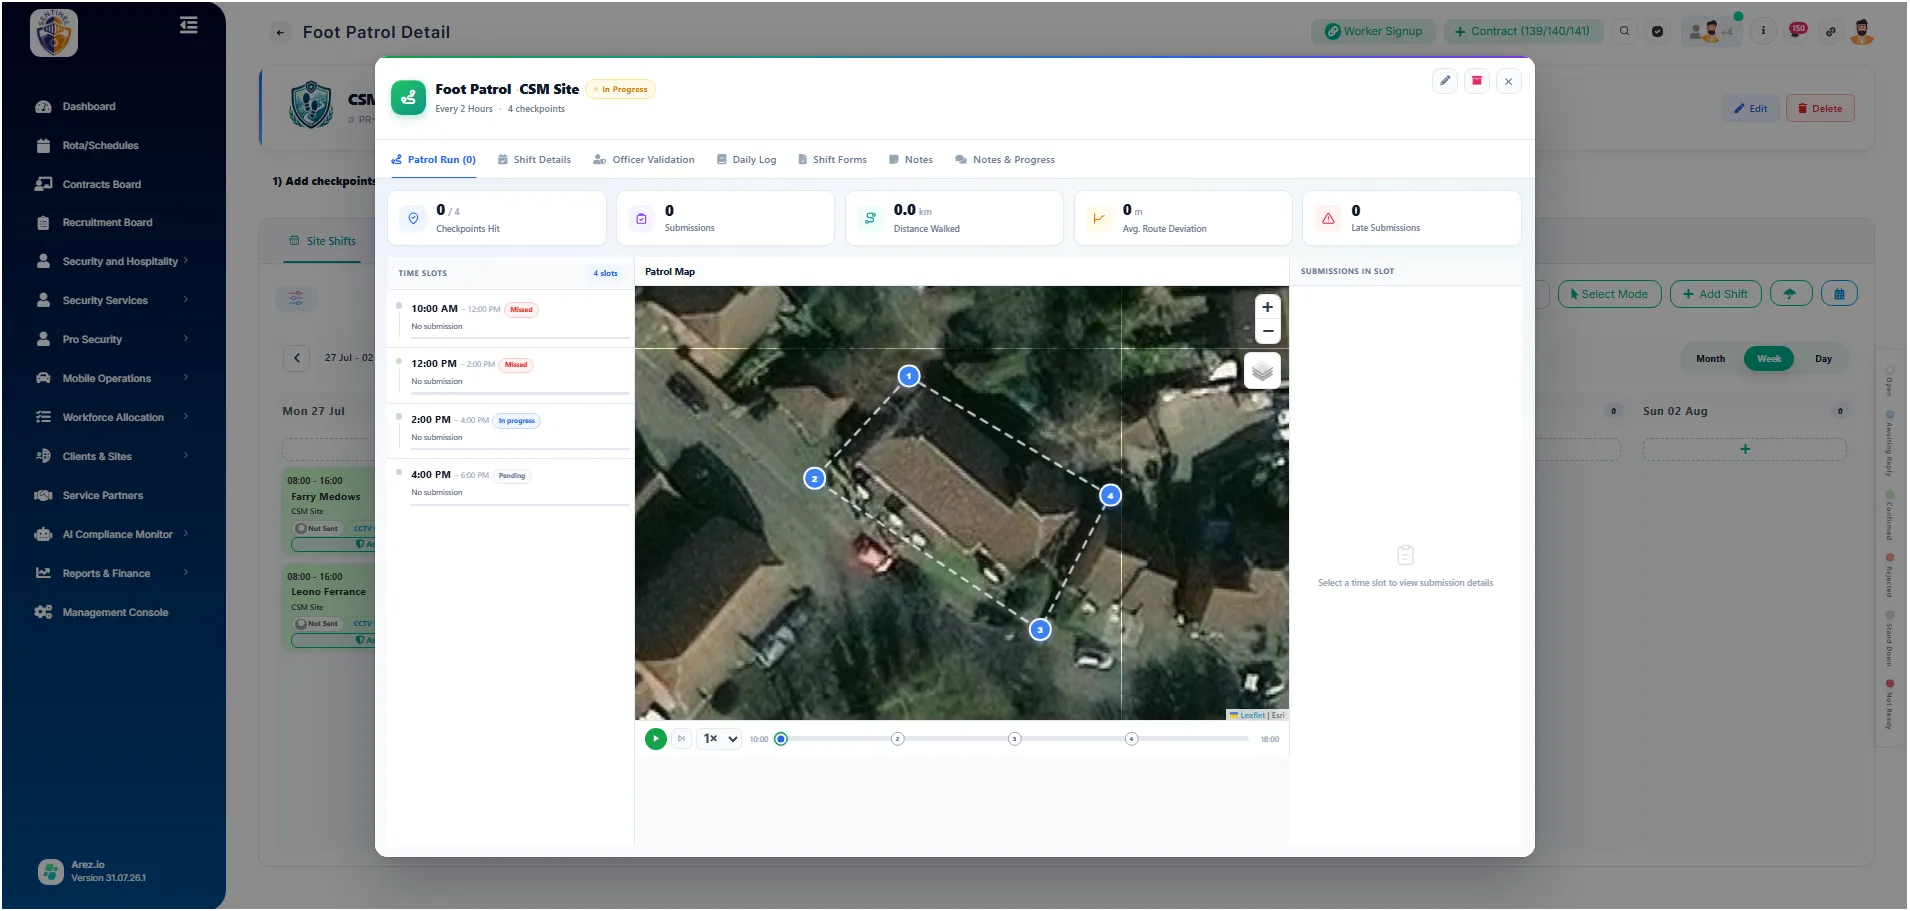
This opens the Patrol Run Review screen.
The Patrol Run Review provides a complete overview of patrol activity, including:
Patrol route map
Checkpoint path
Time slots
Checkpoint submissions
Patrol progress
Worker movement throughout the patrol
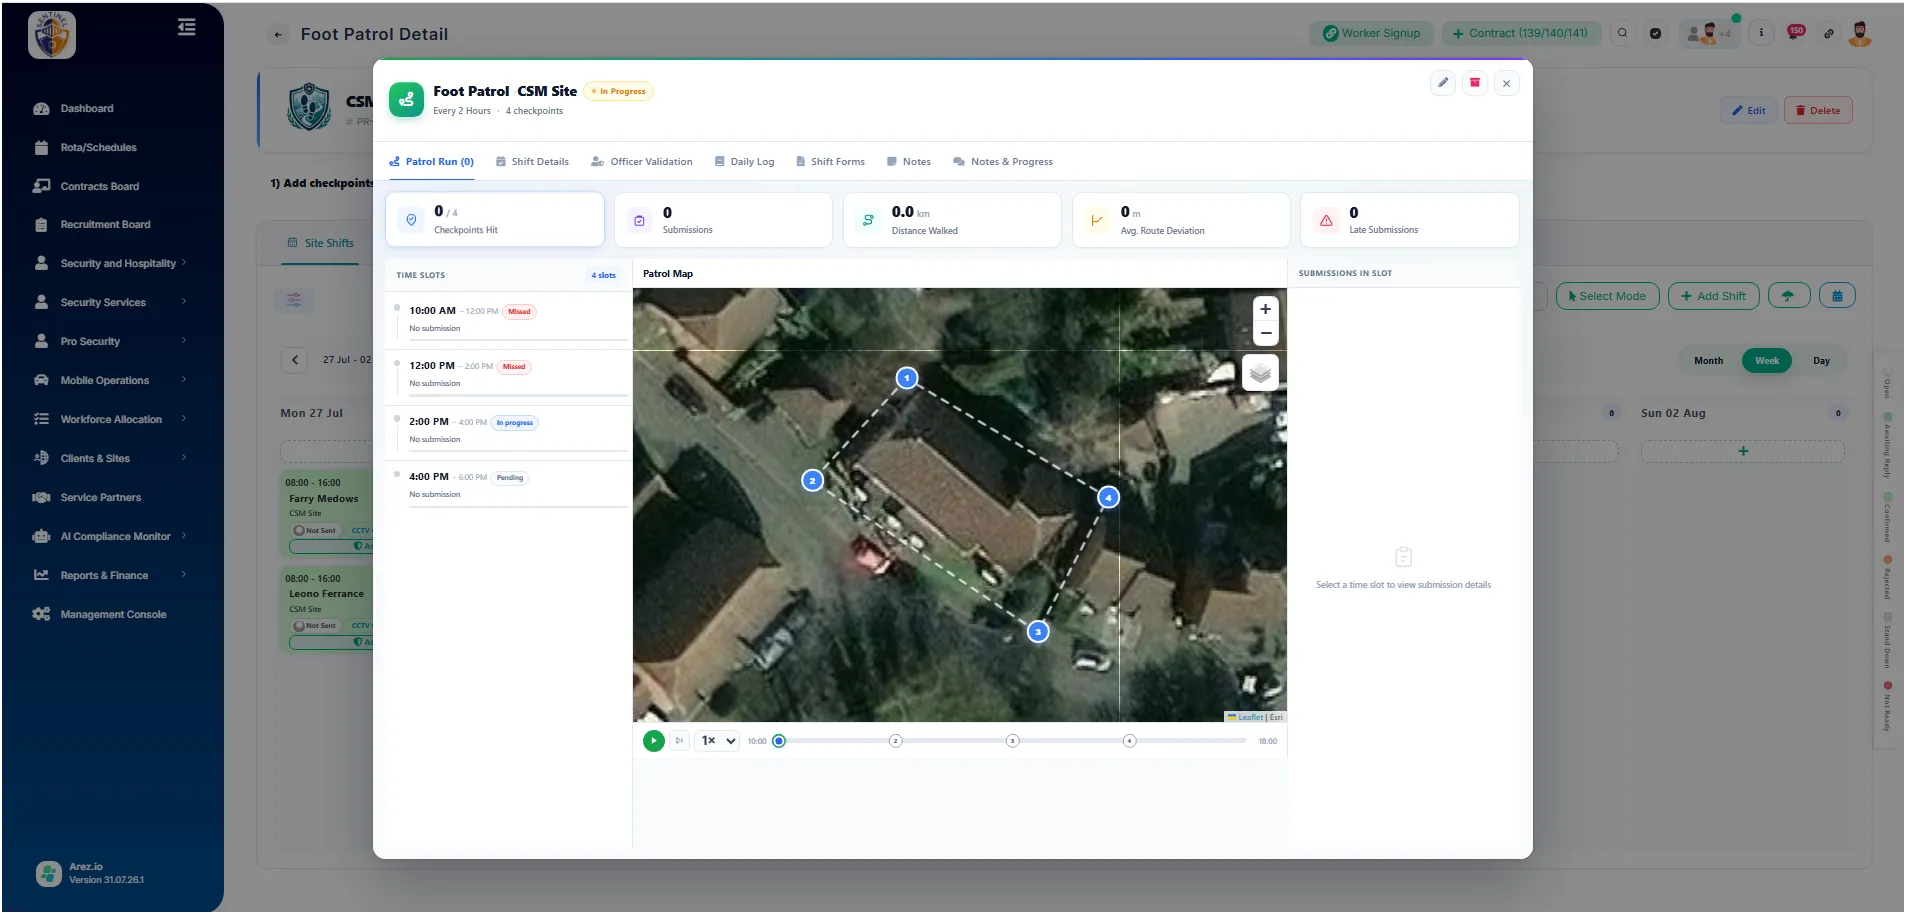
Selecting a time slot displays the corresponding checkpoint submission details, allowing supervisors to review patrol completion and monitor worker activity throughout the shift.
Key Features
Create multiple patrol routes for different sites.
Configure checkpoints using GPS, QR Codes, or NFC Tags.
Automatically complete checkpoints using configurable GPS radiuses.
Assign patrols directly to worker shifts.
Monitor patrol completion through the Patrol Run Review.
Review checkpoint submissions and patrol progress in real time.