
 Facebook
  Twitter
  LinkedIn
 Add a Worker Rota as a Supplier/Service Partner
Create and manage worker shifts from the Main Rota or directly from an individual Worker's Profile.
Overview
As a Supplier/Service Partner, you can assign shifts to workers in two different ways:
Main Rota – Create shifts for any worker from the main rota view.
Worker Profile – Create shifts directly from an individual worker's rota.
Any shift created using either method is automatically displayed in both the Main Rota and the selected Worker's Rota.
Navigation
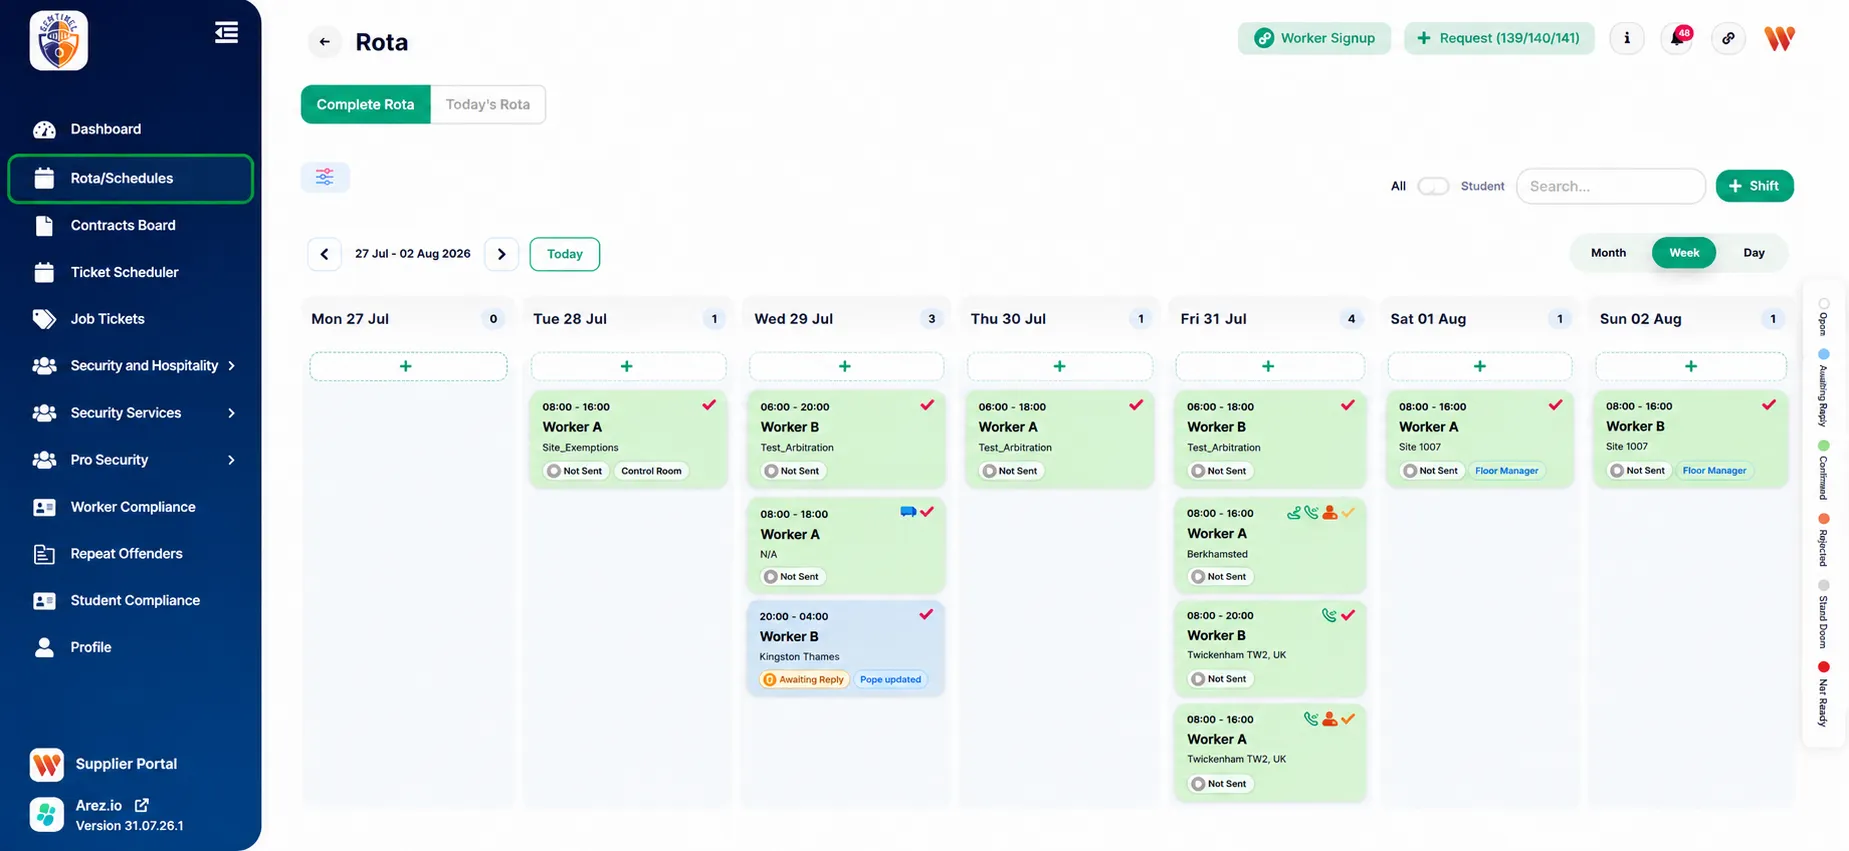
Main Rota
Left Menu → Rota/Schedules
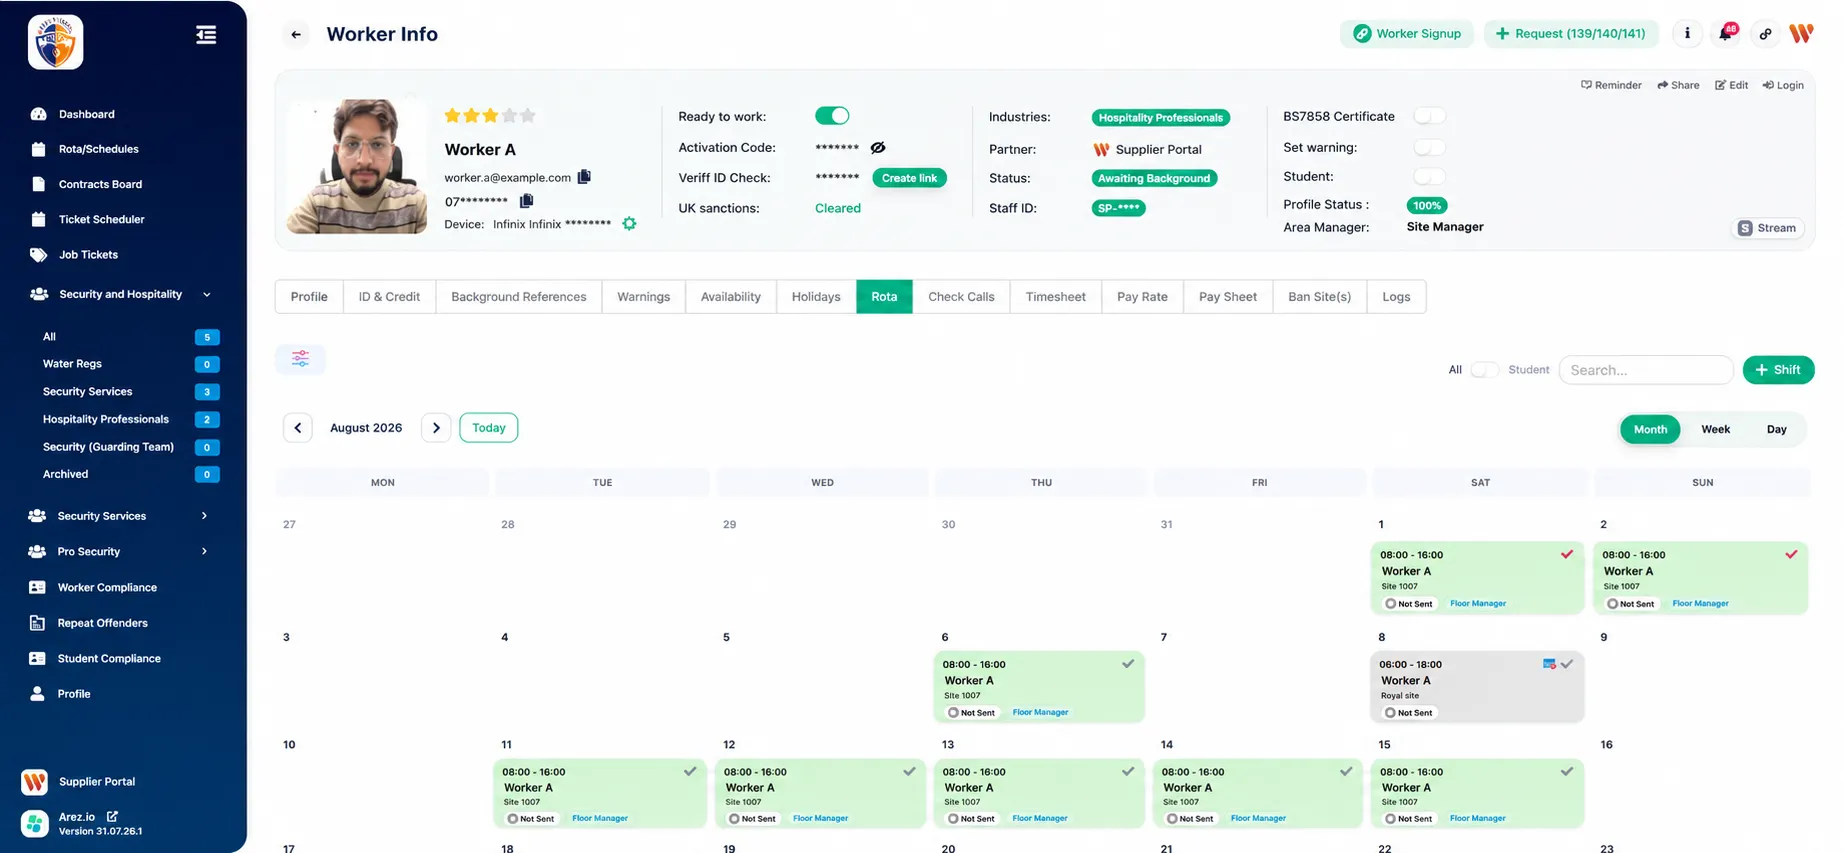
Worker Profile Rota
Left Menu → Select Industry
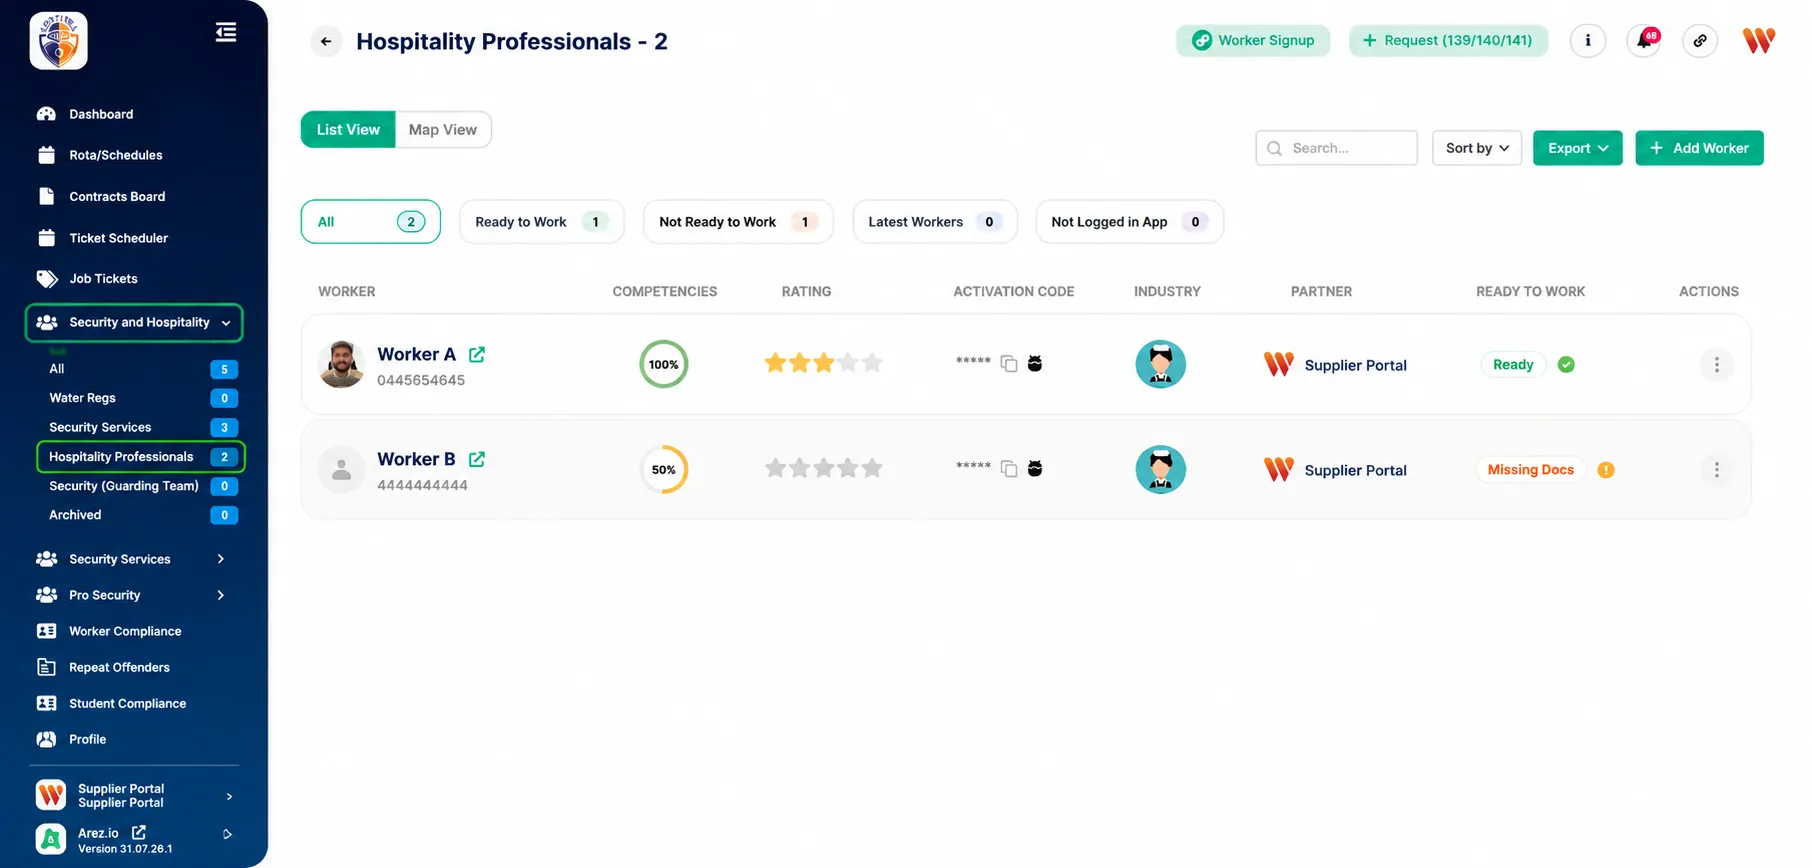
→ Select Worker → Rota tab
Method 1: Add a Shift from the Main Rota
Step 1: Open the Main Rota
From the left navigation menu, click Rota/Schedules.
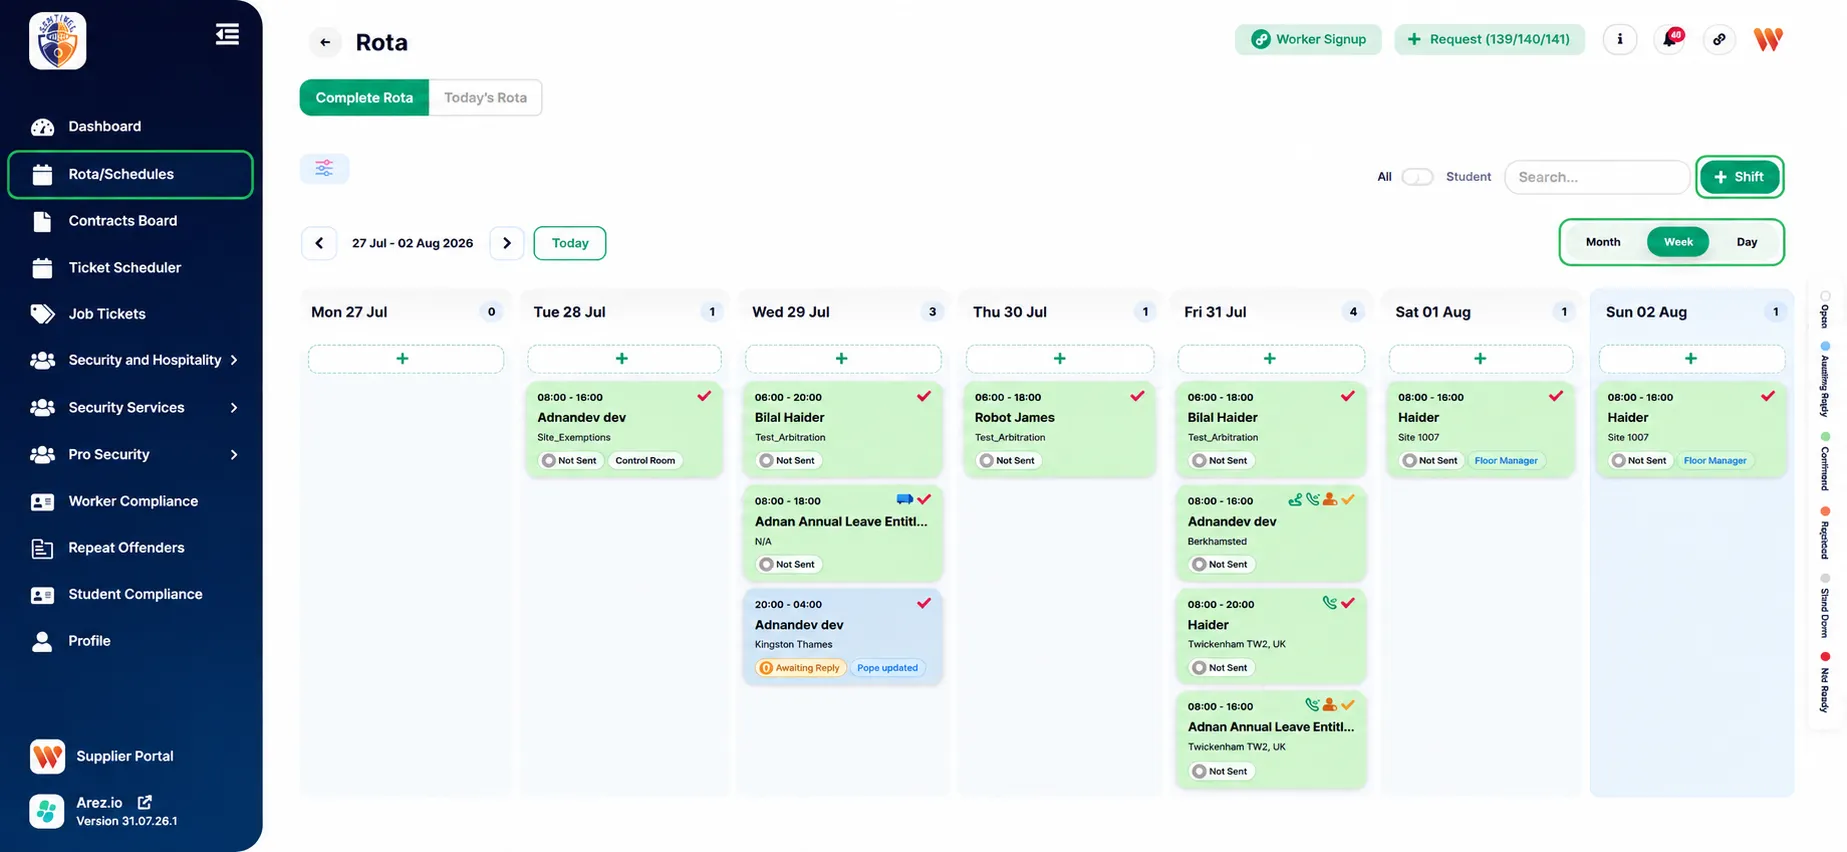
The Main Rota opens displaying the current week by default. You can switch between Day, Week, and Month views using the view selector in the top-right corner.
Step 2: Create a New Shift
Click the + Shift button in the top-right corner.
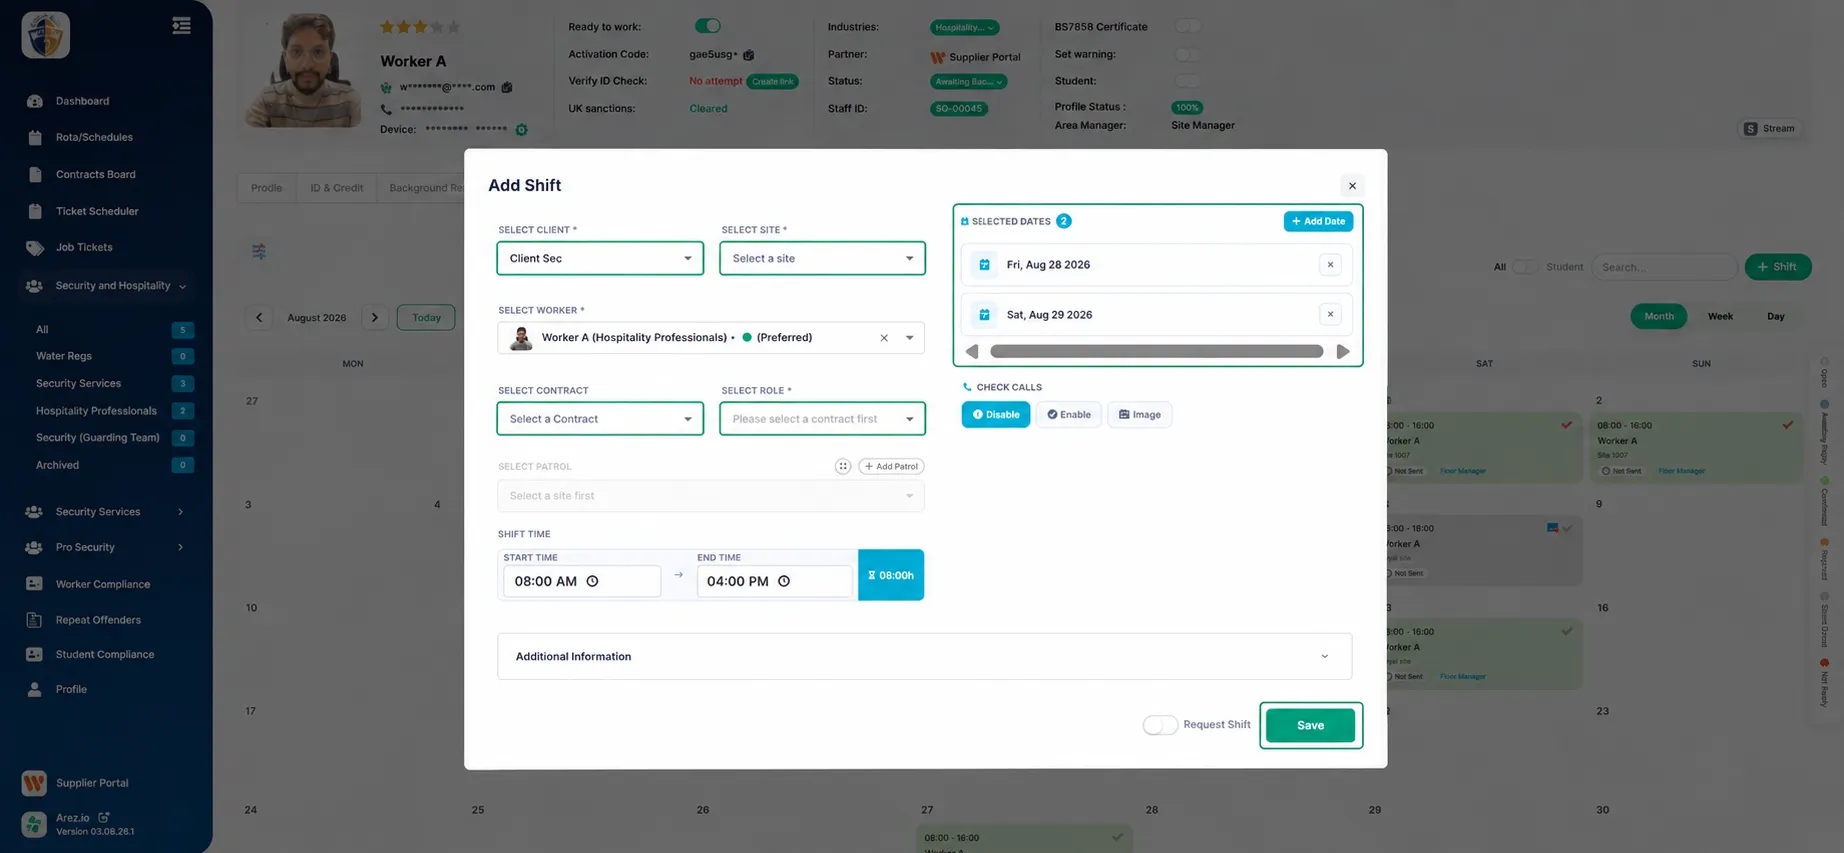
The Add Shift window will open.
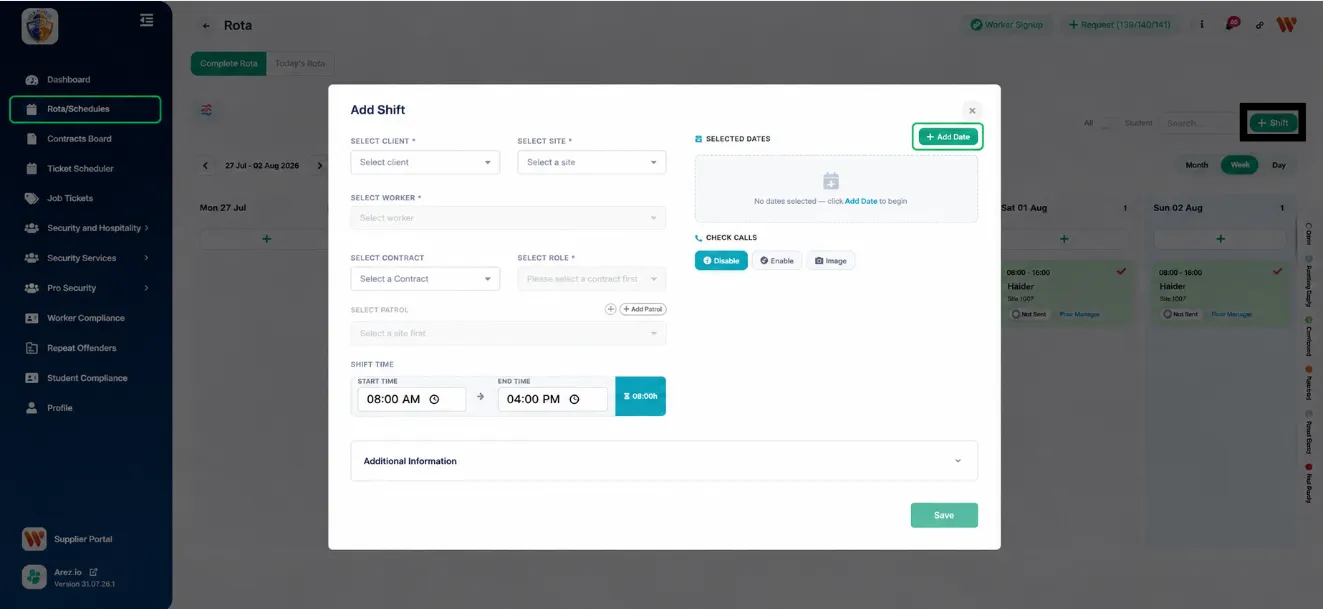
Step 3: Complete the Shift Details
Enter all the required information, including:
Client
Site
Worker
Contract
Role
Patrol (if applicable)
Shift Date(s)
Start Time
End Time
Check Call settings
Click Add Date to select one or multiple shift dates.
Highlight:
Client
Site
Worker
Contract
Role
Add Date
Shift Time
Save button
Step 4: Add Additional Information (Optional)
Expand the Additional Information section to add:
Internal Notes
Pay Rate
Shift Notes
These fields are optional and can be completed if required.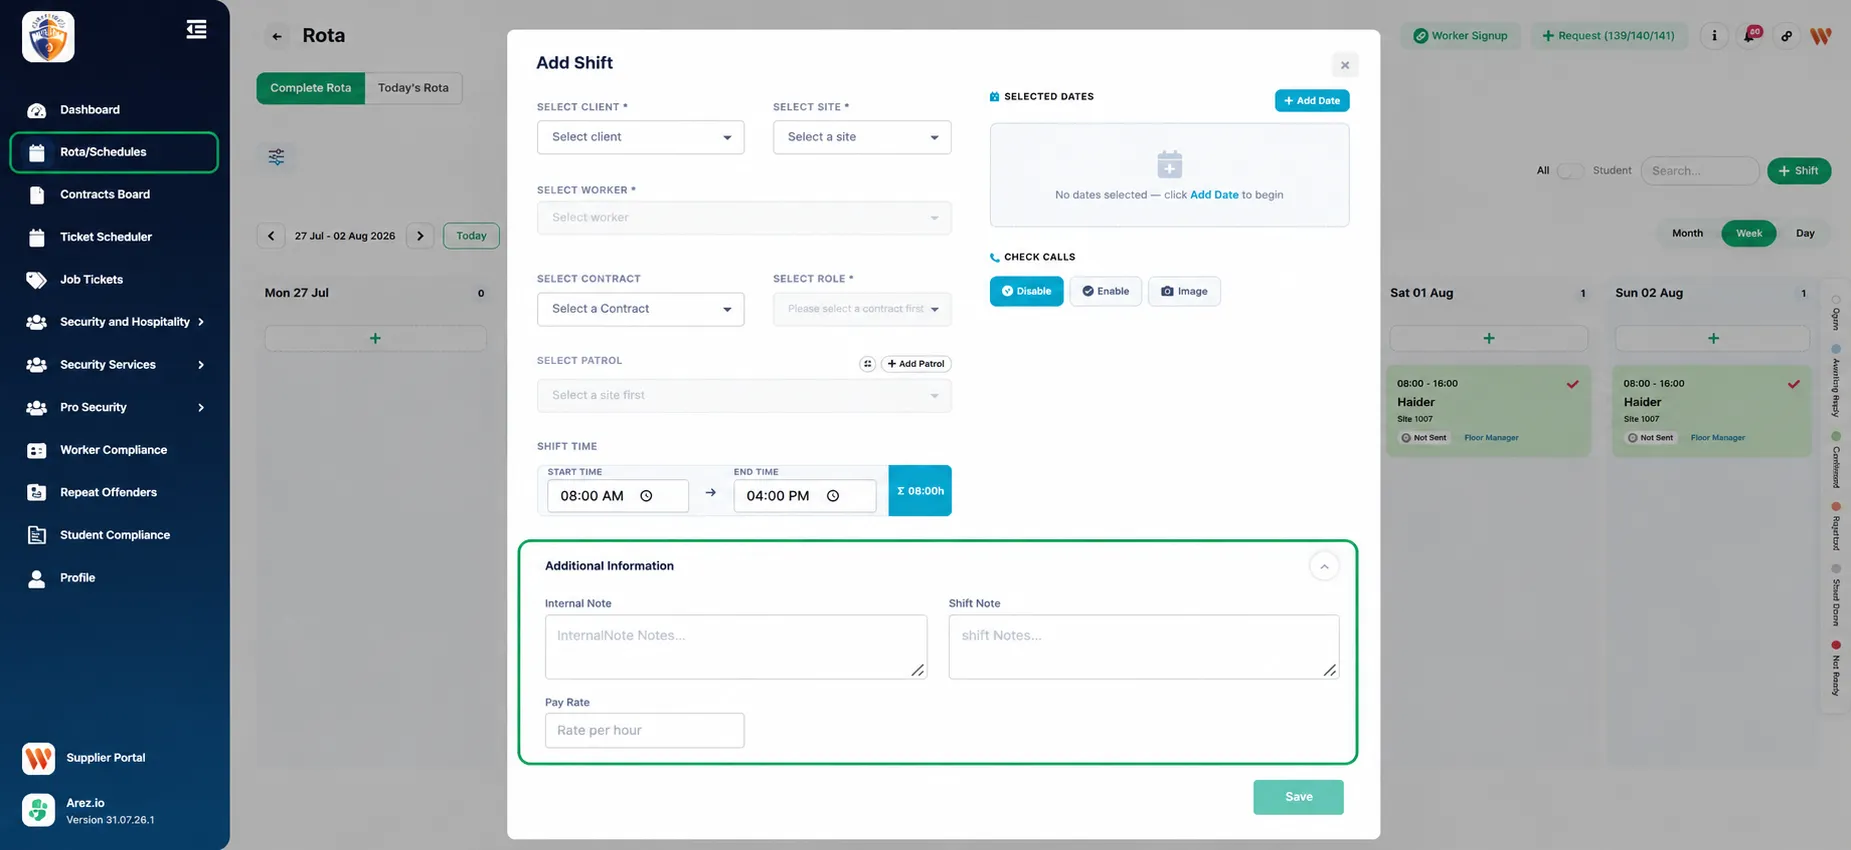
Step 5: Save the Shift
After completing all required fields, click Save.
The shift will immediately appear:
In the Main Rota
In the selected Worker's Profile Rota
Method 2: Add a Shift from a Worker's Profile
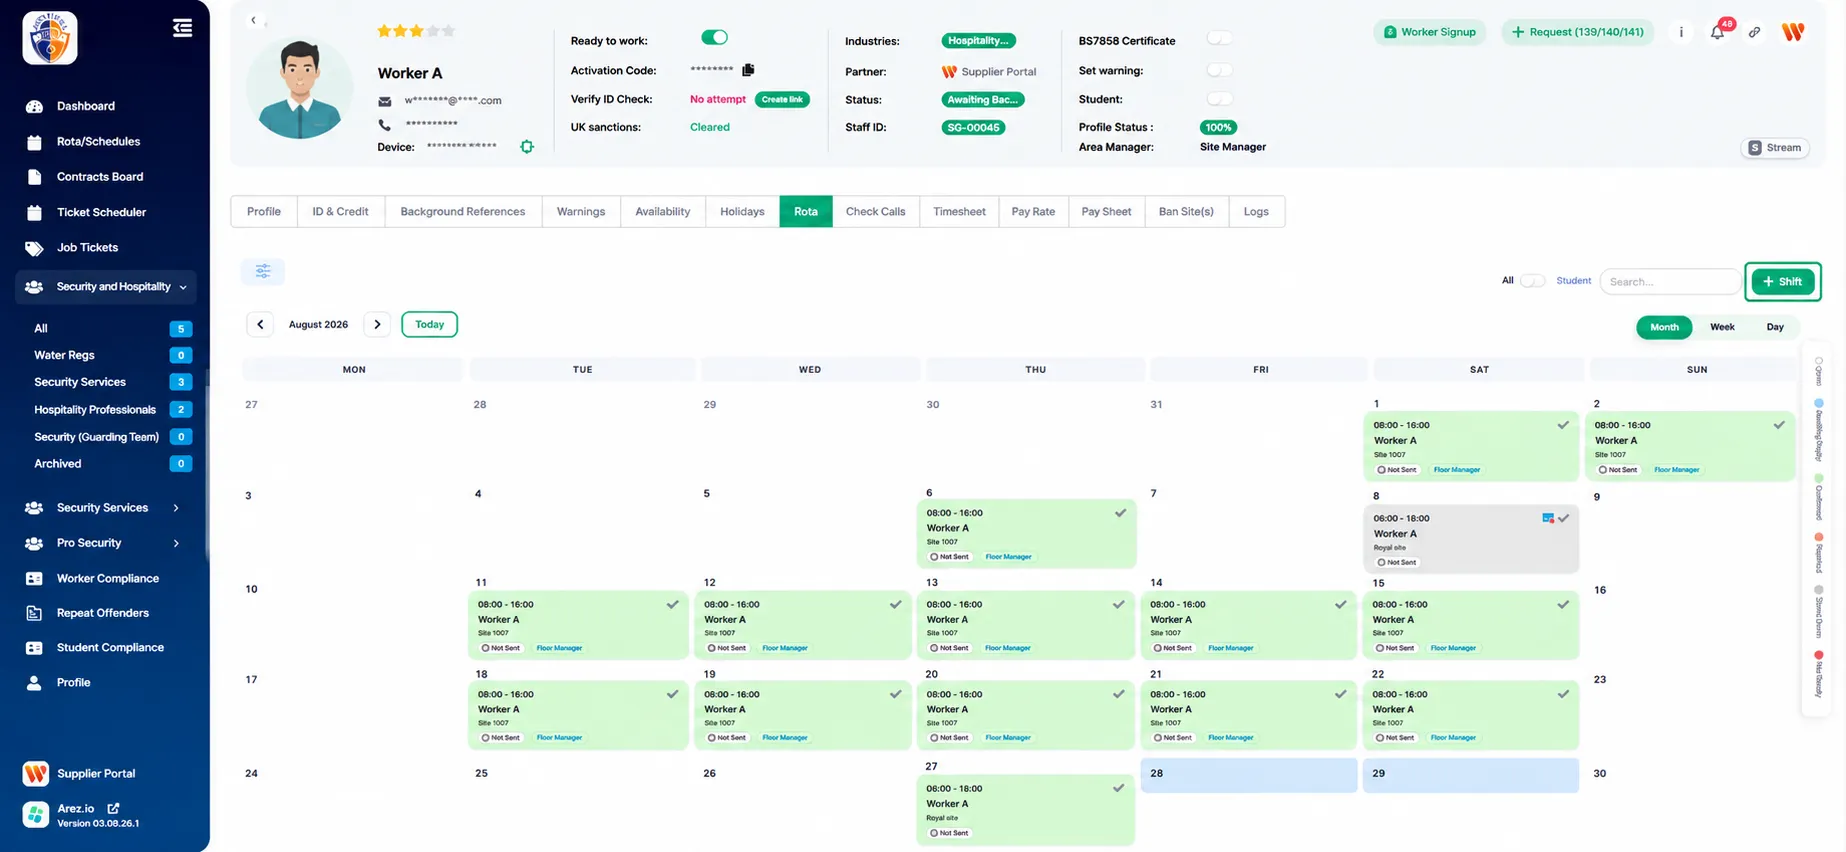
Step 1: Open the Worker
From the left navigation menu:
Select the required Industry.
Choose the worker whose rota you want to manage.
For example:
Hospitality Professionals → Worker A
Click the worker to open their profile.
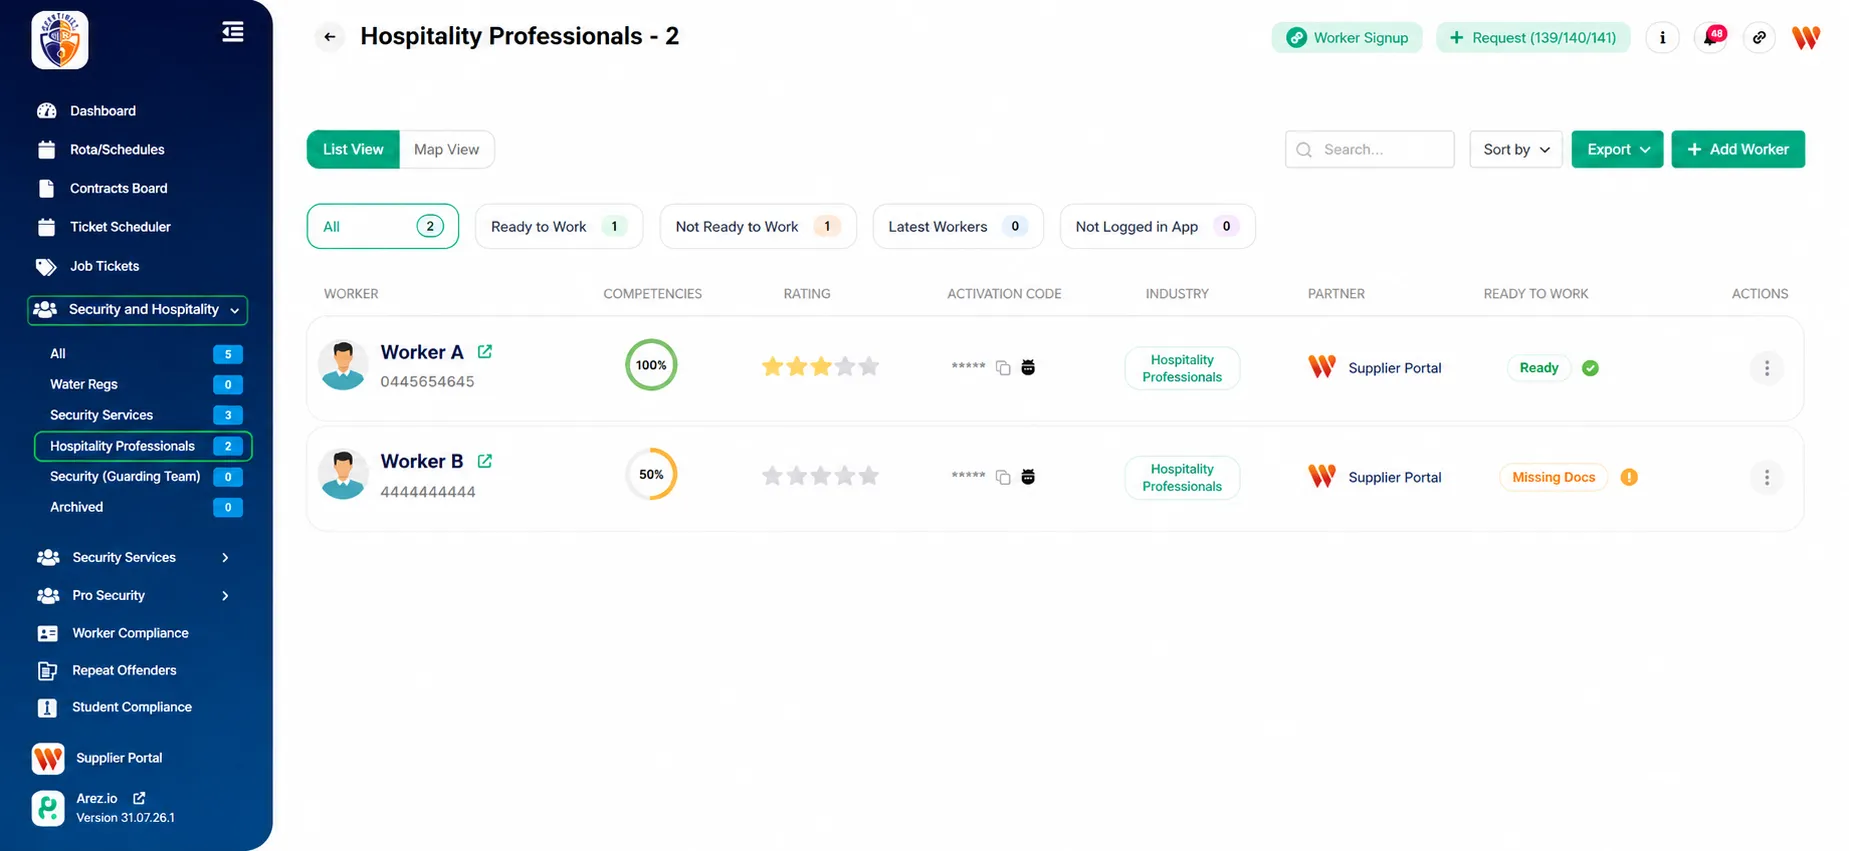
Step 2: Open the Rota Tab
Inside the worker profile, click the Rota tab.
The worker's monthly rota will be displayed.
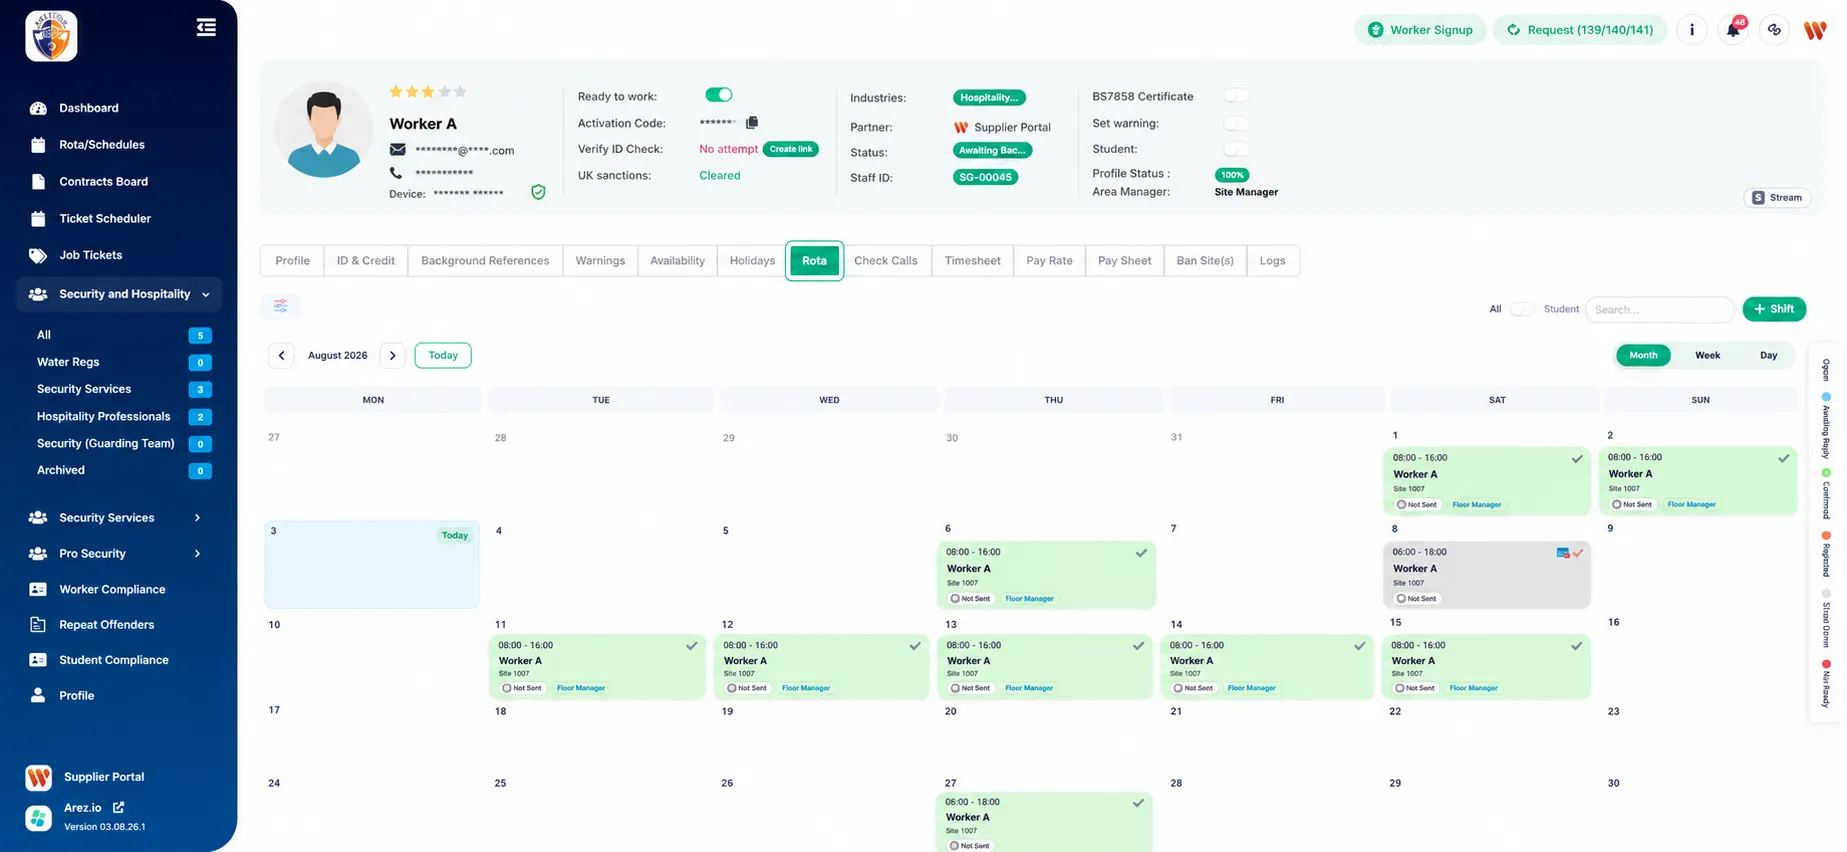
Step 3: Select the Shift Dates
Select one or more dates where you want to create shifts.
For example:
28 August
29 August
After selecting the dates, click the + Shift button.
Step 4: Complete the Shift Details
The Add Shift window will open.
Complete all the required information including:
Client
Site
Contract
Role
Shift Time
Additional Information (if required)
Click Save.
Step 5: Shift Successfully Added
Once saved, the new shift will appear:
In the selected worker's rota.
In the Main Rota.
The shift is now assigned to the worker and can be managed from either location.