
 Facebook
  Twitter
  LinkedIn
 How to Generate an Invoice for a Specific Site
Overview
This guide explains how to generate an invoice for a specific site within a client. Instead of invoicing all sites, you can select only the required site(s) for the chosen billing period.
Step 1: Navigate to Invoices & Billing
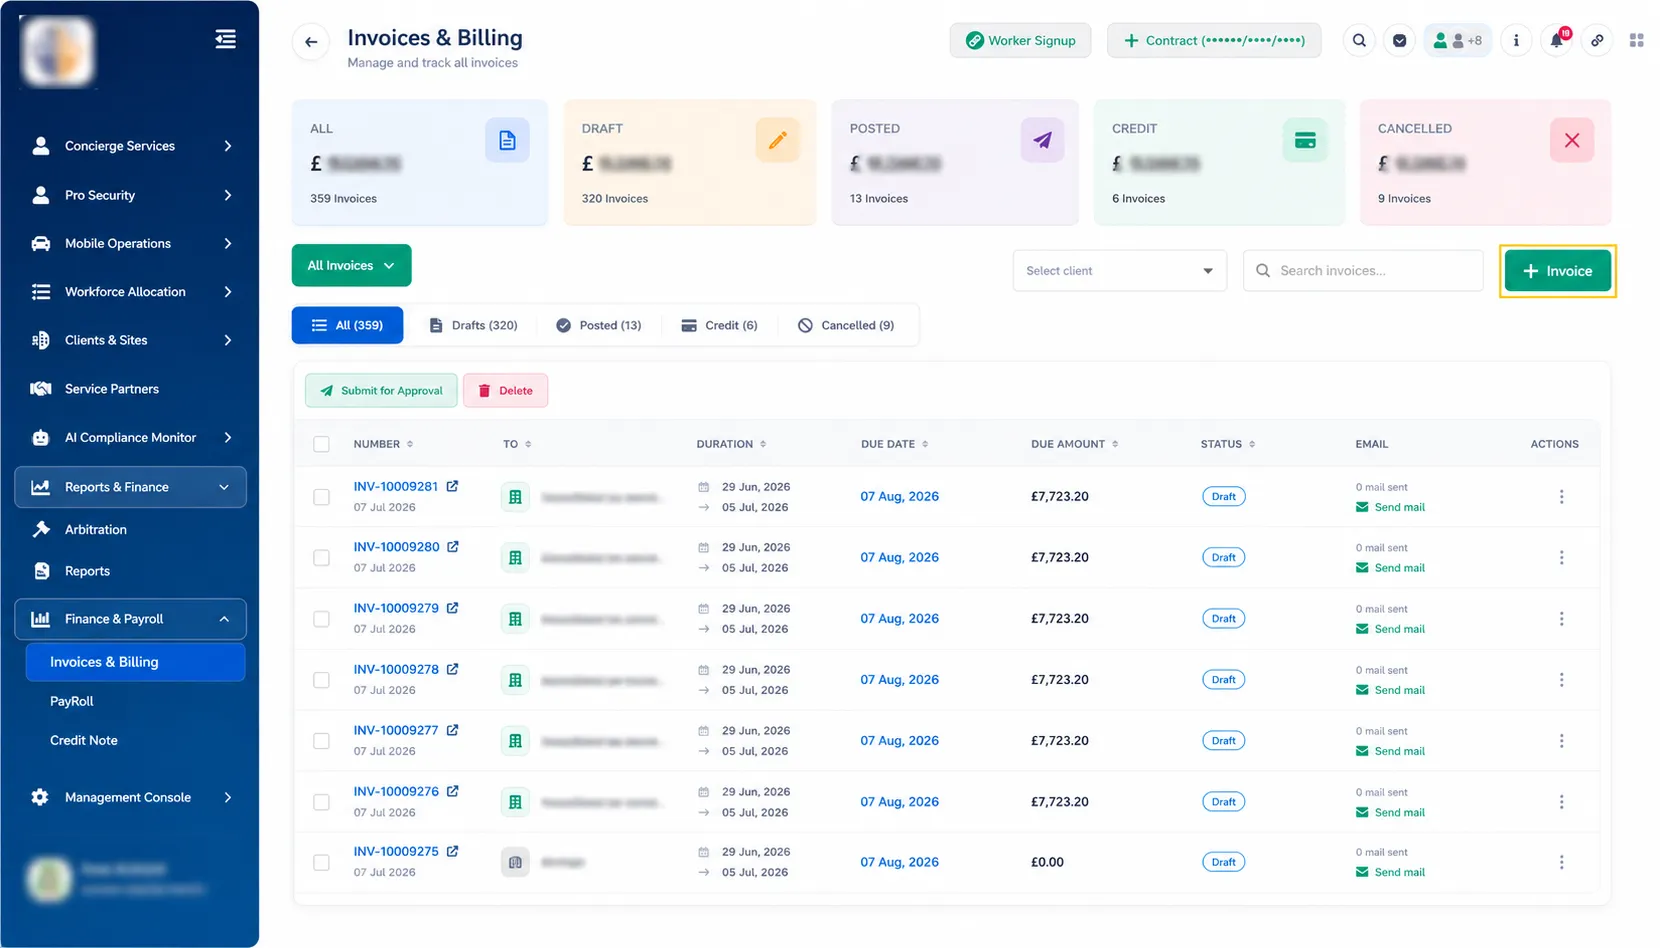
From the left-hand menu, navigate to:
Reports & Finance → Finance & Payroll → Invoices & Billing
On the Invoices & Billing page, click + Invoice in the top-right corner.
Step 2: Select the Client
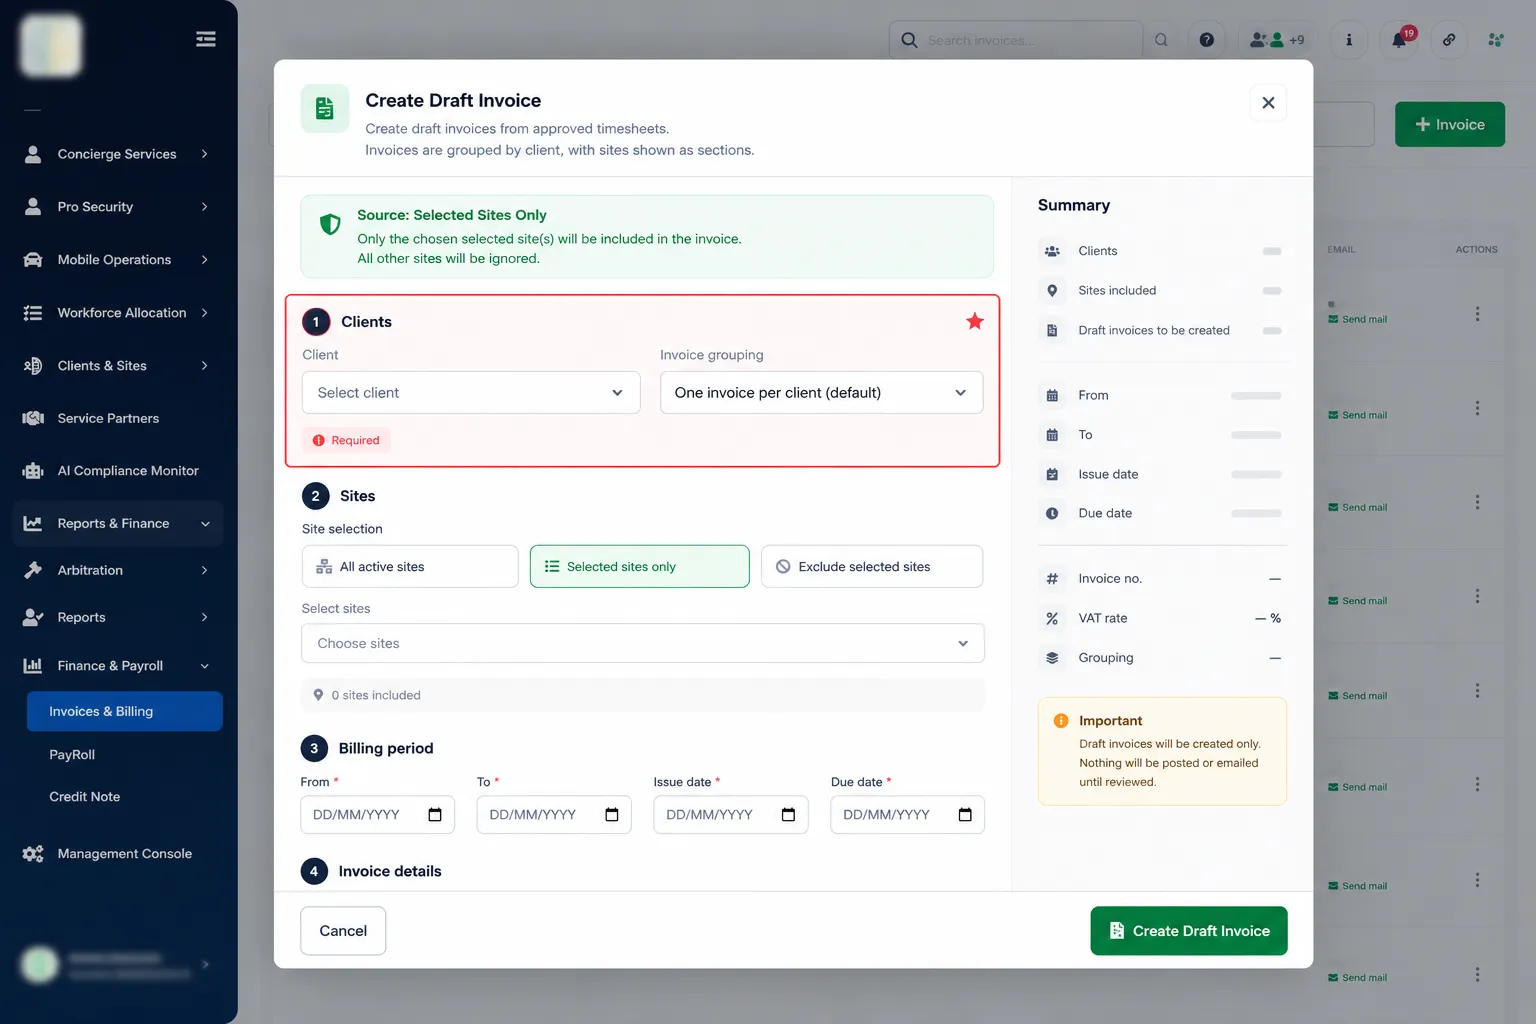
The Create Draft Invoice window will open.
Select the required Client.
Leave the Invoice Grouping option as required (default is One invoice per client).
Step 3: Select the Site
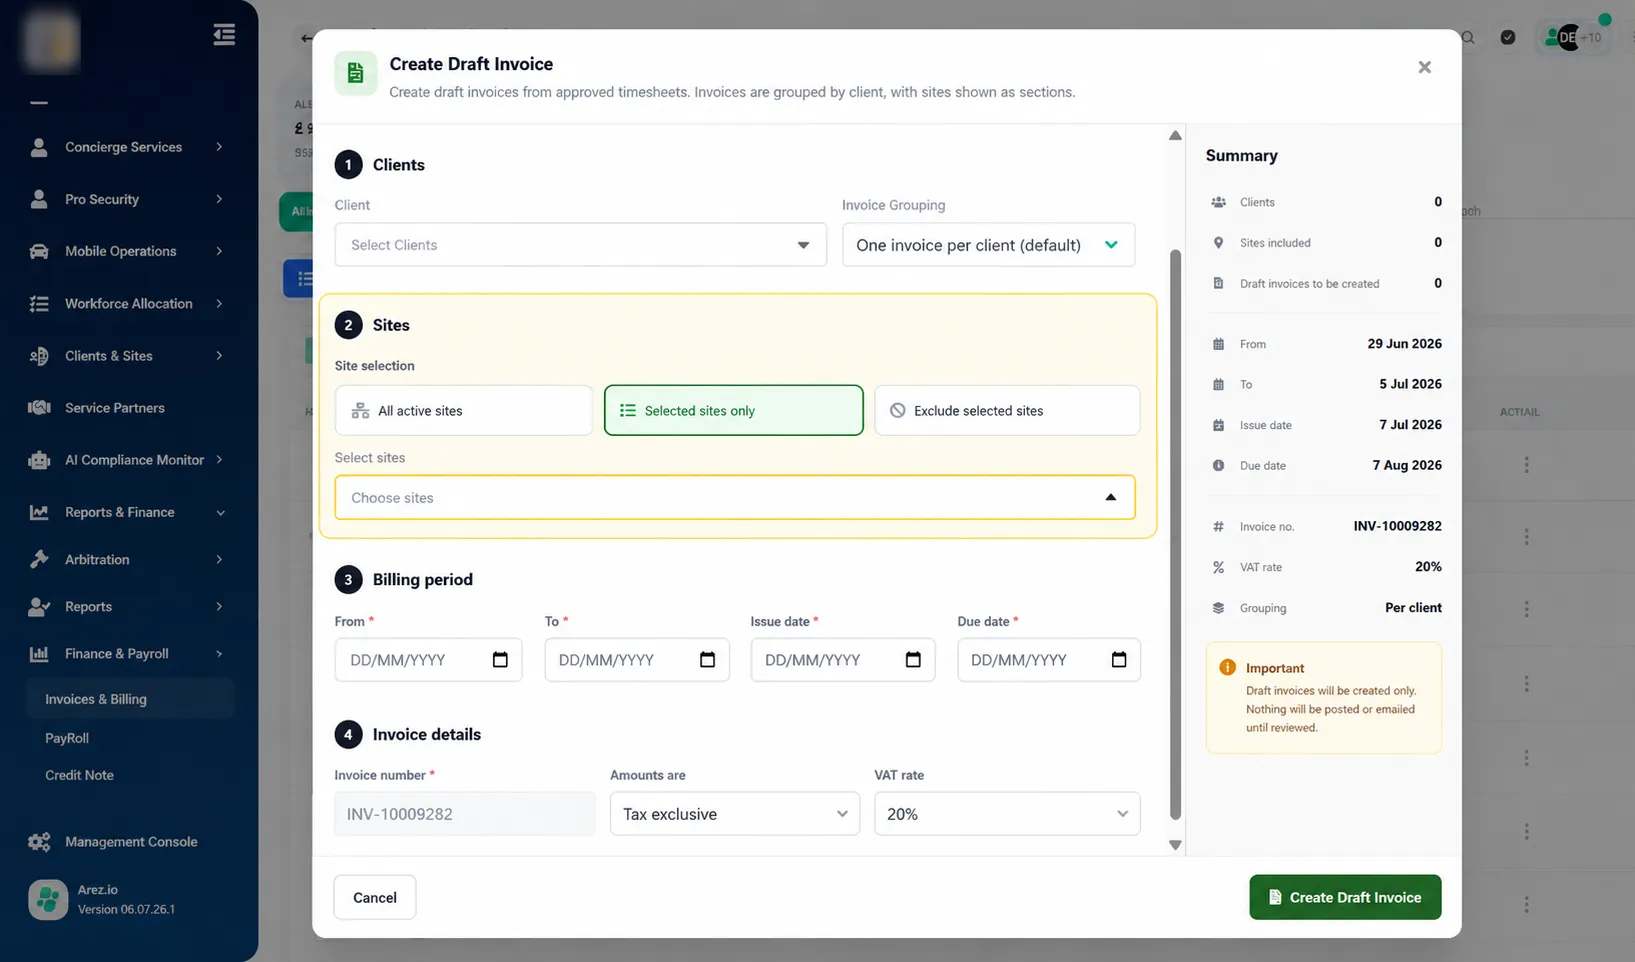
Under the Sites section:
Select Selected sites only.
Click the Choose sites field.
Select the site(s) you want to include in the invoice.
Only the selected site(s) will be included in the invoice.
Step 4: Enter the Billing Period
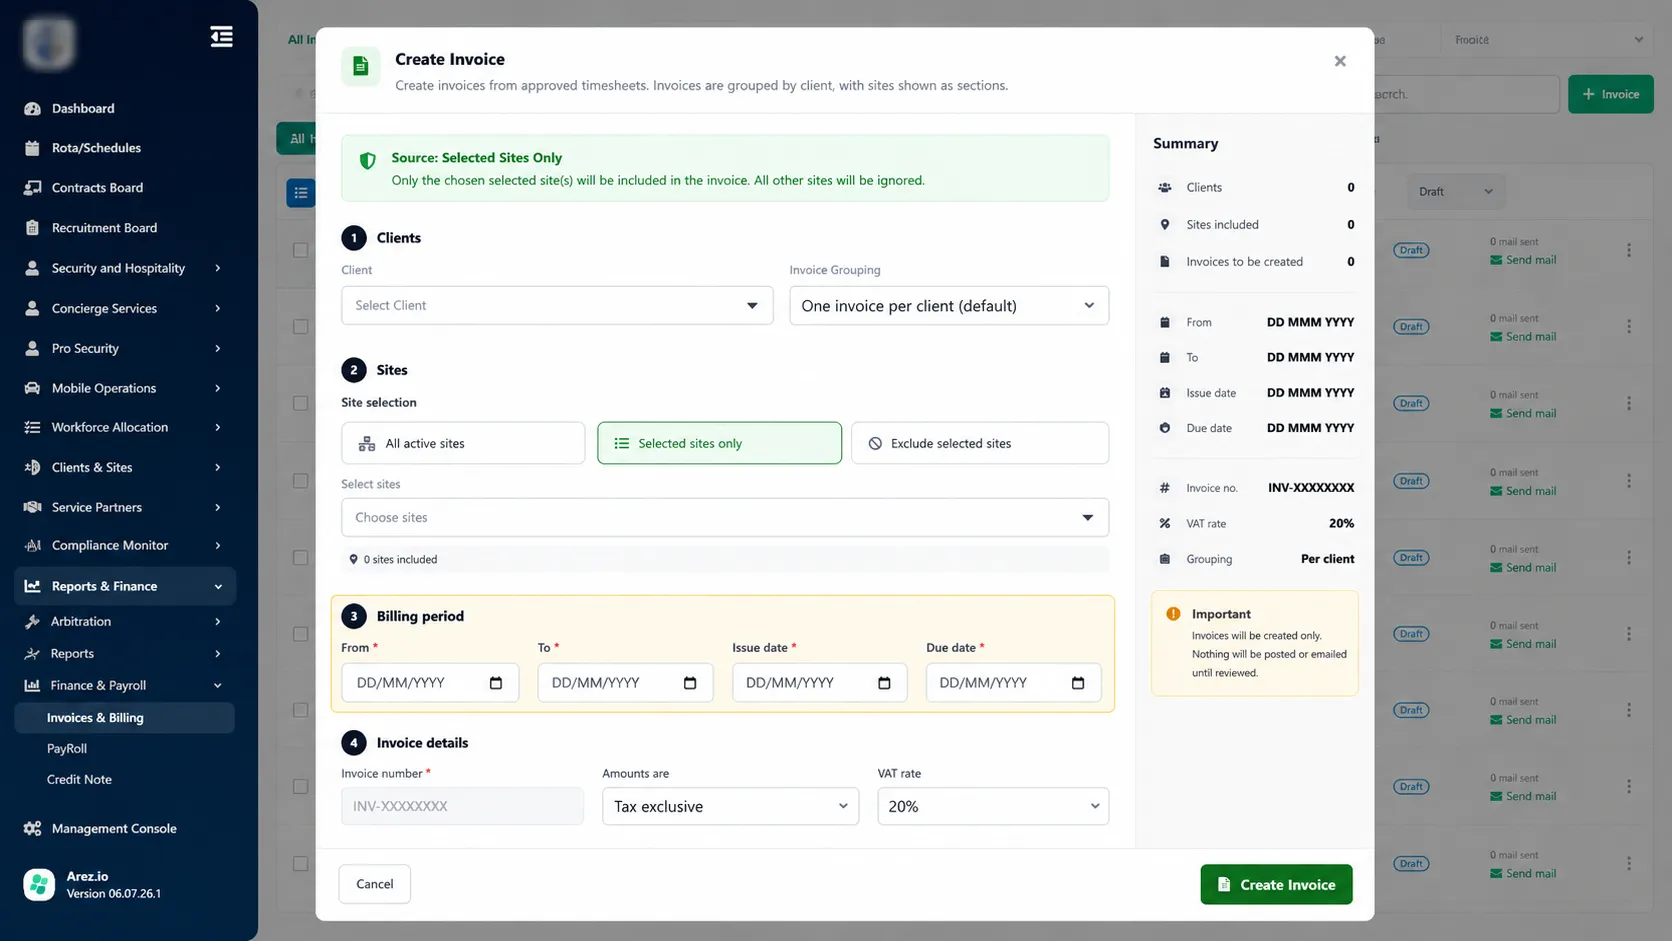
Complete the Billing Period section by entering:
From – Start date of the billing period.
To – End date of the billing period.
Issue Date – Date the invoice is issued.
Due Date – Payment due date.
Step 5: Complete the Invoice Details
In the Invoice Details section:
Invoice Number – Automatically generated by the system.
Amounts Are – Select either:
Tax Exclusive, or
Tax Inclusive
VAT Rate – Select the applicable VAT percentage.
Step 6: Create the Invoice
Once all the required information has been entered:
Review the invoice details.
Click Create Draft Invoice.
The invoice will be created and saved in Draft status, where it can be reviewed, edited, submitted for approval, or posted when ready.
Notes
Only approved and arbitration-confirmed timesheets are included in the invoice.
Selecting Selected sites only ensures that only the chosen site(s) are included in the invoice.
Clicking Create Draft Invoice creates the invoice in Draft status. It is not posted or emailed until further action is taken.