
 Facebook
  Twitter
  LinkedIn
 How to Create a Reactive Job
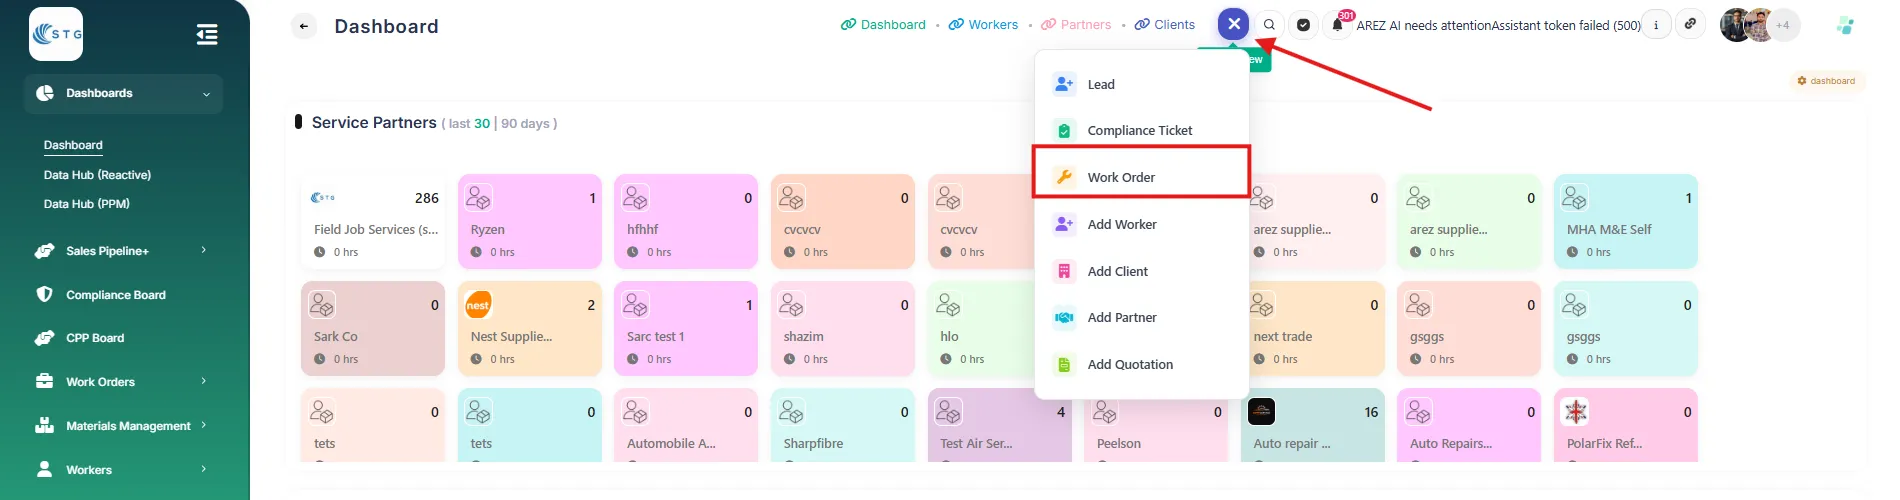
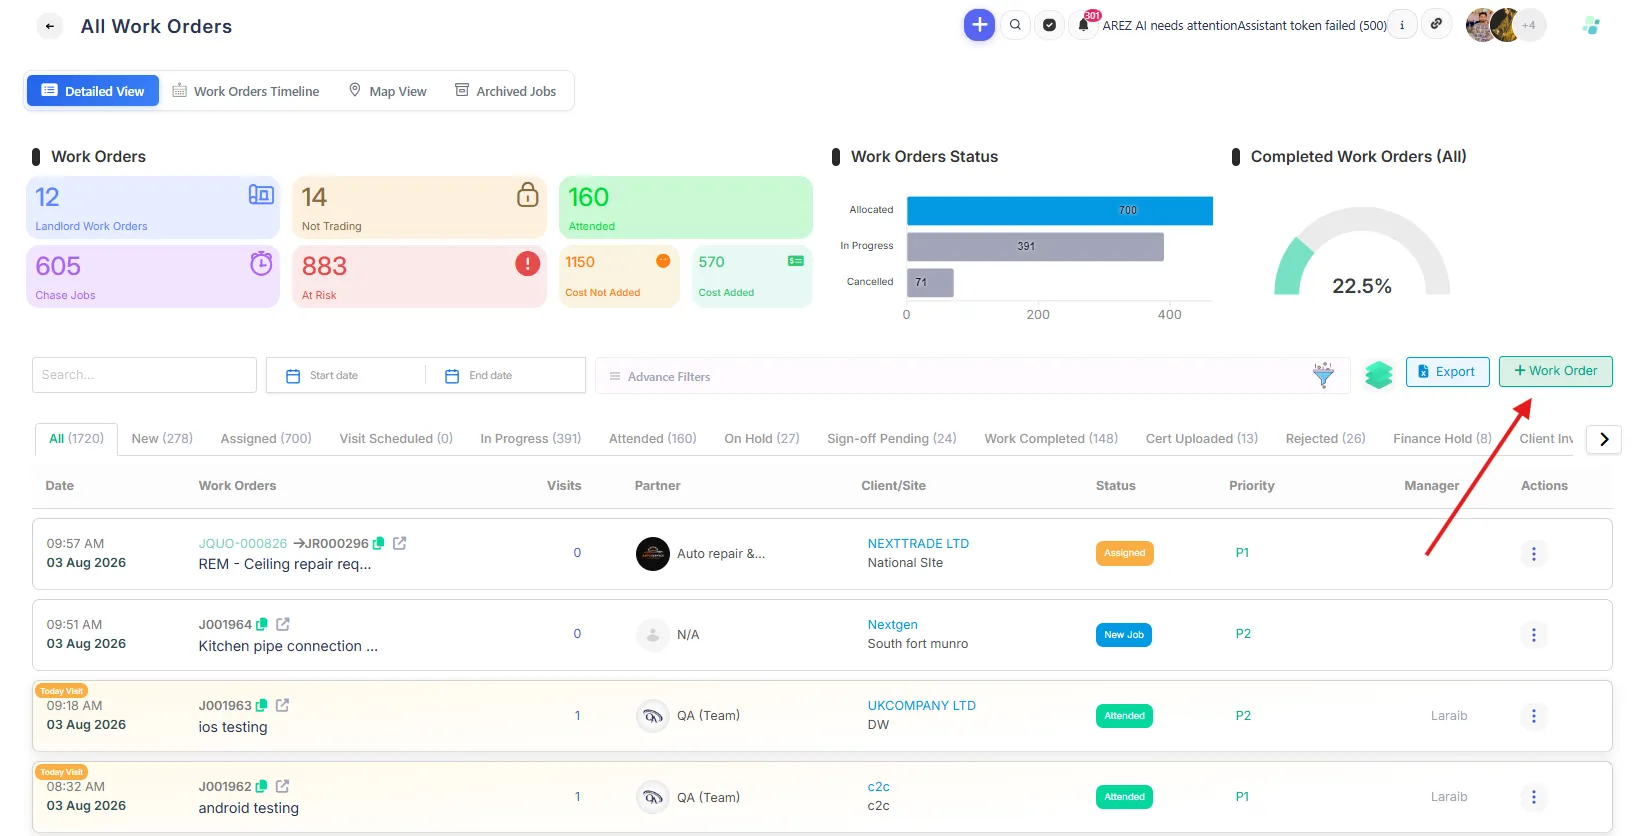
A reactive job can be created in either of the following ways:
Click the + icon and select Work Order.
Go to the Reactive Jobs page and click + Work Order.
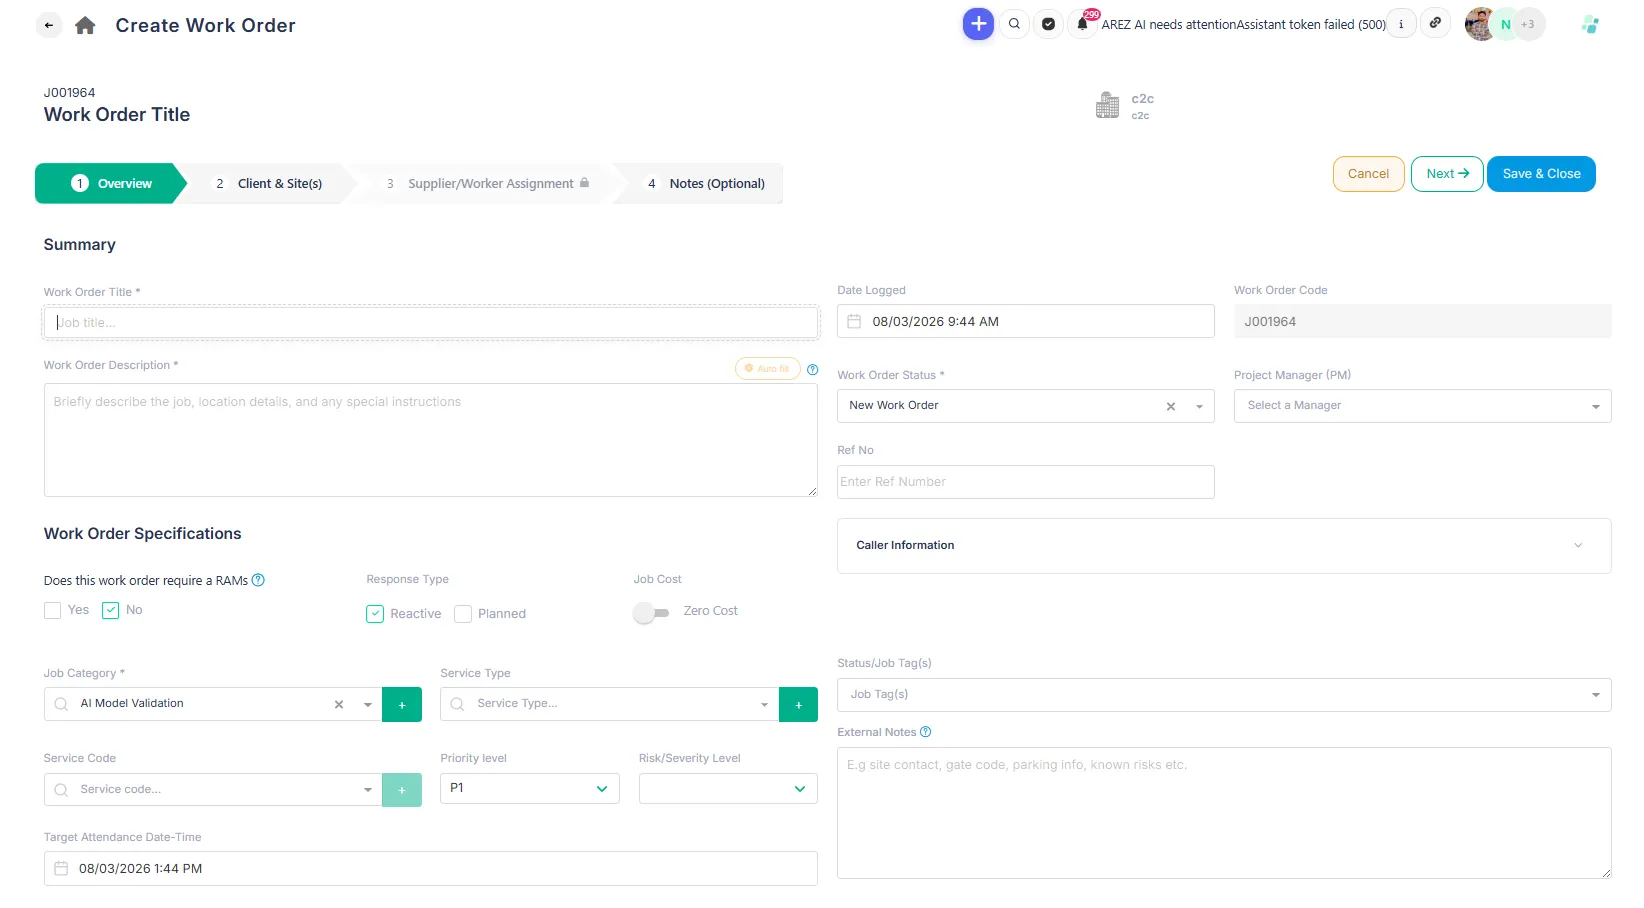
1. Overview
Enter the job details:
Title
Description
PM (optional)
Specifications
Category
Priority
Target Attendance date and time
Job Tags (optional)
External Notes (optional)
Tip: Enter the job description and click Auto Fill to automatically generate the title and select the relevant category.
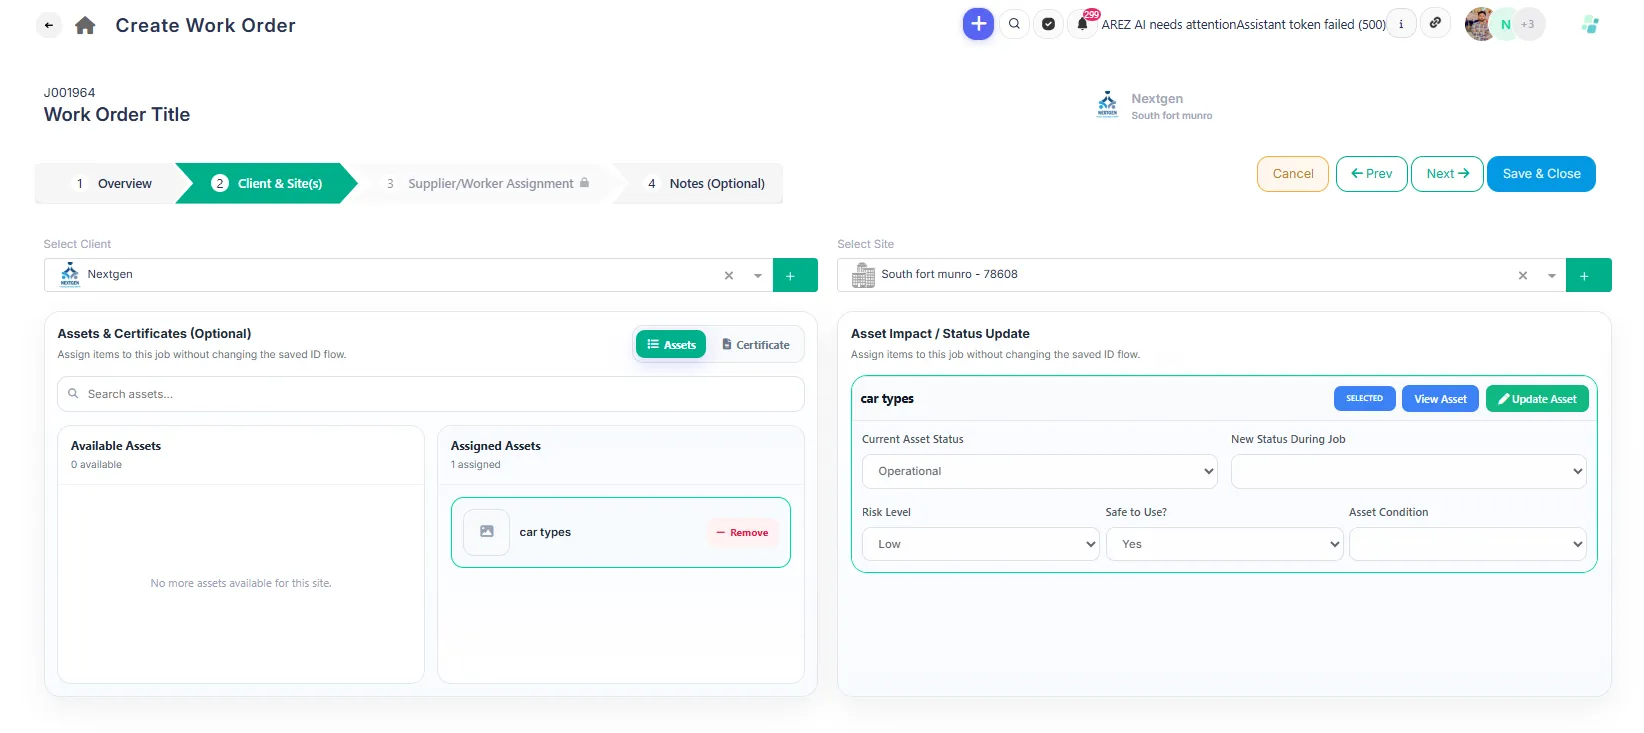
2. Client & Site
Select the Client.
Select the Site.
Select any relevant Assets (optional).
Create a Visit (optional).
You can also add a new client or site if it is not available in the list.
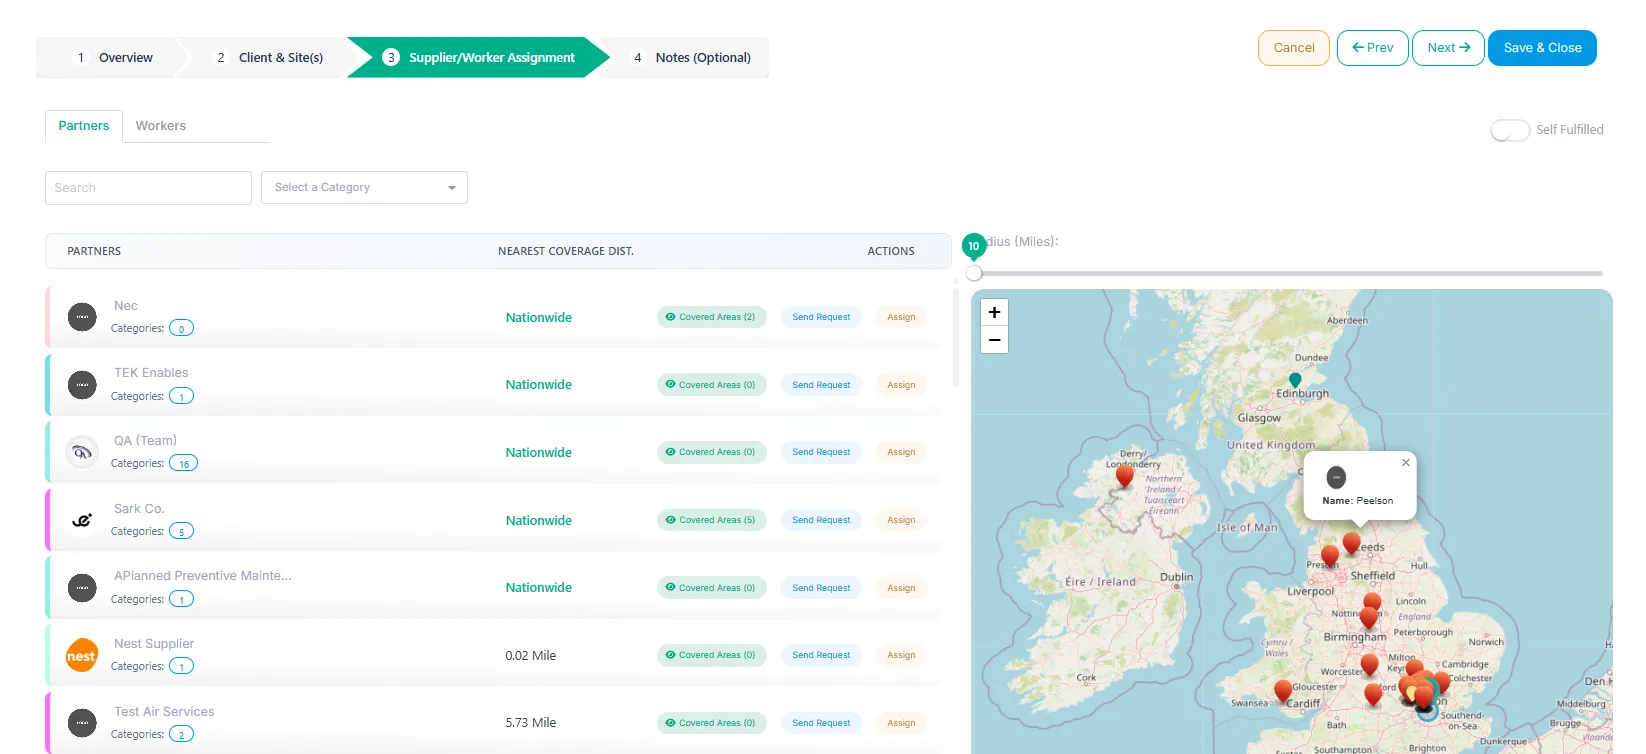
3. Supplier/Worker Assignment
This stage is optional. You can:
Assign the job to a supplier.
Assign the job directly to a worker.
Send a request to a supplier asking them to accept the job.
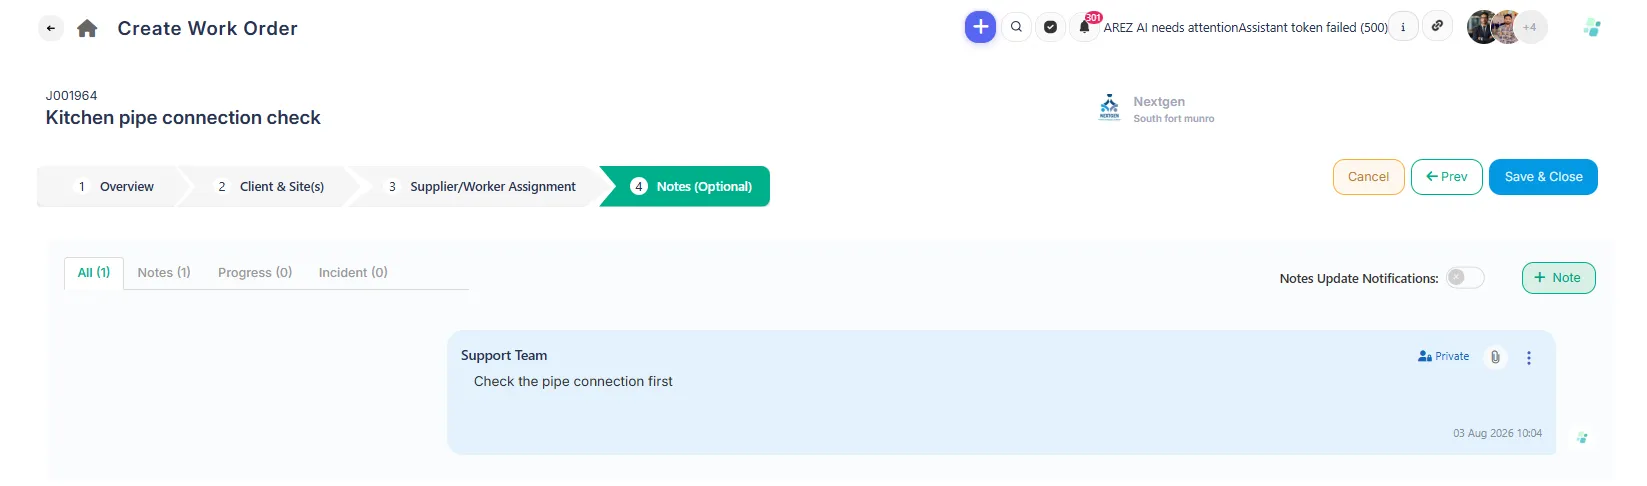
4. Notes
Add any relevant internal notes or additional job information. This stage is optional.
Note: Stages 3 and 4 will remain locked until all mandatory information in stages 1 and 2 has been completed.
Once all required information has been entered, click Save & Close to create the job.