How to Set Up a Service Partner
Overview
The Service Partner feature allows you to onboard and manage subcontractors/partners within Arez. During the setup process, you can configure the partner's company information, upload required compliance documents, add bank and tax details, and create a user account for the partner.
Prerequisites
Before creating a Service Partner, ensure you have:
Company registration details
Contact information
Required compliance documents (e.g., Insurance Cover, Public Liability Insurance, ISO Certifications)
Bank account details
User account details for the partner administrator
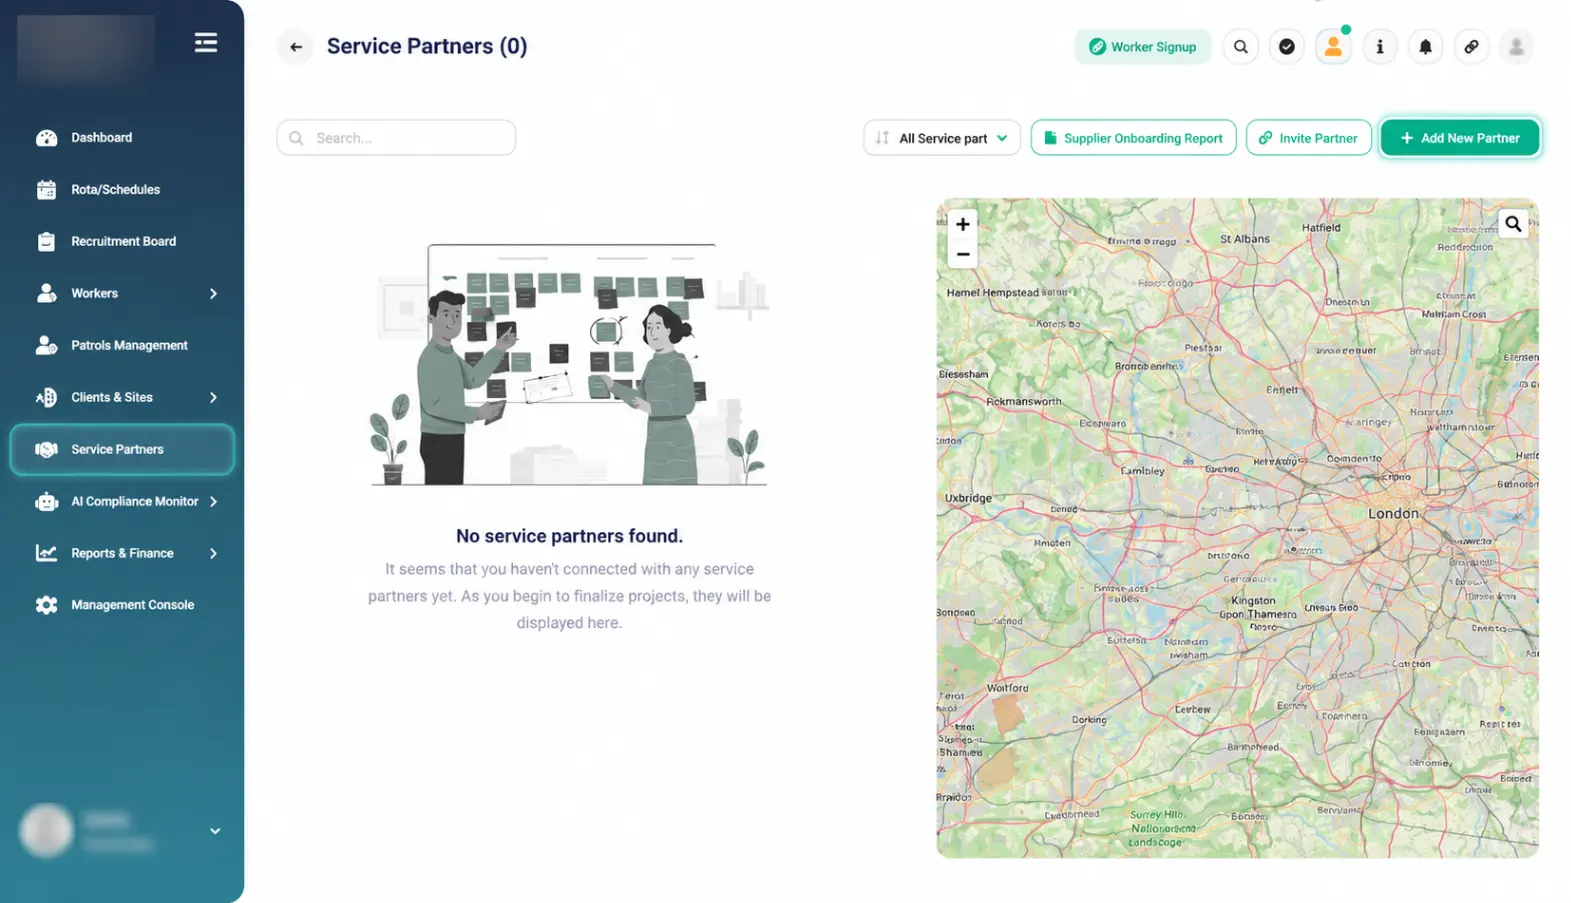
Step 1: Navigate to Service Partners
From the left-hand menu, click Service Partners.
On the Service Partners page, click Add New Partner.
Purpose: This option allows you to onboard a new service partner into the system.
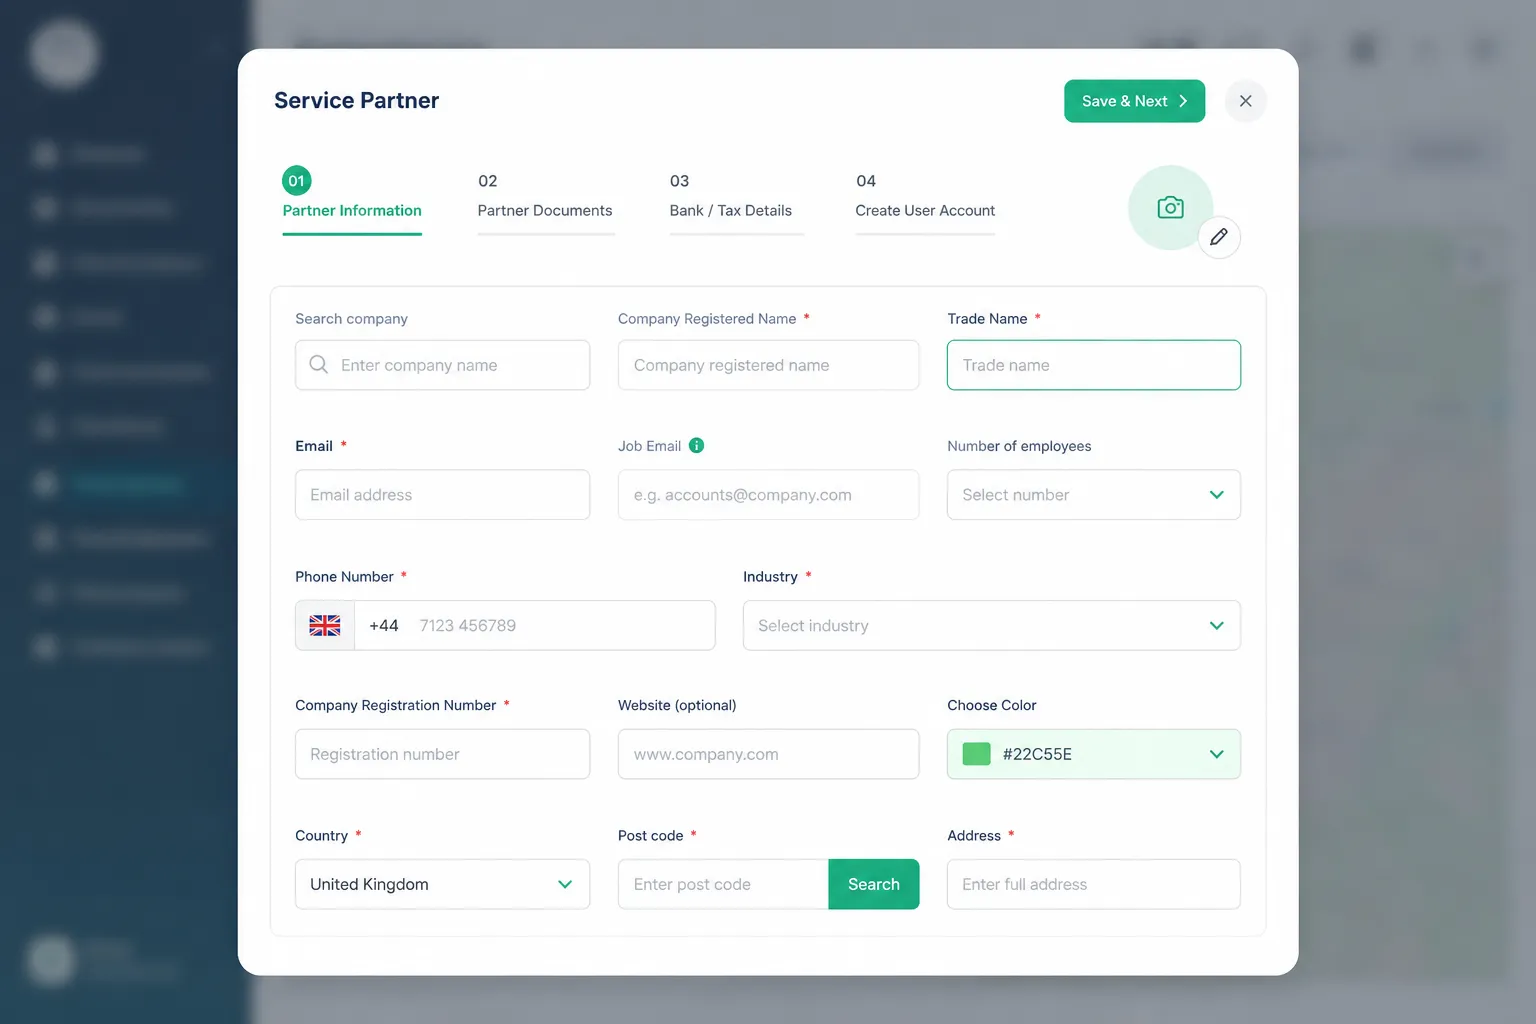
Step 2: Complete Partner Information
The Partner Information tab will open.
Fill in the required information, including:
Company Registered Name
Trade Name
Email Address
Job Email
Phone Number
Industry
Number of Employees
Company Registration Number
Website (Optional)
Country
Postcode
Full Address
You can also upload the partner logo and select a company colour if required.
Once all required fields have been completed, click Save & Next.
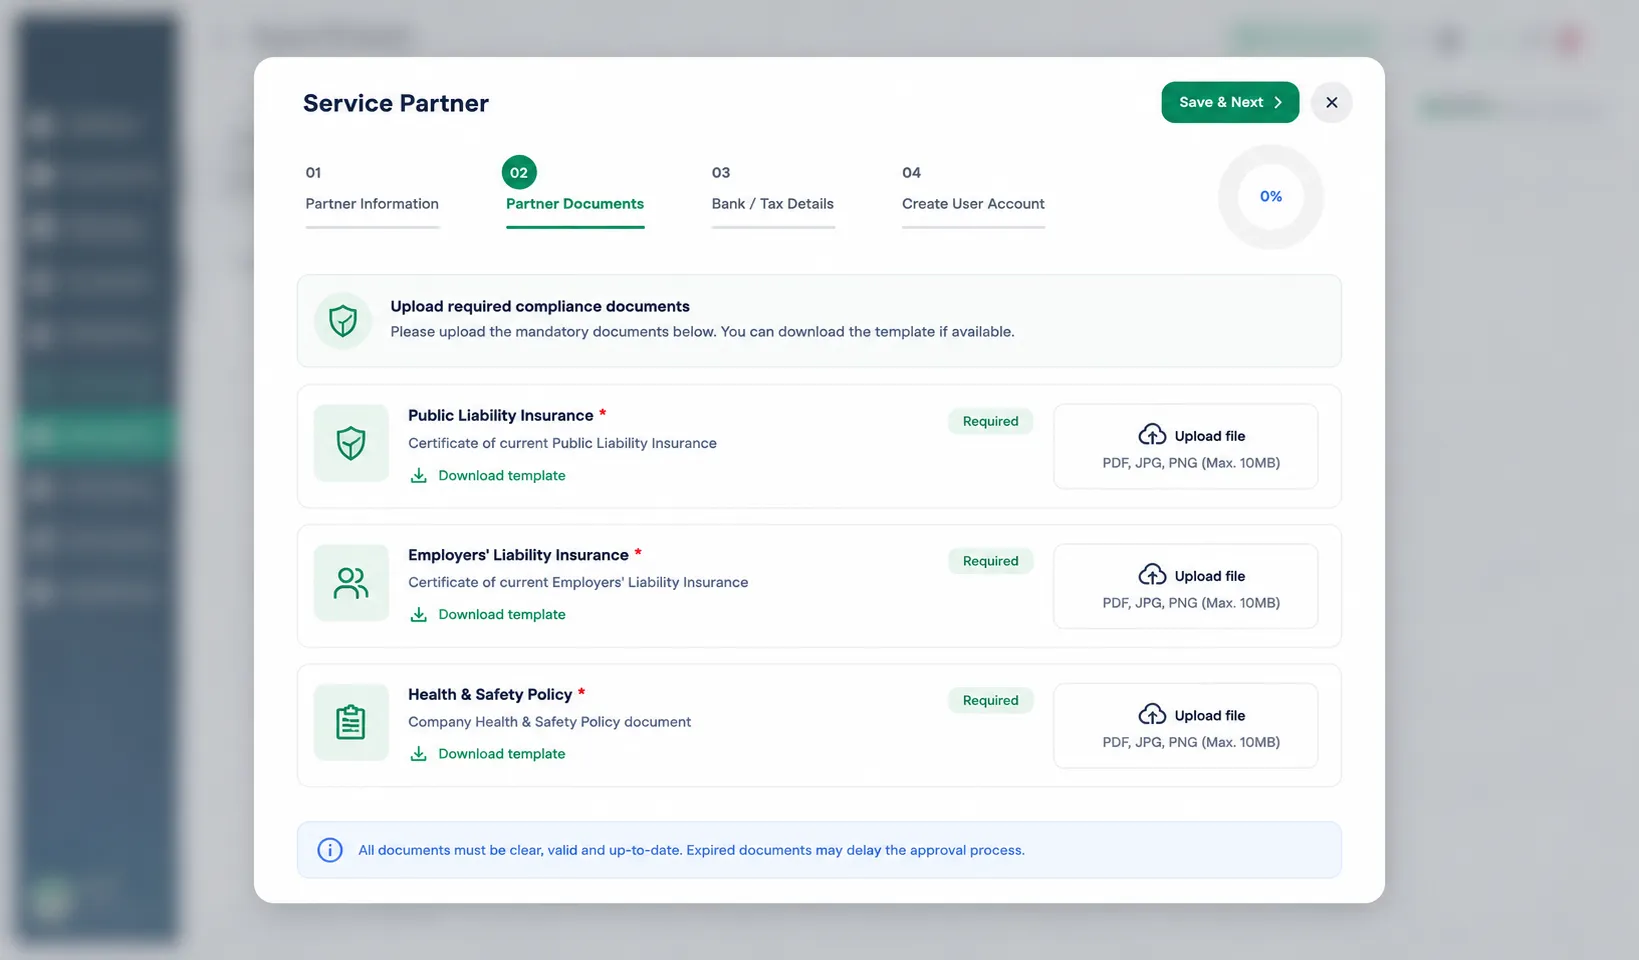
Step 3: Upload Partner Documents
The Partner Documents tab allows you to upload compliance and certification documents.
Examples include:
Public Liability Insurance
Employers’ Liability Insurance
Health and Safety Policy
Additional compliance documents configured by your organisation
For each document:
Review the document requirement.
Upload the relevant file.
Enter any required expiry dates or supporting information.
Once all required documents have been uploaded, click Save & Next.
Important:
Ensure that all mandatory documents are uploaded and are valid before proceeding.
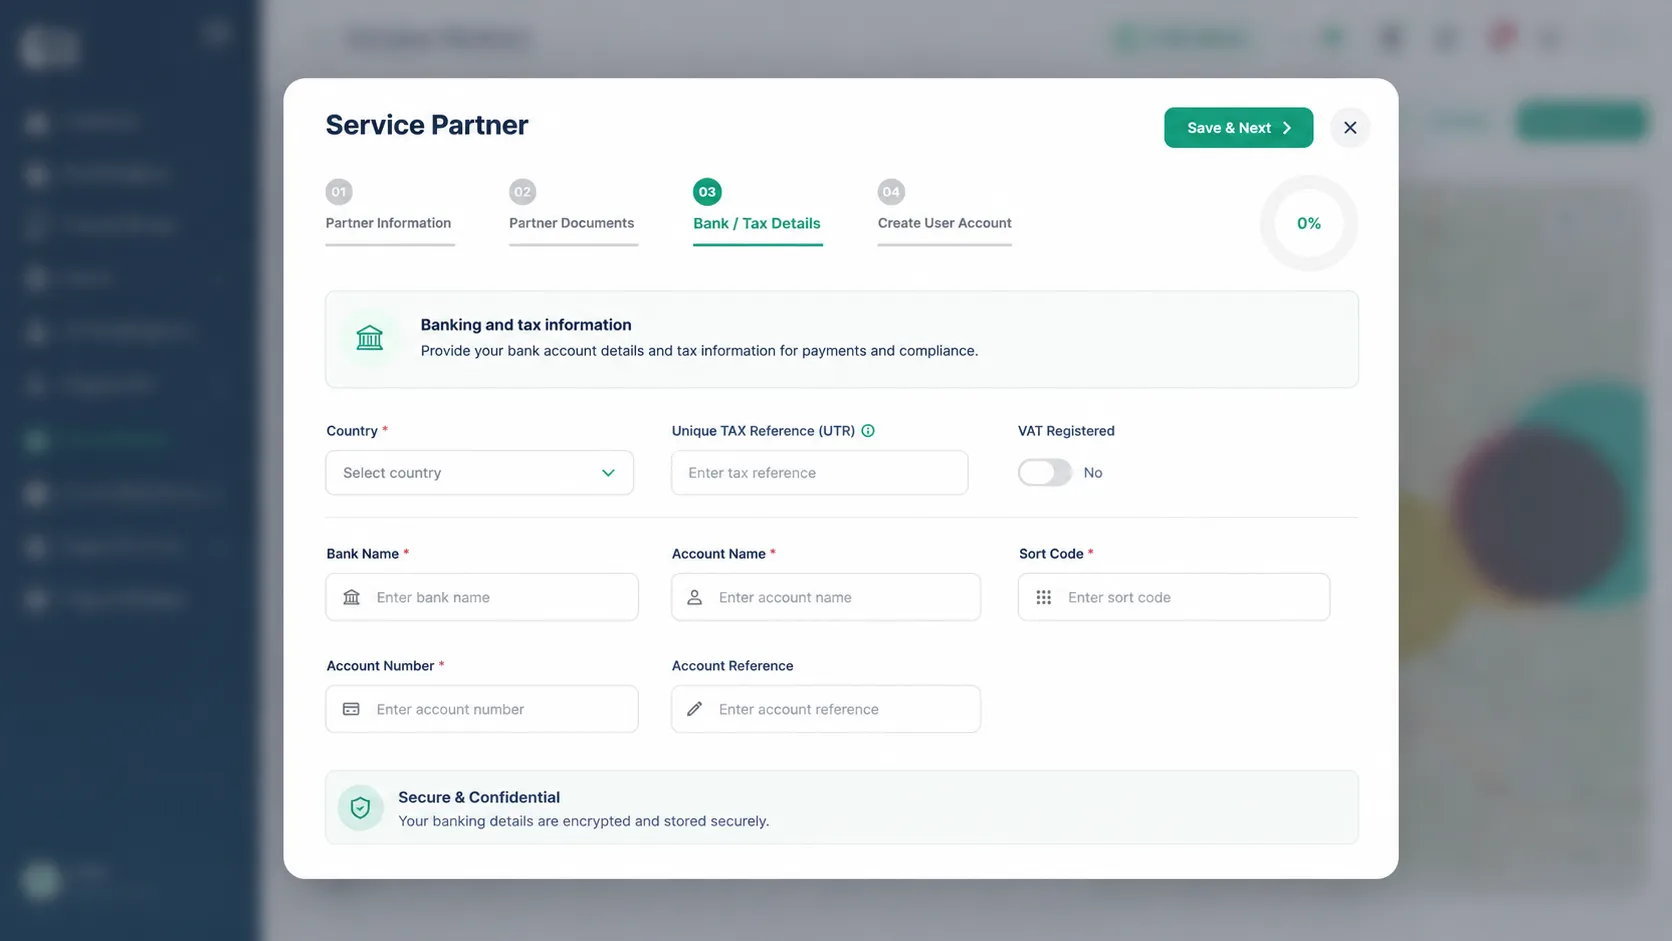
Step 4: Enter Bank & Tax Details
The Bank / Tax Details tab allows you to record the partner's payment information.
Complete the following fields as applicable:
Country
Unique Tax Reference (UTR)
VAT Registration Status
Bank Name
Account Name
Sort Code
Account Number
Account Reference
After completing the details, click Save & Next.
Important:
Verify all banking information carefully to ensure payments can be processed correctly.
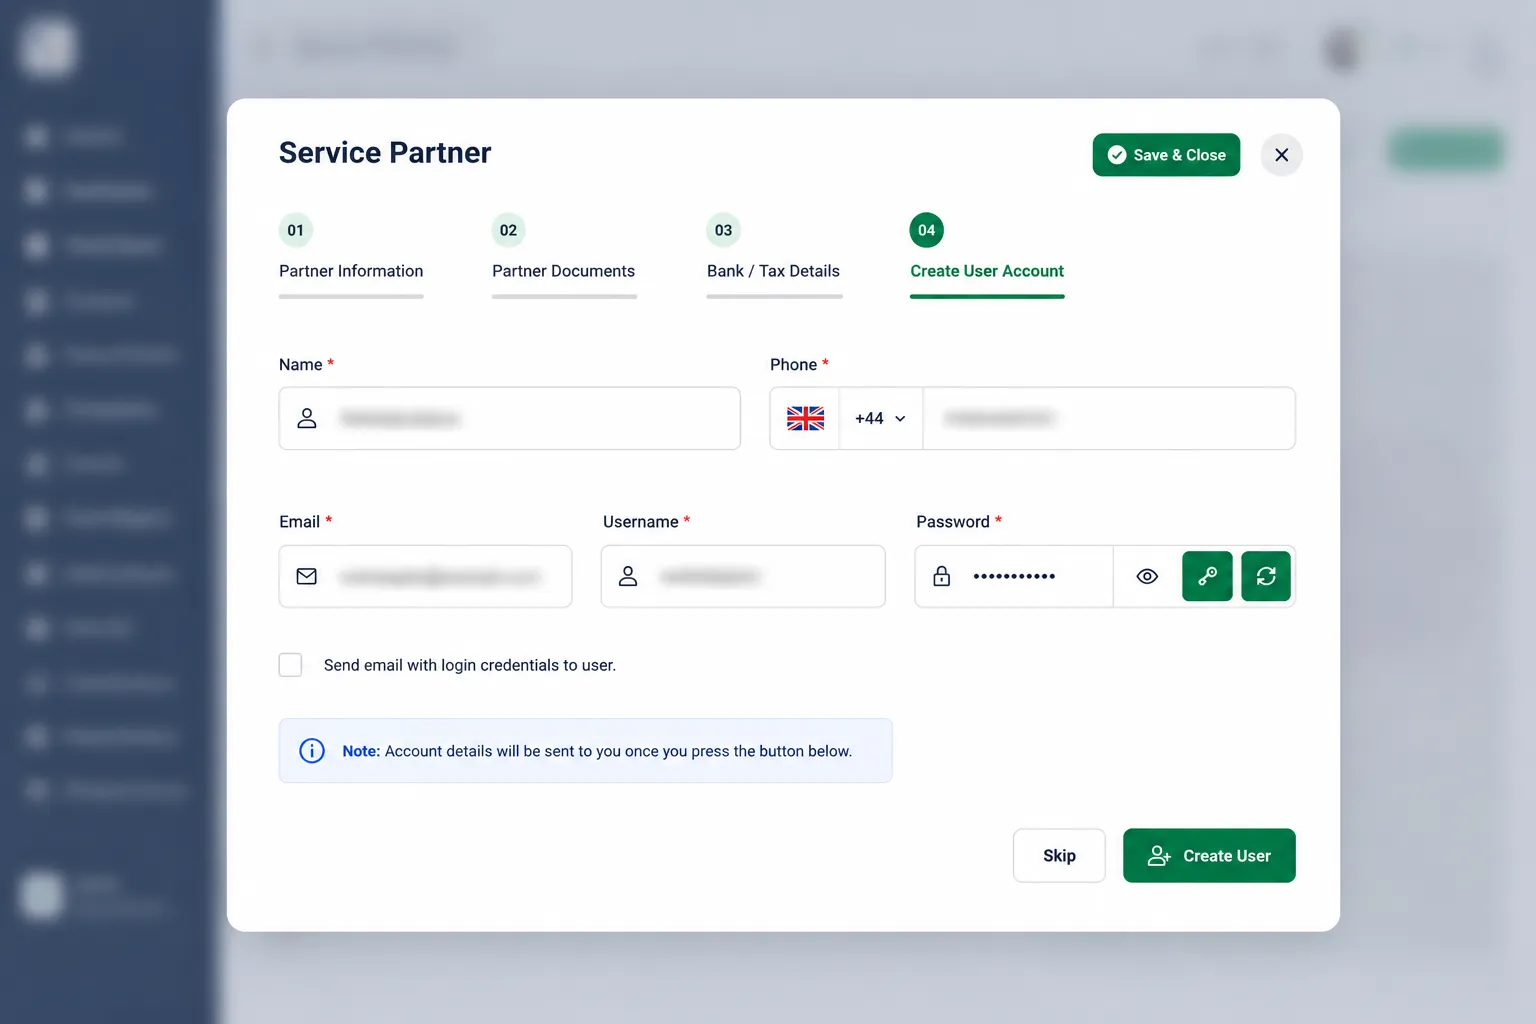
Step 5: Create a User Account
The final step is to create a login account for the Service Partner.
Complete the following:
Name
Phone Number
Email Address
Username
Password
Optional:
Tick Send email with login credentials to user if you would like the system to send the account details automatically.
Click Create User to complete the setup.
If you do not wish to create a user account at this stage, click Skip.
Completion
Once all steps have been completed successfully, the Service Partner will be added to the Service Partners list and can begin receiving assignments, managing workers, and interacting with the platform according to their permissions.
Notes
Ensure all required compliance documents remain valid and up to date.
User accounts can be created later if required.
Service Partner information can be edited after creation if changes are needed.
Always verify bank and tax details before saving.