How to Complete Veriff Identity Verification
This guide explains how to create and send a Veriff verification link to a worker, and how the worker completes the identity verification process.
Administrator Actions (Steps 1-2-8):
The first two steps are completed by an administrator, who generates and sends the Veriff verification link to the worker.
Worker Actions (Steps 3-7):
Once the worker receives the verification email, they must complete the remaining steps by providing their identity document, taking a selfie, and submitting the verification request through Veriff.
Step 1: Open the Worker Profile
Navigate to Worker Profile.
Open the ID & Credit tab.
Click Create Veriff Link.
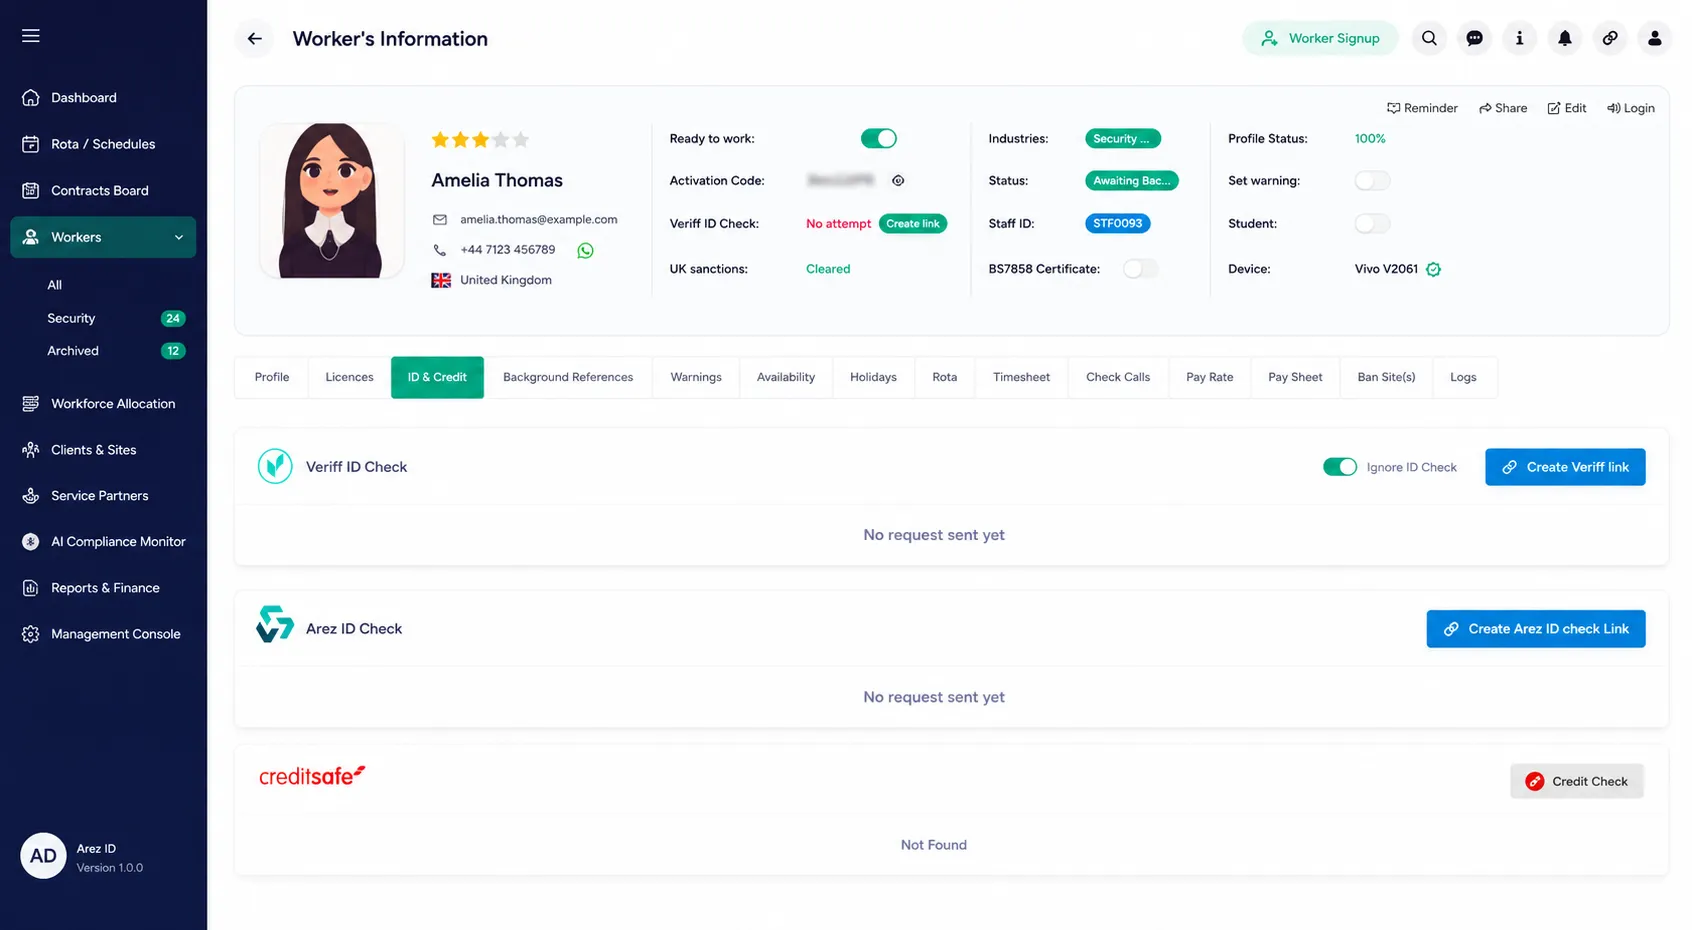
Step 2: Generate the Verification Link
Click Create Link.
Once the link is generated, click Mail to send the verification link to the worker's registered email address.

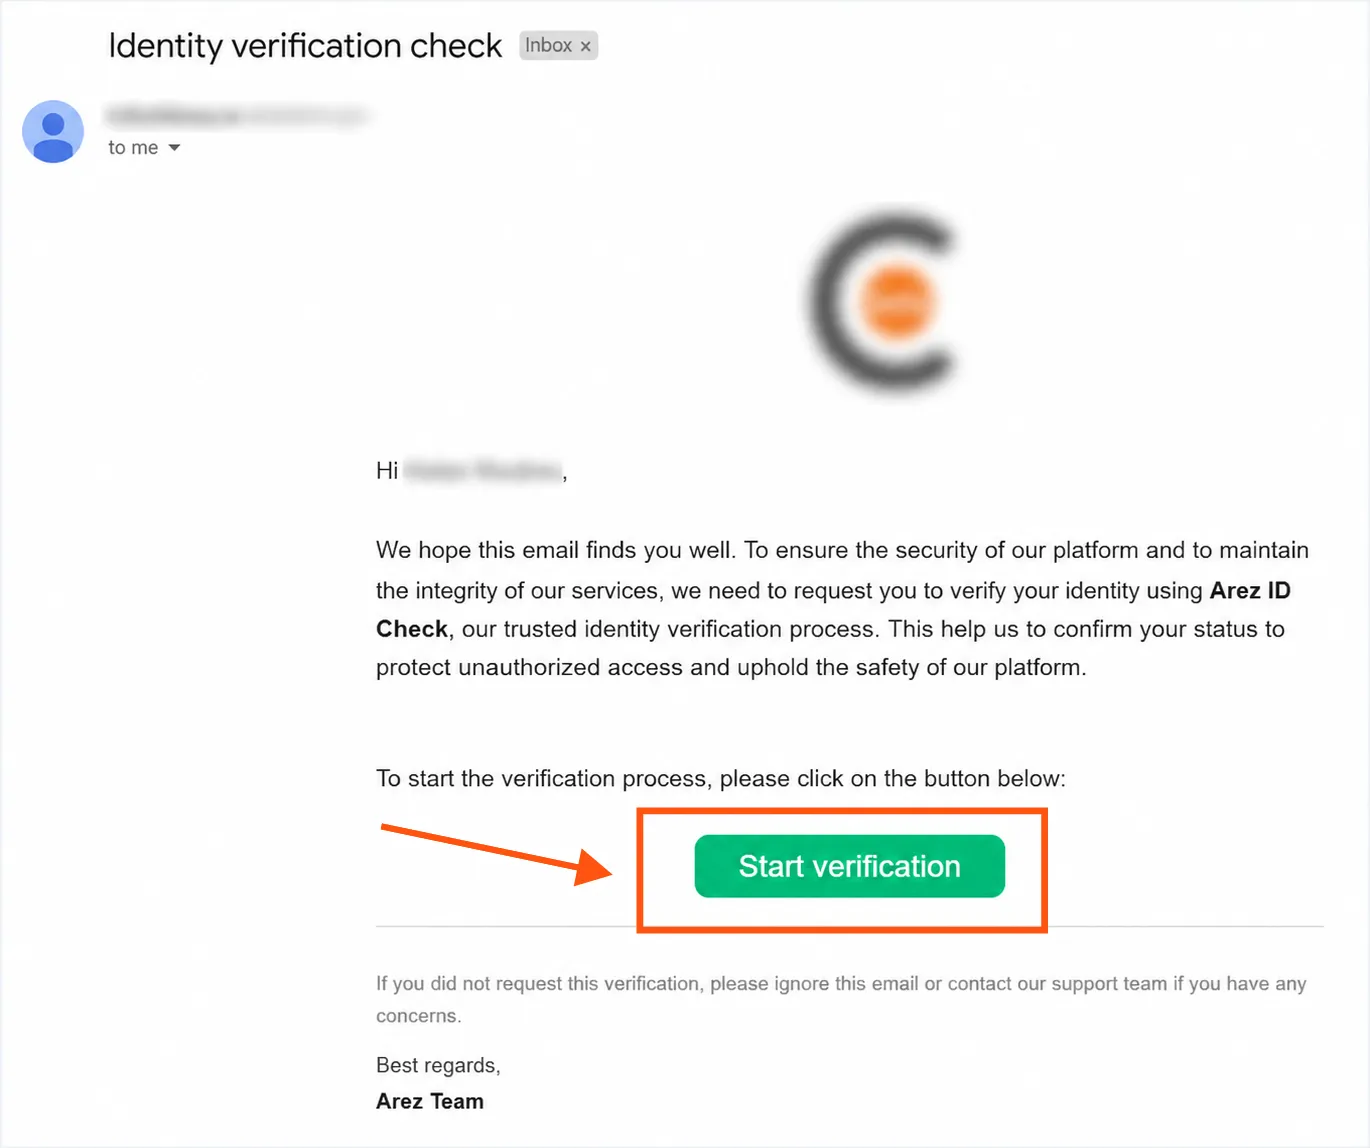
Step 3: Worker Receives the Verification Email
The worker will receive an email titled Identity Verification Check.
Open the email.
Click the Start Verification button.
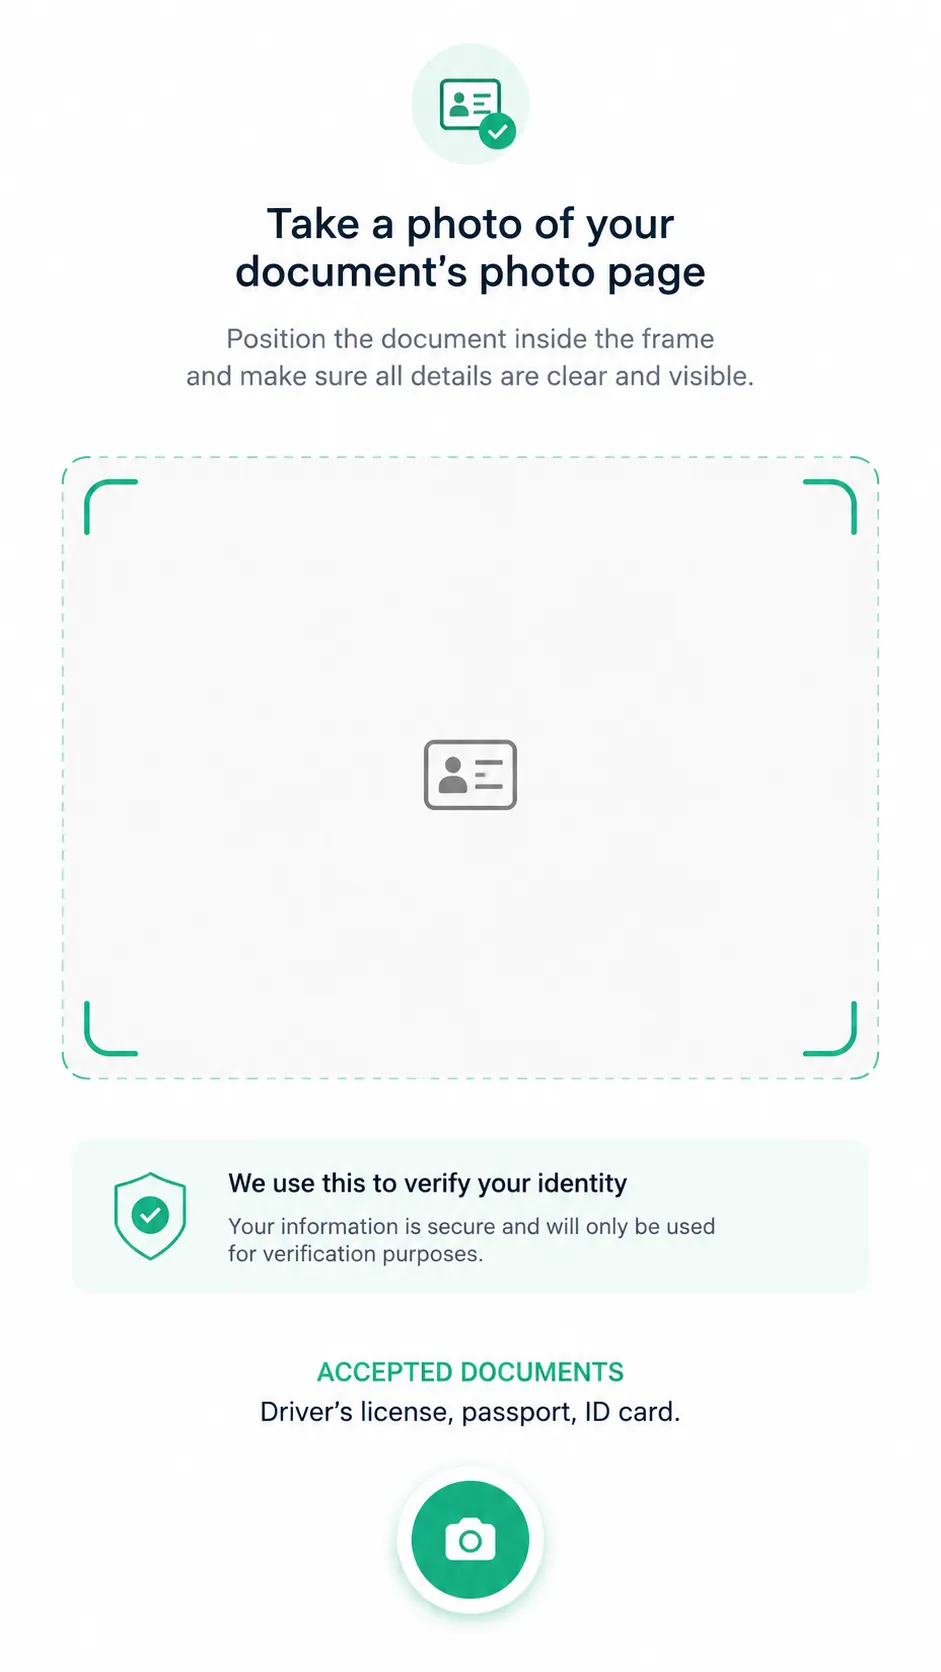
Step 4: Capture the Front Side of the Document
Position the document inside the frame.
Ensure all details are clearly visible.
Take a photo of the front side of the document.
Accepted Documents
Passport
Driving Licence
National ID Card
 Step 5: Capture the Back Side of the Document
Turn the document over.
Position it within the frame.
Take a photo of the back side of the document.

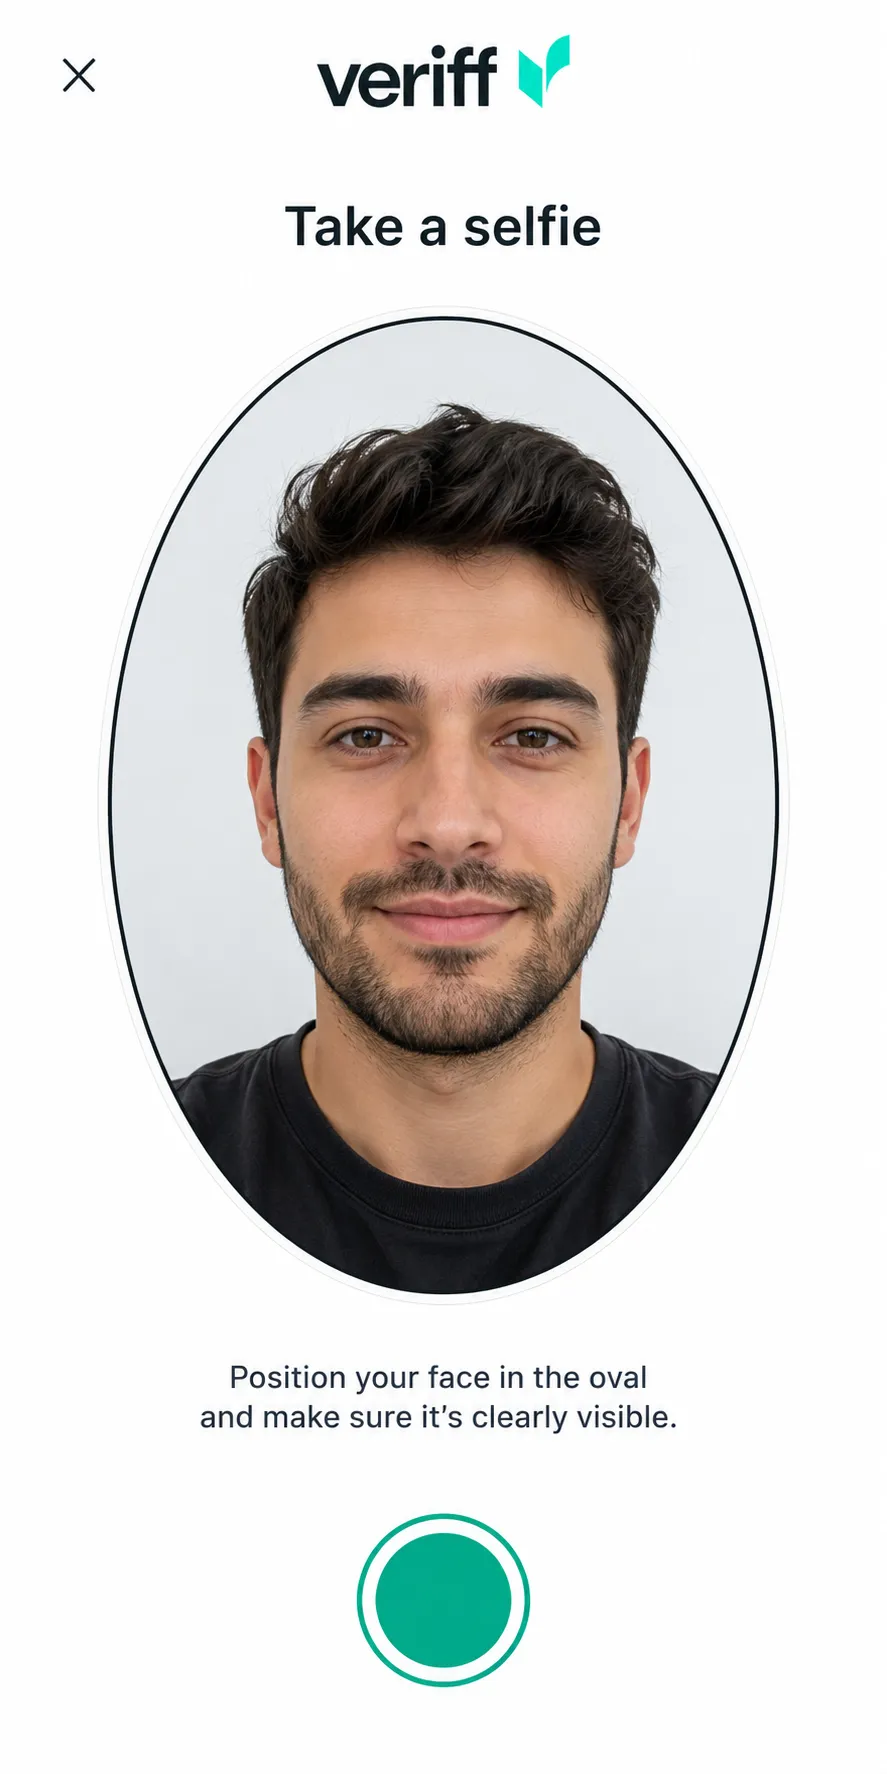
Step 6: Take a Selfie
Position your face within the oval frame.
Ensure your face is clearly visible and well-lit.
Take a selfie when prompted.
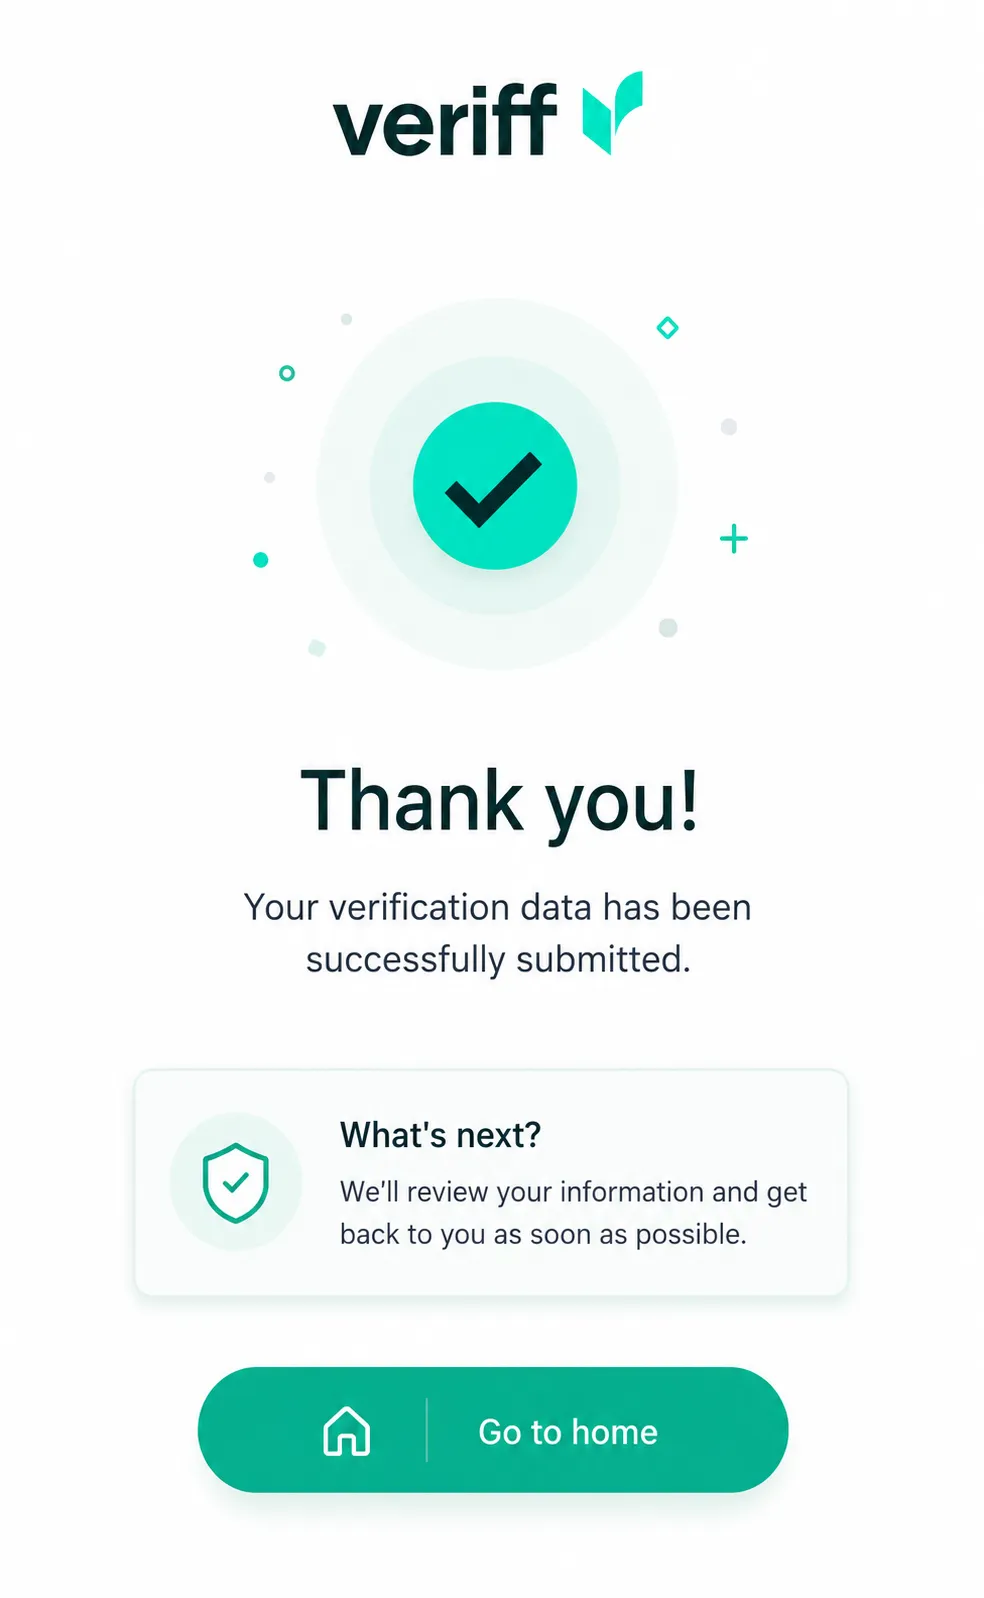
 Step 7: Verification Submitted Successfully
Once the submission is completed, the worker will see a confirmation message indicating that the verification data has been successfully submitted.
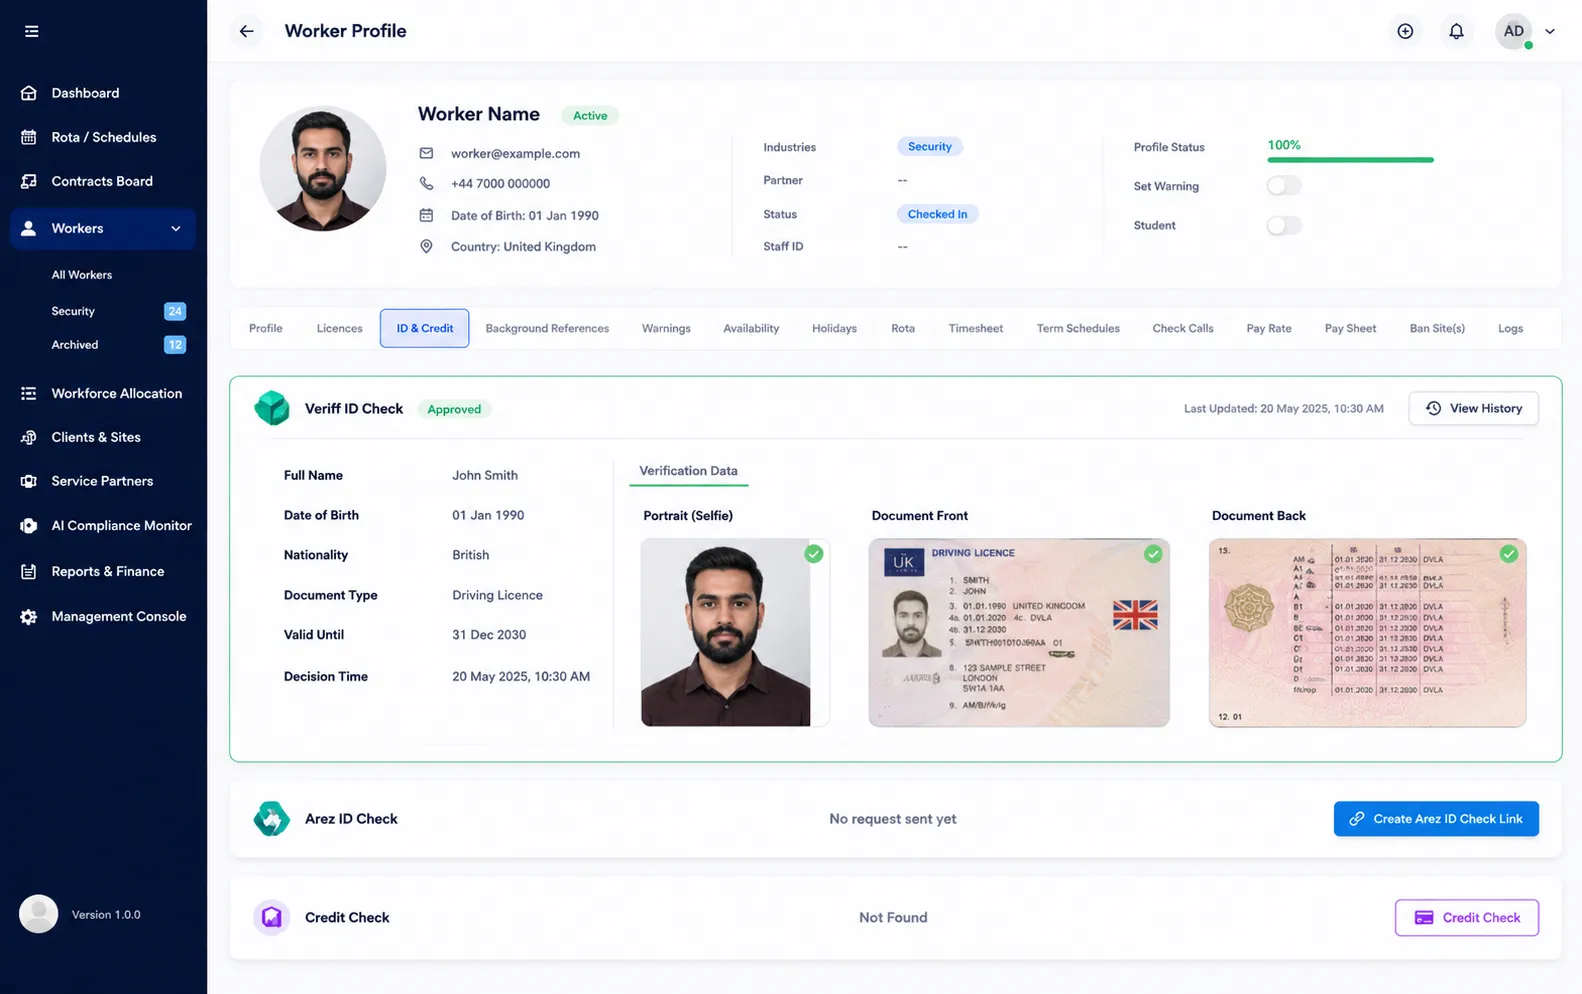
Step 8: Review Verification Results in the Worker Profile
Once the worker has successfully completed the identity verification process and the verification has been approved, administrators can view the results in the worker's profile.
Navigate to Worker Profile.
Open the ID & Credit tab.
Locate the Veriff ID Check section.
Review the verification status and submitted information.
The following details will be available:
Verification Status (e.g., Approved)
Verification Date
Worker's Name
Date of Birth
Nationality (if provided)
Verification Decision Time
Selfie (Portrait Image)
Document Front Image
Document Back Image
Result
The worker's identity verification is now complete, and the verification record is stored within the worker profile for future reference and compliance checks.