How to Add a Worker in Arez
Introduction
Adding a worker in Arez allows you to manage employee information, assign shifts, monitor operational details, and maintain workforce records efficiently. Follow the steps below to create a new worker profile.
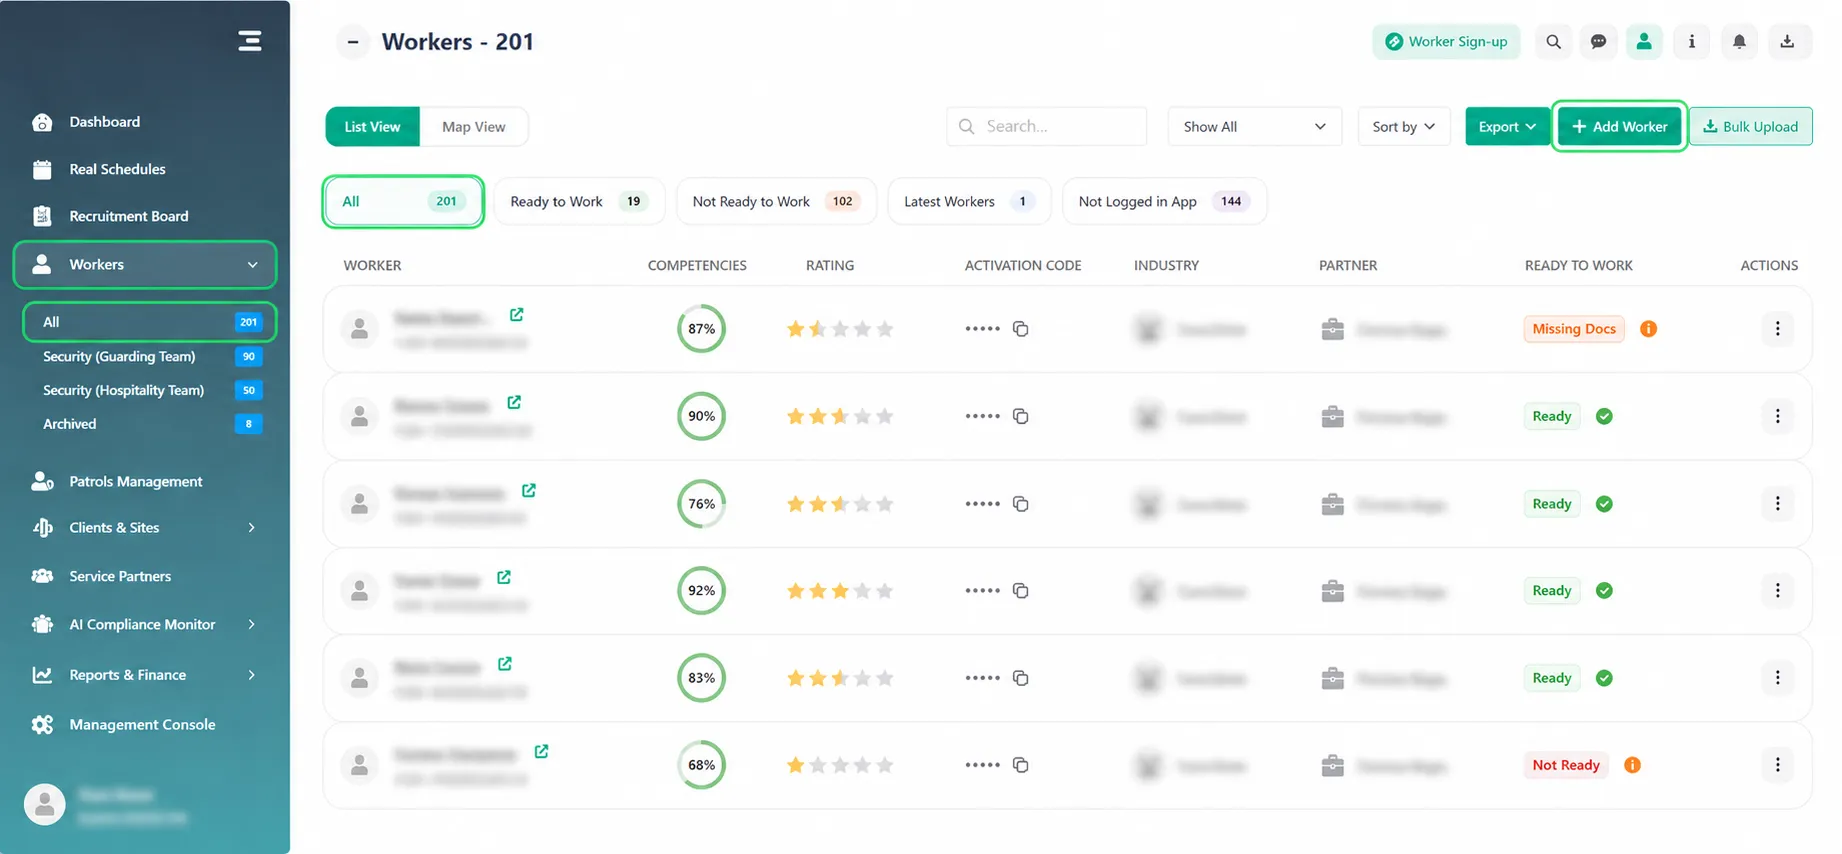
Step 1: Navigate to Workers
From the left-side menu, click Workers.
Select All from the dropdown menu.
On the Workers page, click the Add Worker button located in the top-right corner.
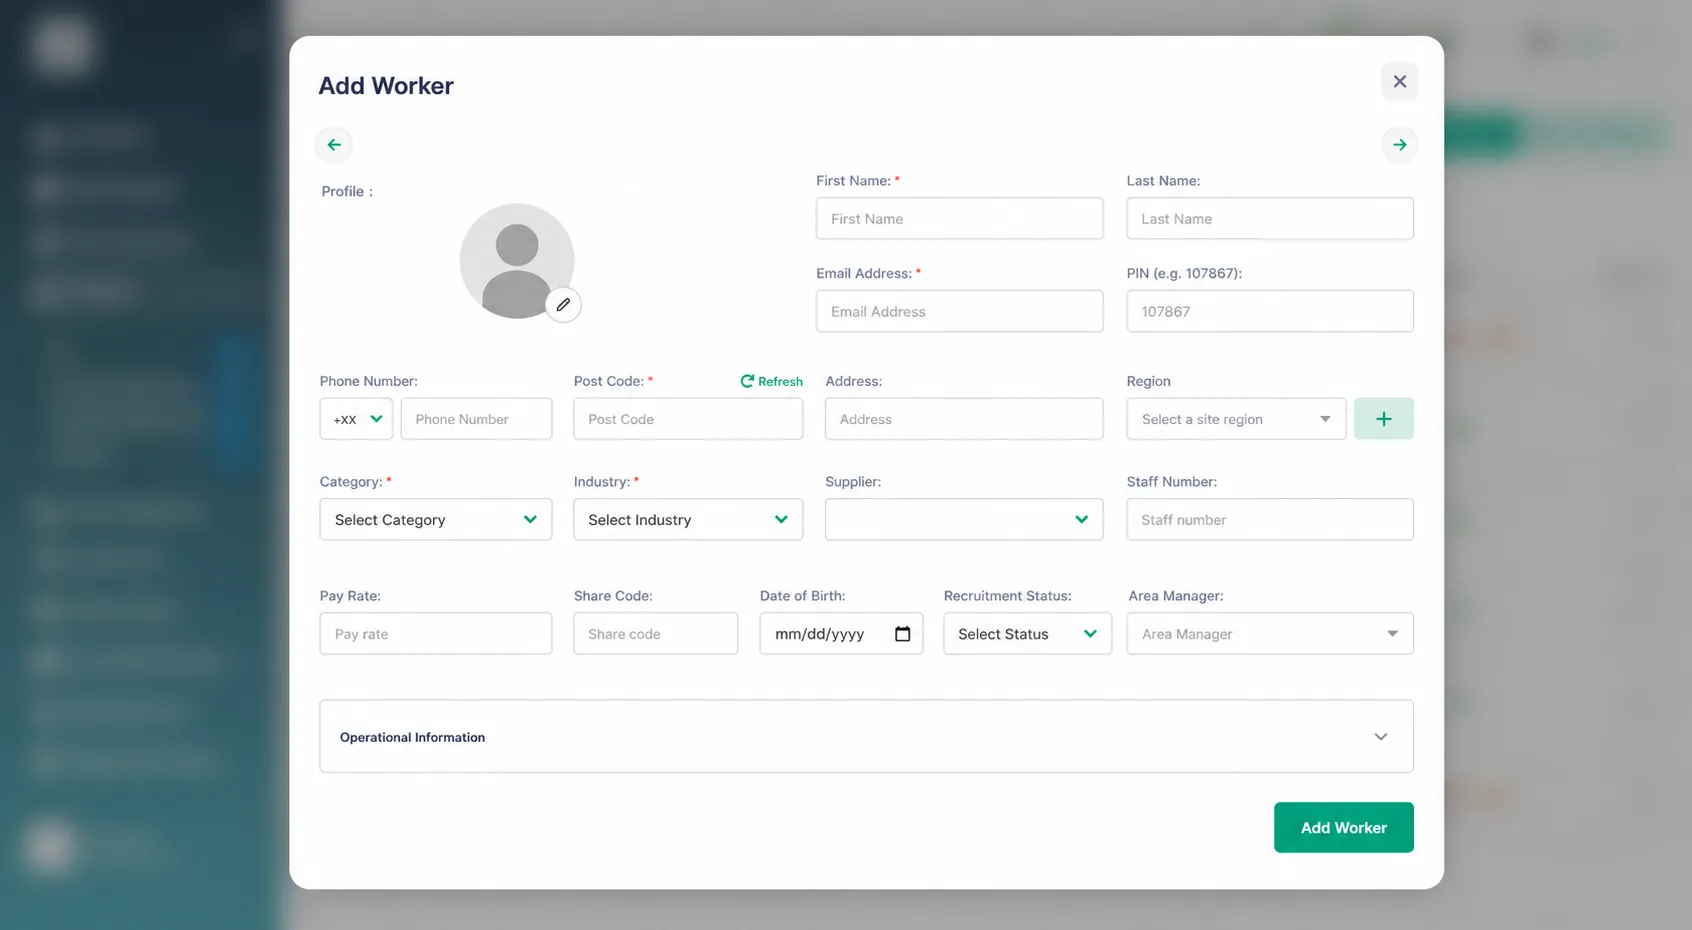
Step 2: Enter Personal Information
Fill in the worker’s basic details, including:
First Name *
Last Name
Email Address *
PIN (e.g. 107867)
Phone Number
Post Code
Phone Number
Post Code *
Address
Region
Employment Information
Category *
Industry *
Supplier
Staff Number
Ensure all mandatory fields are completed before proceeding.
Step 3: Complete Operational Information
Scroll down to the Operational Information section and enter:
Worker Type
Department
Skills or Qualifications
Employment Status
Availability
Payroll Details (if required)
This information helps manage scheduling and workforce operations effectively.
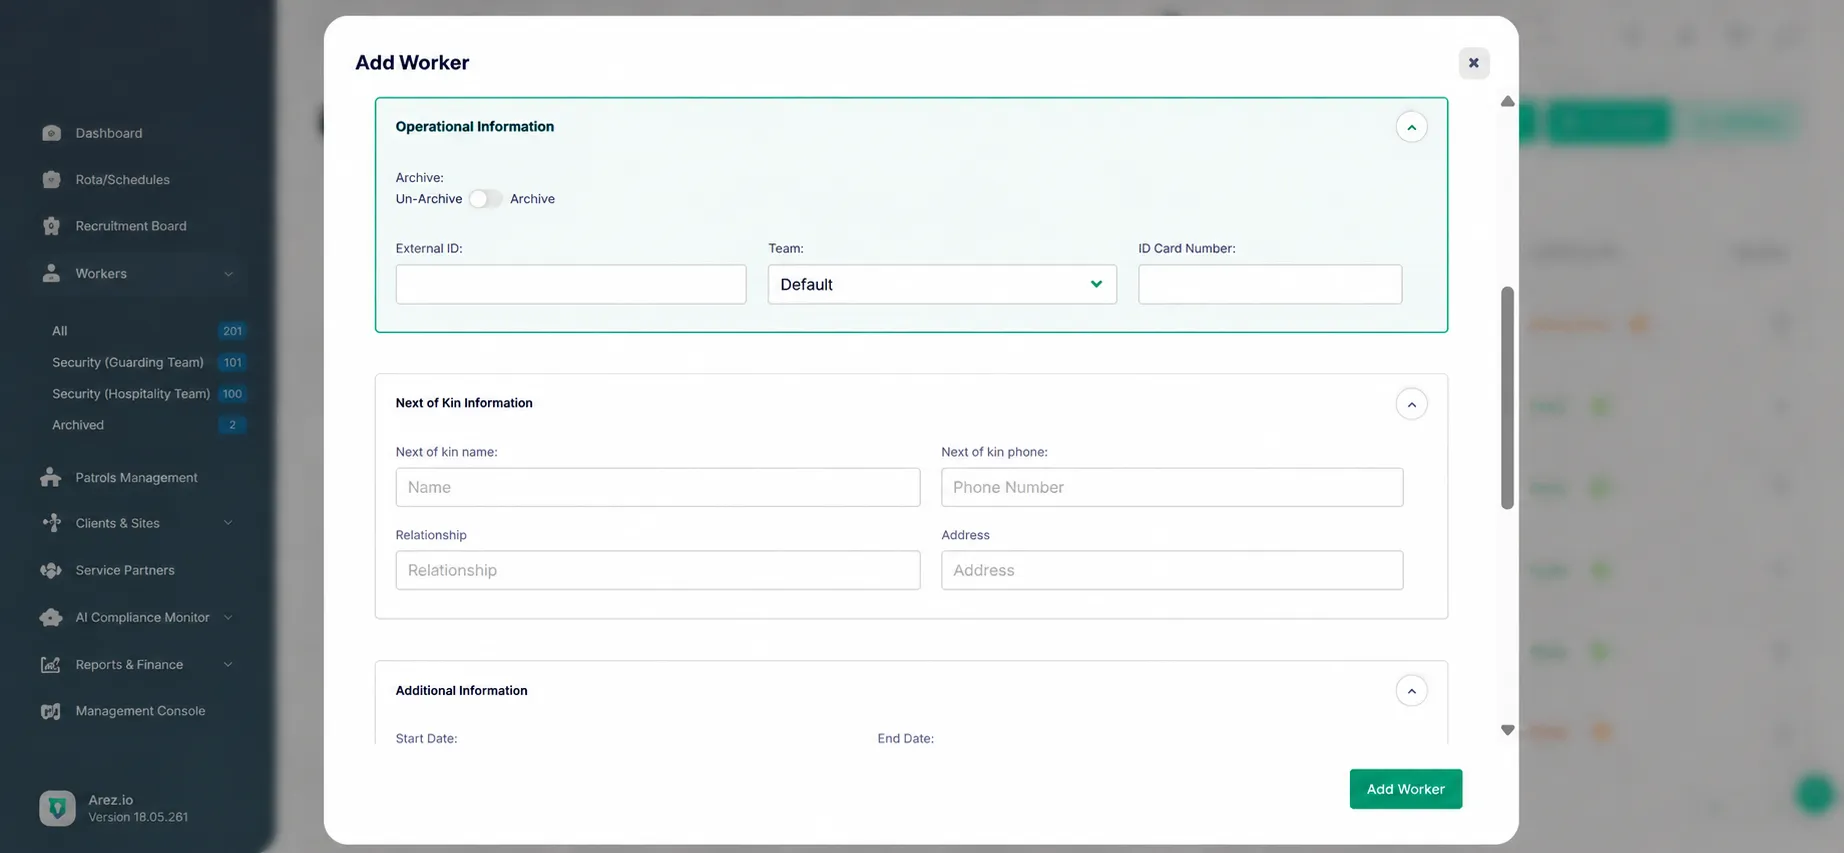
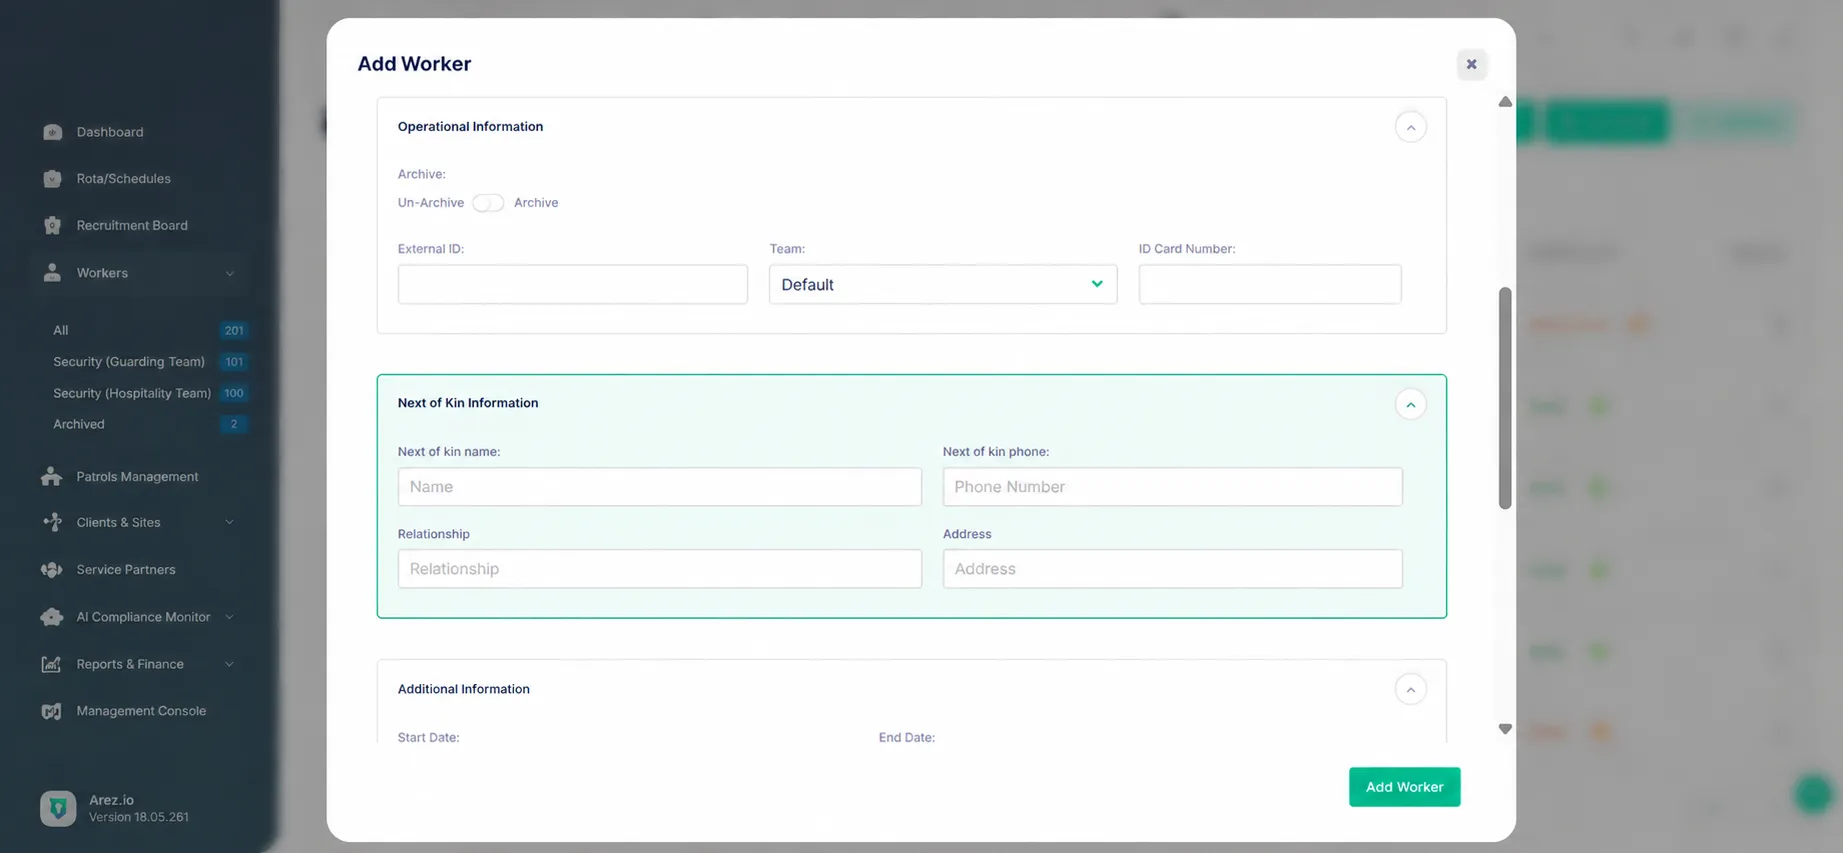
Step 4: Add Next of Kin Details
In the Next of Kin section, provide emergency contact information:
Full Name
Relationship
Contact Number
Address
Keeping this information updated ensures emergency contacts are available when needed.
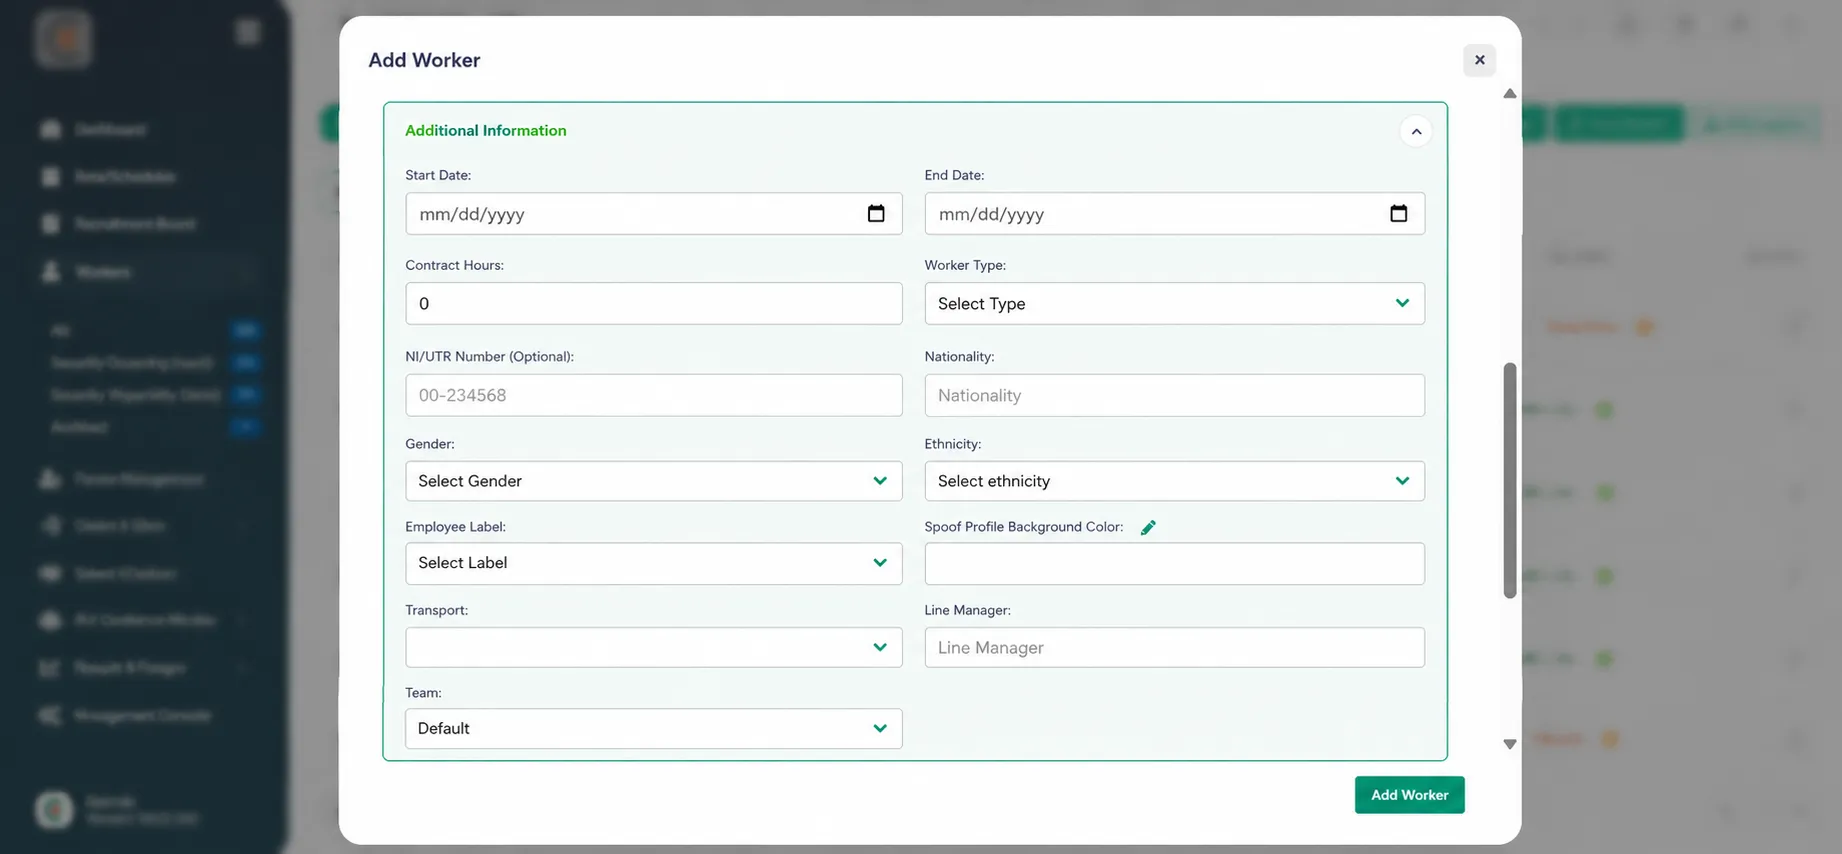
Step 5: Complete Additional Information
Continue scrolling to the Additional Information section and enter any extra details required by your organisation.
Fill in the following information:
Start Date – Select the worker’s employment start date.
End Date – Enter an end date if applicable (e.g., temporary contracts).
Contract Hours – Specify the worker’s contracted working hours.
Worker Type – Select the appropriate worker category or employment type.
NI/UTR Number (Optional) – Enter the National Insurance or Unique Taxpayer Reference number if required.
Nationality – Provide the worker’s nationality.
Gender – Select the worker’s gender.
Ethnicity – Choose the relevant ethnicity information.
Employee Label – Assign a label or tag to help categorise workers.
Profile Background Colour – Choose a profile colour for easier identification within the system.
Transport – Add transport details if applicable.
Line Manager – Assign the worker’s line manager.
Team – Select the appropriate team the worker belongs to.
Ensure all required information is entered accurately before proceeding.
Step 6: Save the Worker Profile
After reviewing all entered information:
Click Add Worker.
The new worker profile will be created and added to the system.
Final Notes
Ensure all required fields are completed before submitting.
Verify contact and operational details to avoid scheduling or payroll issues.
Keep worker records updated for accurate workforce management.