
 Facebook
  Twitter
  LinkedIn
 Purpose
This guide explains how to add a new client in the Arez platform.
Step 1: Navigate to Clients
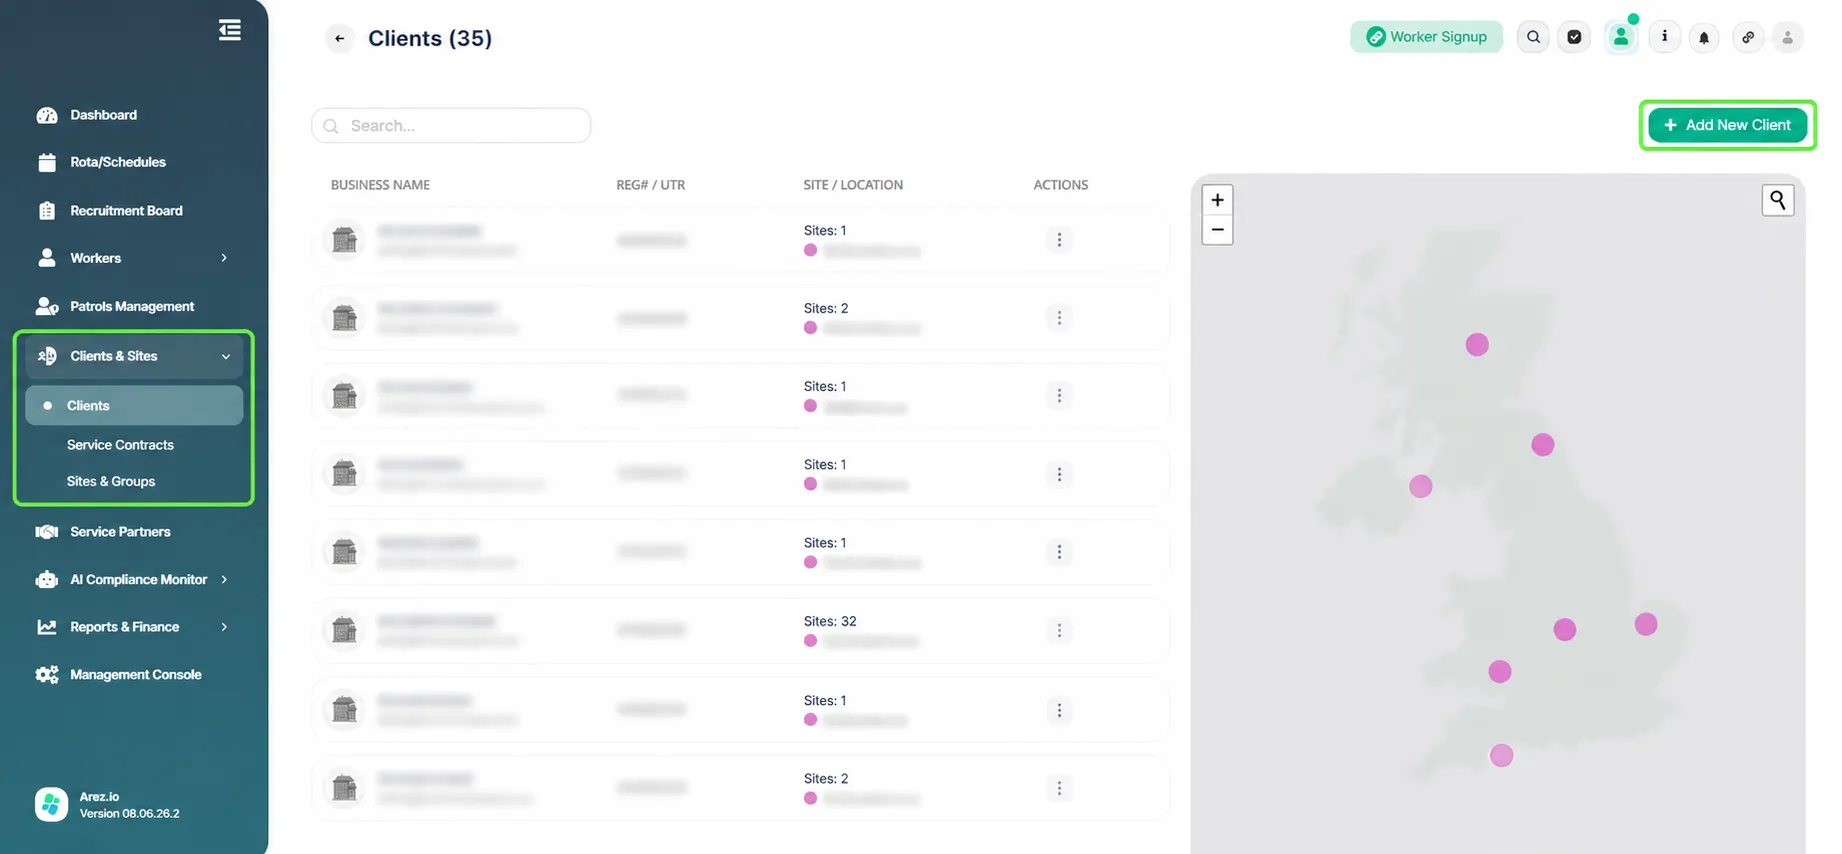
From the left-side menu, click Clients & Sites and then select Clients.
On the Clients page, click Add New Client in the top-right corner to create a new client.
Step 2: Complete Contact Information
The Add New Client form will open on the Contact Information tab.
Fill in the required fields:
• Client Logo (optional)
• Search Company (optional lookup)
• Registered Company Name*
• Company Registration Number
• Trade Name*
• Email Address*
• Phone Number
• Date of Creation
Tick the privacy policy checkbox, then click Save & Next.
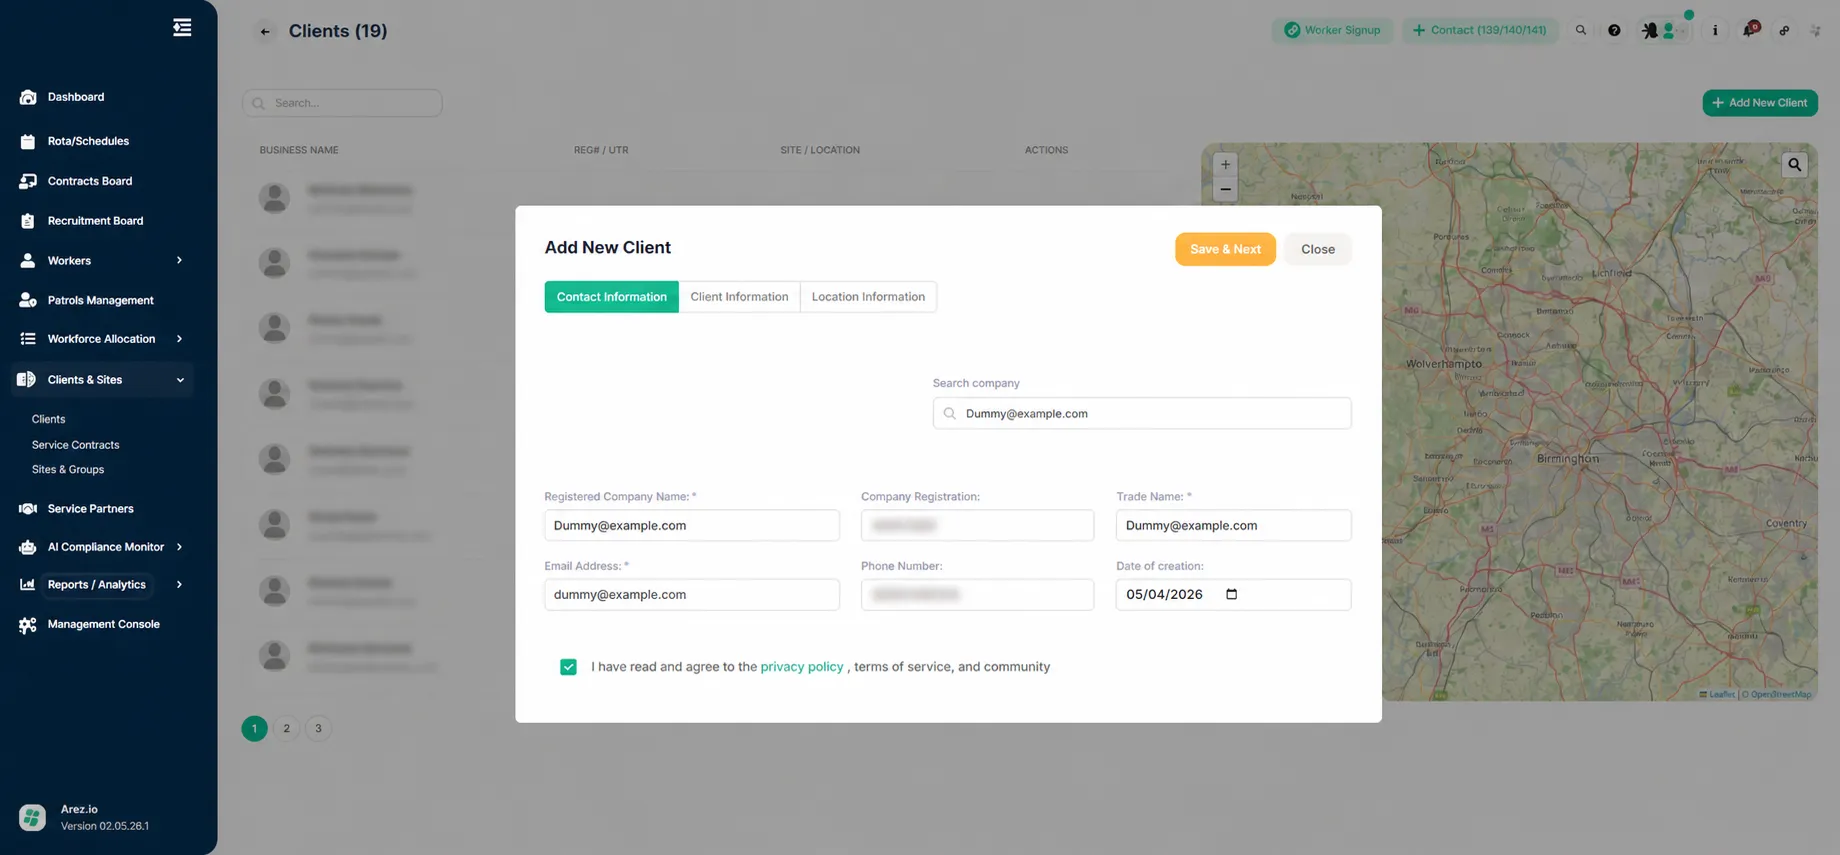
Fields marked with an asterisk () are mandatory.*
Step 3: Complete Client Information
Move to the Client Information tab and enter any additional client-specific details required.
Review all information, then click Save & Next.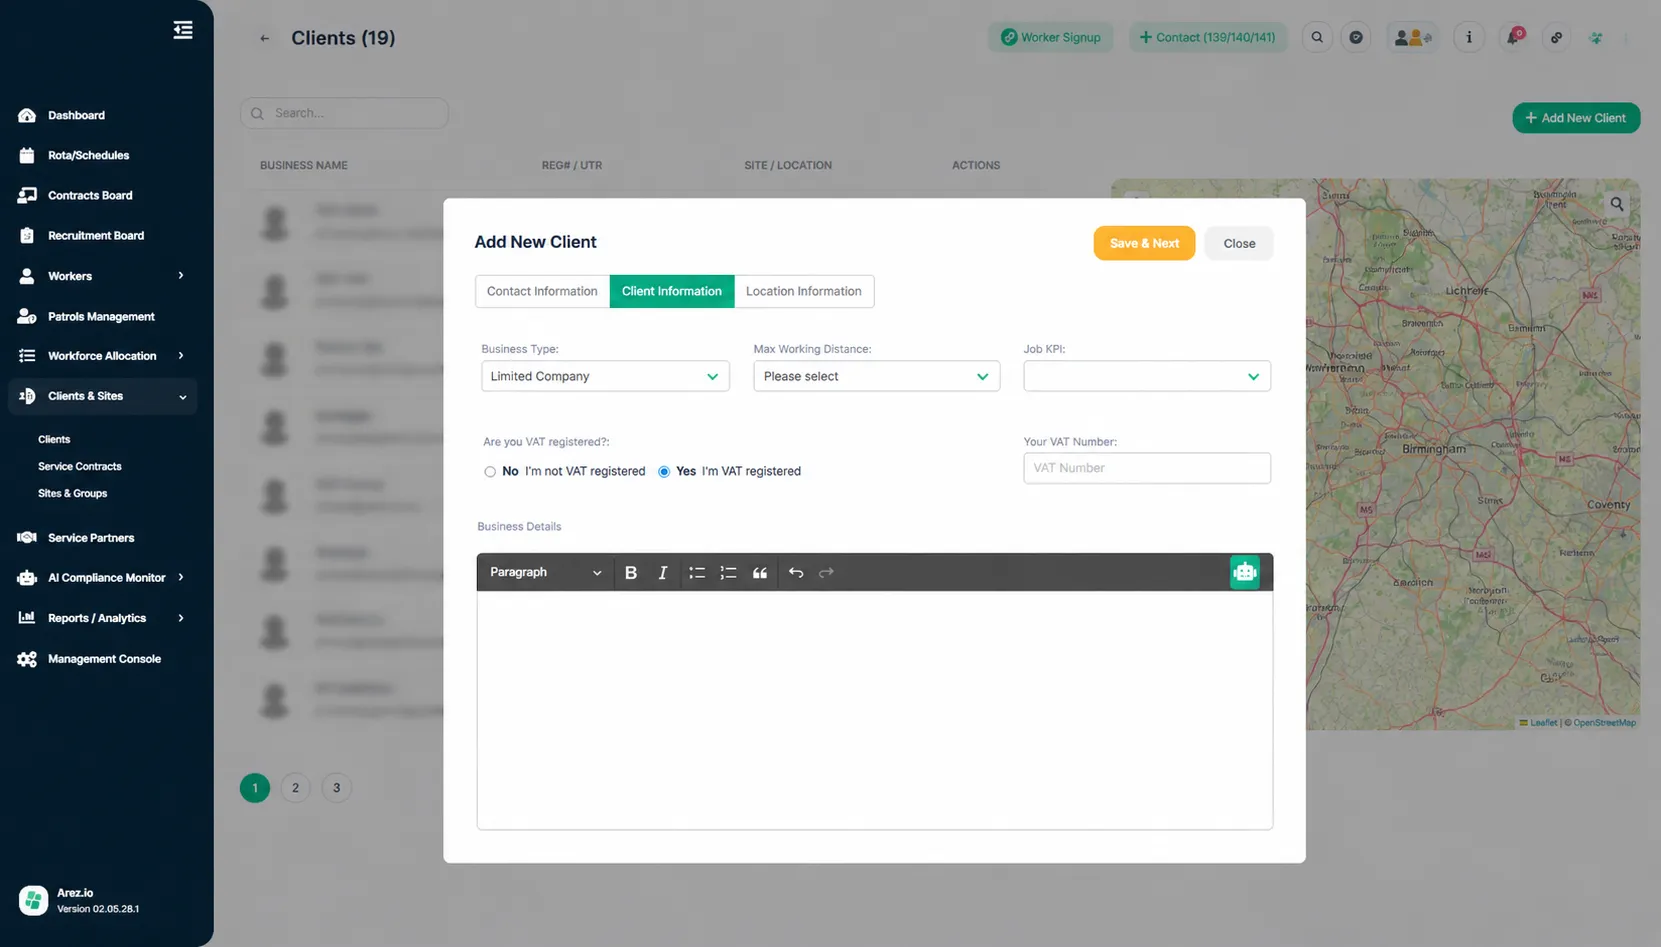
Step 4: Add Location Information
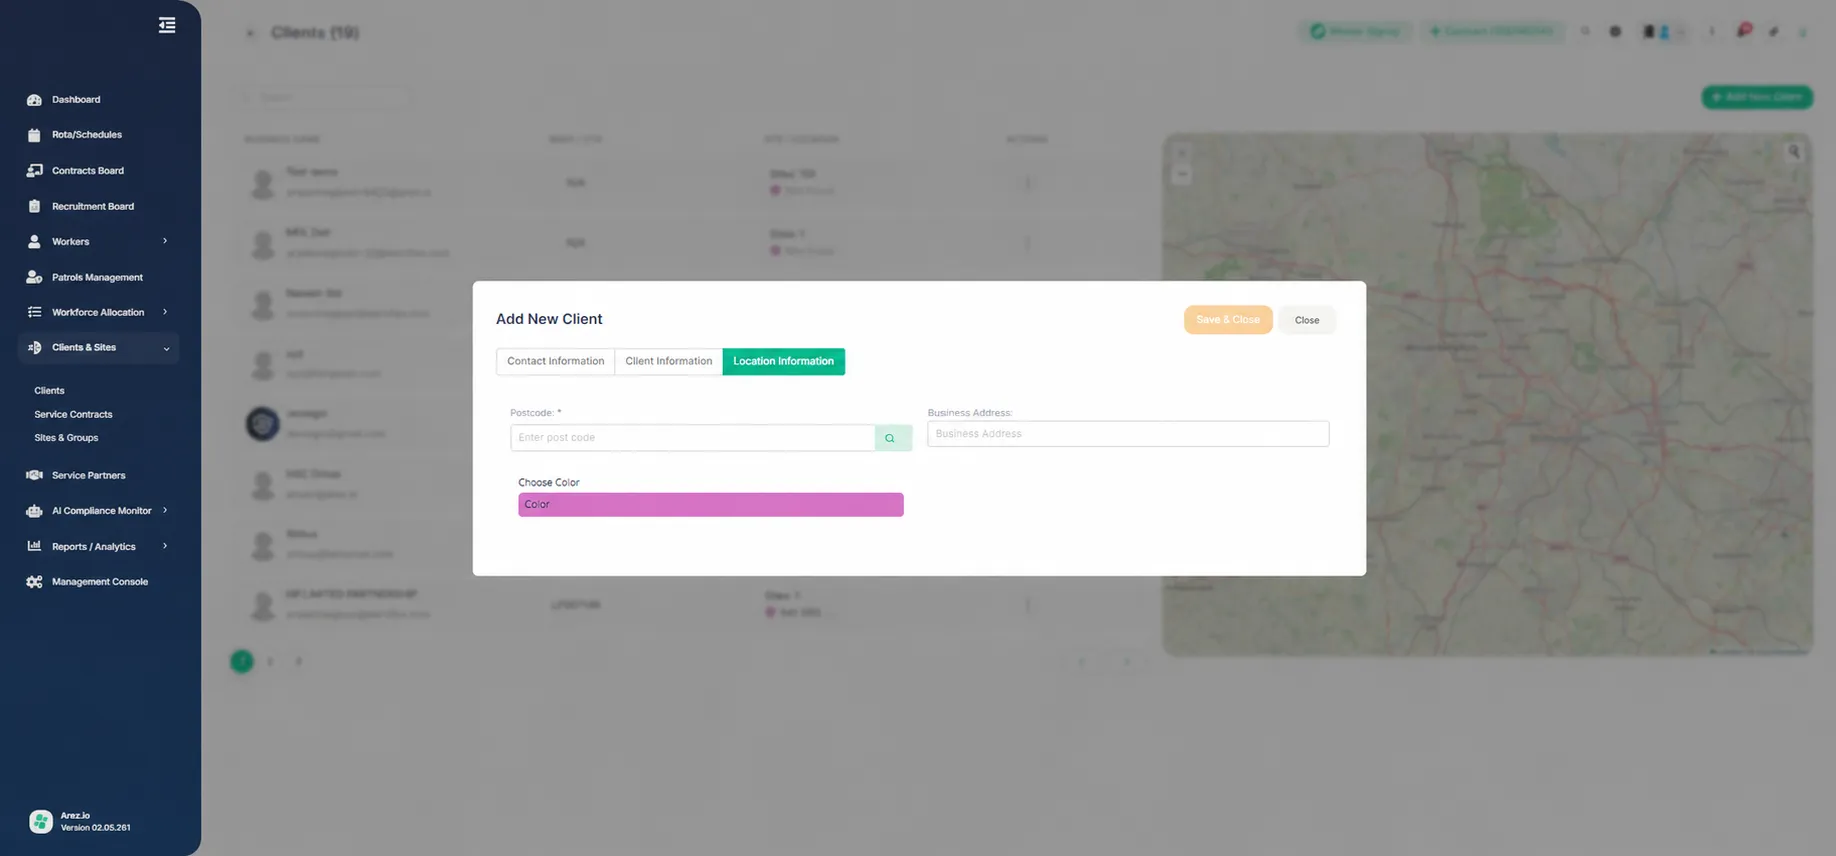
In the Location Information tab:
Enter:
• Postcode*
• Use postcode lookup/search if required
• Business Address
• Choose a Client Colour (used for identification within the system)
Step 5: Save the Client
Once all details are completed:
1. Review the information
2. Click Save & Close
The client will now be added to the Clients list.
Need to add multiple sites? View the Bulk Upload Sites guide here:
https://help.arez.io/docs/how-to-upload-multiple-sites-for-an-existing-client-using-bulk-upload